|
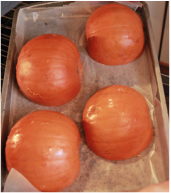
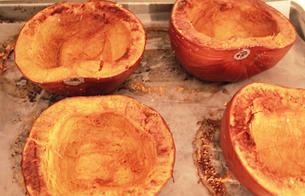
Homemade pumpkin Years ago, I decided to try my hand at using fresh pumpkin to make my pumpkin pie instead of buying the grocery-store canned pumpkin. So off I went in search of some pumpkins. Now pumpkins that you want to use for baking or eating are a bit different than those used for carving out jack-o-lanterns. So make sure you get the right kind. My first adventure ended up a bit of a disaster since I didn't realize that! Plus I thought you just peeled the pumpkin and cut it up, then boiled it until it cooked soft. Again, not a good idea...pumpkin skin is very tough and will kill your peeling hands! Roasting pumpkins I have since found an easier way to make fresh pumpkin by roasting them in the oven until soft. Ready? Let's do it!
Step 1: Get some fresh baking pumpkins that are a medium size (big ones may be a bit tough). Make sure they are not carving pumpkins! Step 2: Preheat oven to 400 degrees. Step 3: Remove stems, wash the outside well and cut in half from top to bottom. Scoop out the seeds and inside goop. (Save the seeds if you'd like to have them roasted later for a great snack!) Sprinkle lightly with salt. Step 4: Place each half flesh-side down onto cookie sheets that have been lined with parchment paper. Roast in oven for 30-40 minutes or until the flesh is soft. Step 5: Let cool completely. Scoop out soft flesh and either mash (for a courser pumpkin) or puree in blender for a smoother pumpkin. If the pumpkin is too thick to puree, you might add a tiny bit of water. Storage: Store in tight-fitting container in fridge if you plan to use it within a few days...or store in freezer bags in the freezer for later use. Ta-da! Now you have some yummy pumpkin to make pies, or soups, or cookies....mmm, I'm headed to the kitchen now! The best part of making your own is that it is fresher and better for you than any canned you'll buy! ~~~~~~~~~~~~~~~~~~~~~~~~~~~~~~~~~~~~~~~~~~~~~~~~~~~~~~~~~~~~~~~~~~~~~~~~~~~~~~~~~~~~~~~~~~~ Growing up in a house of 5 kids, my Mom would bake up a storm all the time for us, but especially for the holidays. She always made 2 types of pumpkin pie...the traditional spice pie and her yummy Pumpkin Custard pie that her Mom used to make for a family of 8 kids! This version is a bit sweeter (my hands-down favorite!) and has a fluffy, almost meringue-type top since you beat the egg whites separately. Here's her recipe for you to try...it's awesome yum!
For some great benefits of pumpkin and a 15% off coupon on fall goodies, sign up for our free monthly newsletter...just click this link! Newsletter We don't share your info with anyone...nope, no one!
Until next time, Happy Fall!
0 Comments
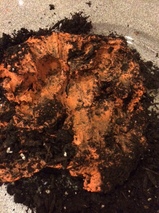
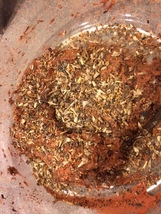
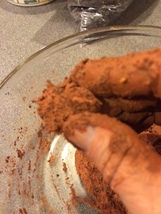
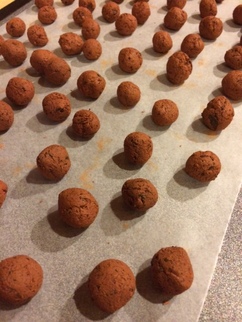
All summer, I've been so busy with making different soapy goodies that tonight I decided to get dirty and make some seed balls. Playing in the dirt can be so relaxing! Mixed with some clay and Honeybee Wildflower seeds, the organic soil has become an easy way to plant "bee" friendly flowers just about anywhere you can toss out a seed ball! Easy for you and loved by our precious honeybees. 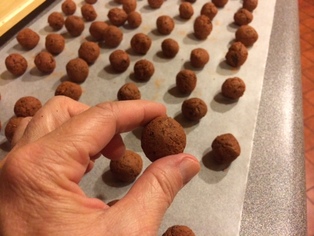 So what is a Seed Ball? It's a combination of rich soil, some regular air dry clay and seeds of your choice. A seed ball is so easy to plant. You toss them wherever you'd like to add some flowers...a flower bed, along a highway or median, along pathways...get creative! It's a perfect activity to do with kids of all ages. The combination of soil and clay holds the seeds safely until Mother Nature provides the right amount of moisture and warm temperatures for proper germination. Seed balls can be planted any time of year. 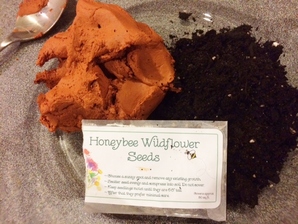 How to make Seed Balls... Start out with some rich organic soil, some plain ol' air-dry clay, and Honeybee Wildflower Seeds.
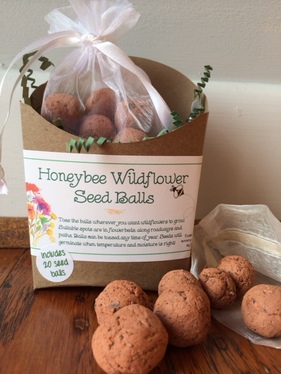 Each package has 20 hand-rolled seed balls ready for tossing. Each ball covers about 1 square foot. You can find them here...Honeybee Wildflower Seed Balls. Seed Balls can be planted anytime of year, so toss some now to enjoy a bright wildflower spring! Until next time...Happy Planting! ~~~~~~~~~~~~~~~~~~~~~~~~~~~~~~~~~~~~~~~~~~~~~~~~~~ |

Welcome to Tailored Tidbits!If I'm not in the kitchen cooking up new items for my shop, I'm sewing fabric baskets, taking care of our honeybees, pitching in on the latest project at my son's, or planning a trip somewhere with my daughter. Here, I'll share a "day in the life" at Tailored Touches! 
Sign up for the newsletter for an instant 10% off coupon.
Categories
All
Archives
February 2019
|


 RSS Feed