Surviving WinterOur winter in VA this year has been downright weird with warm 60-70 degree days that change into 20-30 degree days over the course of a single week. It’s tough enough for us humans to know what to wear to keep warm, so it’s no wonder the bees have no idea what to do within their hives! You see... when the weather starts to warm, each Queen begins to lay eggs to build up the colony in anticipation of spring. But when the weather turns cold again, that means there are more mouths to feed and keep warm. Such fluctuations in the weather add undue stress on each hive of bees. This stress can cause the hive to die if conditions become too extreme. Within each hive, the optimal temperature at any one time is 95 degrees Fahrenheit. It is the best temperature for the emerging brood (baby bees) to develop normally. When the temperature outside is below that, the bees keep the internal hive temperature at 89-95 degrees by clustering together and beating their wings to cause friction and maintain the heat. In the summer, when temps go above 95 degrees, the bees will stand outside the entrance of the hive and beat their wings to fan cool air into the hive as a sort of air-conditioning. They maintain a temp of around 95 degrees year-round!
Any seasoned beekeeper knows in the fall that some of his hives may not make it through the winter. Many conditions can determine how well a hive weathers the winter. How strong is the Queen and her laying capabilities? How strong is the overall colony of bees? Are they disease-free? Do they have ample stores of honey as their winter food source? They need anywhere from 40 lbs of honey for southern bees to 90 lbs for northern bees per colony or hive! During the warmer months, a beekeeper will inspect his/her hives regularly to make sure (a) the Queen is strong, (b) there are no signs of small hive beetles that can destroy a hive if left unmanaged, (c) the bees are building up their stores of honey, and (d) that the overall health of the colony is good. The problem is: unless temperatures are at least 50 degrees, a beekeeper is unable to open the hive for an inspection. Imagine if someone threw open all your windows and pulled off the roof of your house so they could look inside in the dead of winter… yikes! You’d be freezing in no time! The same goes for a hive of bees. They need to maintain their 95 degrees. If baby brood gets chilled, the larva will die. So what happens in winter? Well, the beekeeper waits and hopes that everything is well within each hive. There are ways to surmise if they are ok, but until they are opened up, it’s mostly a guessing game.
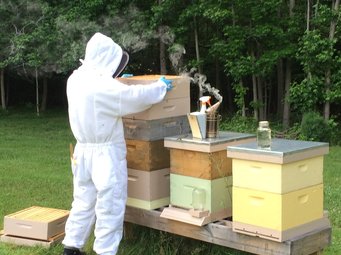
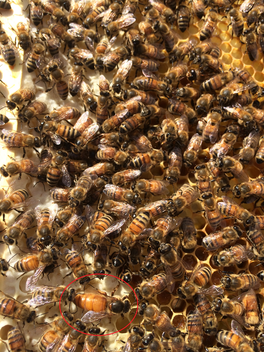
My son had gone into the winter with 16 beehives. Once the weather started to warm up a few weeks ago, he was down to what he thought was 12. It looked like he lost 4 hives due to the weather, but he wouldn’t know for sure until he inspected them. He hadn’t seen any activity around the 4 hives for weeks, which is a clear sign of trouble. Then the weather warmed up, and we enjoyed some 70 degree days. All of a sudden, the 4 hives that he thought were dead started to show signs of life again. It could mean that they had made it after all or that the healthy neighboring hives had built up their numbers enough to swarm into the empty space. A couple of weeks ago, I went to visit him and check in on the hives. Inspecting the hives can be a bit tricky since they are busy working and don't want us humans bothering them! So having an extra set of hands to aid in quickly making an inspection is always helpful. While I was there, I took the video that follows. Bee Hive Reducers and Multiple Entrances
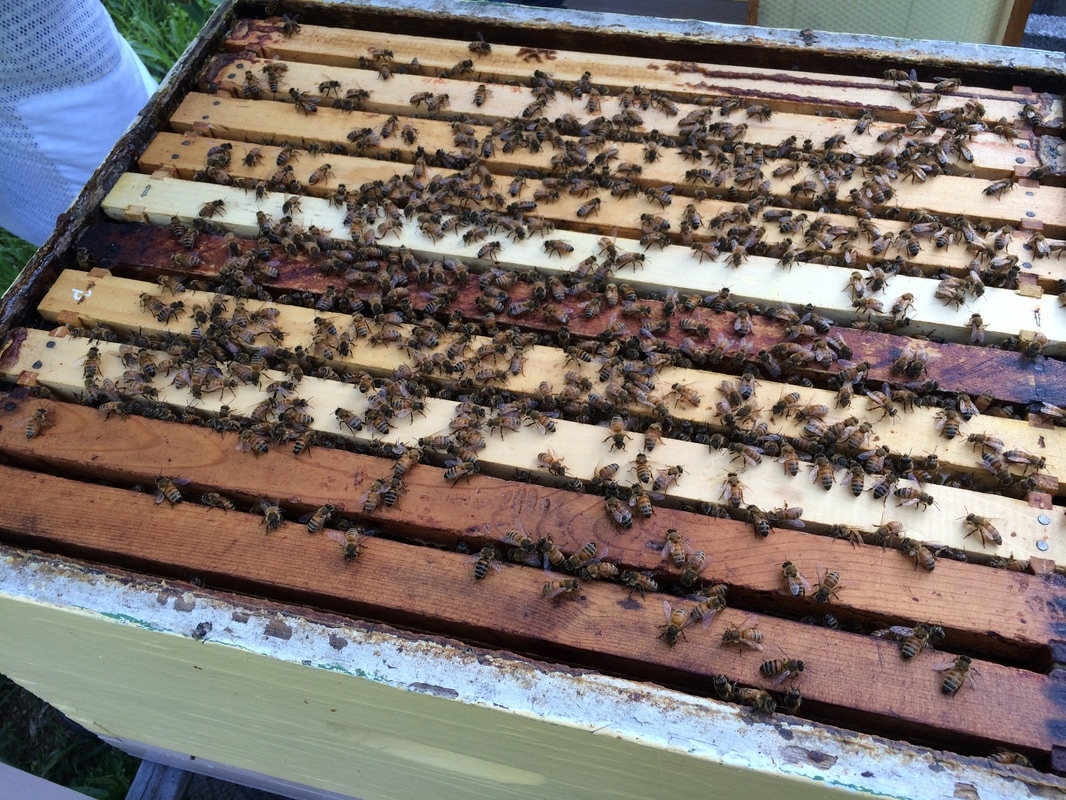
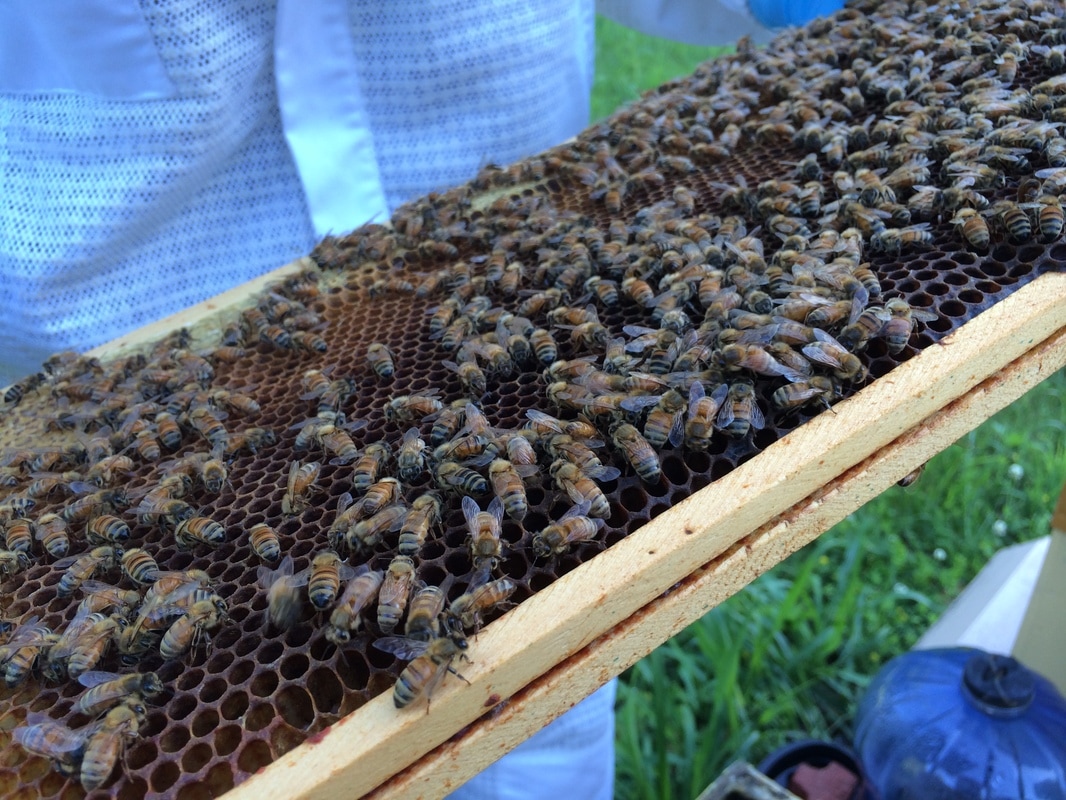
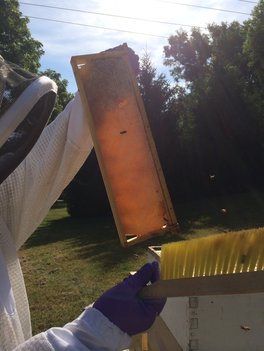
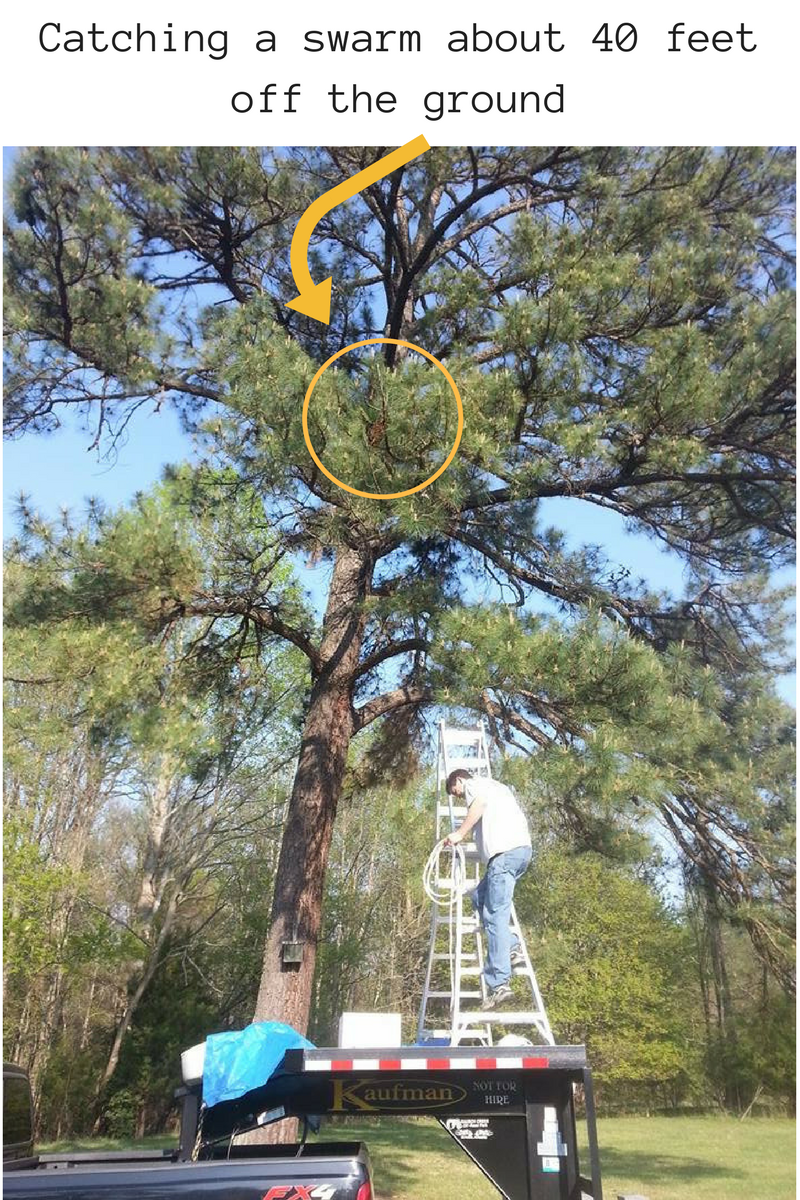
As the weather warms, the upper entrance may be left open to allow better ventilation and to help the bees control the inside from getting too warm. Having two entrances can also help with the overall colony movement. Remember that a healthy hive can include between 20,000 and 80,000 bees. So bee traffic can get crazy! SwarmsWith the warm weather, the Queen starts to lay her daily average of 1500 - 2000 eggs (yes, that many!). So it doesn't take long for the colony to outgrow its space. When the Queen feels like the space is getting too crowded, she will take half of the colony population and fly off in search of another home, leaving the other half to raise a new Queen. This is called "swarming." It is the colony's way of reproducing another colony while maintaining the old colony. Swarms can happen quickly and will keep a beekeeper busy trying to catch the swarm or building up the hive body to accommodate the growing colony. Over the past two weeks, my son has been trying to keep up with his "girls," as I affectionately like to call the bees. He has been busy building more hive boxes and frames, plus catching swarms that have decided to take flight. So far, he has dealt with 5 swarms.
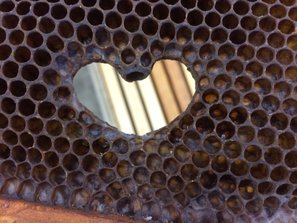
#savethebees
2 Comments
Easter is just around the corner. Are you ready? At our home, dyeing Easter eggs is one of our favorite traditions. But... instead of dyes made up of chemicals, preservatives, and who knows what else, we use several all-natural dyes that are 100% fun and 100% safe - kid-tested and mom-approved :-)
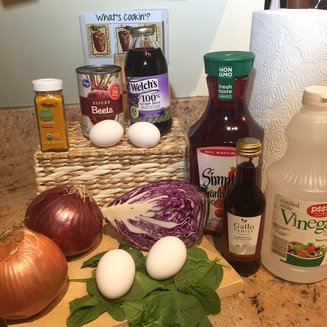
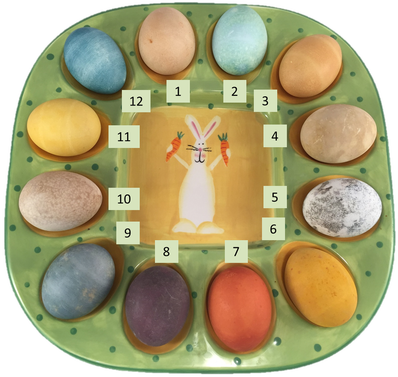
Let's Get Cookin'! This weekend, Maelee (our media lead) helped me dye some eggs... naturally! We had so much fun testing out different methods, and we've written up our favorites below. Try them, and tag us in any pics you post! In the below 'recipes,' we use vinegar a lot. Why? Because it helps the color spread evenly over the egg. Also, when we call for boiling water in a few recipes, feel free to use your microwave instead of the stove! #savetime Paper towels are needed to place the wet eggs on until dry. 1. Paprika Paprika! Add 2 Tbsp. of Paprika to 1 cup of boiling water and add 2 tsp. of white vinegar. These eggs take about an hour to dye, but they sure are beautiful. The Paprika seasoning leaves little dots covering the egg, making them look oh-so-natural and unique! If these specks aren't your thing, just wipe them off when the eggs are still wet. 2. Red Cabbage This one holds a surprise...! To make these eggs, chop a 1/4 head of red cabbage into chunks. Bring 2 cups of water and cabbage to a boil, stirring occasionally, and simmer for about 15 minutes. Strain the cabbage and add 1 Tbsp. of white vinegar. This dye will be warm, but that's ok! The color will be... surprisingly... a beautiful blue! 3. Red Onion To make these eggs, peel the skin from a few red onions and simmer in 2 cups of water for about 15 minutes. You'll notice the water will become very dark. Strain the water, and add 1 Tbsp. of white vinegar. Add in the eggs, and they'll become a pale orange color that get darker over time. Be careful though! The dye works best when the water is hot, but curious little fingers will get burned. 4. Spinach Leaves Tear or cut your spinach leaves into small pieces. Add about 1 cup of water and cook until simmering. Stir and cook for about 15-20 minutes until the water turns green. Cool the water for a few minutes, then carefully add the eggs, allowing the water and spinach to completely cover eggs. Soak for several hours. These eggs have a light sage color. 5. Grape Juice This one was one of our favorites. Grape juice takes a while to dye... but creates a beautiful surprise. Put the grape juice in a cup with the egg so that it just covers the egg. As the egg soaks, it became darker. This one sat overnight in the fridge. The next day, the color virtually wiped off to give the egg a mottled look. So cool!
6. Turmeric These lovely guys are made the exact same way as the paprika eggs, and they come out a rich mustard-yellow - perfect for Easter. To make them, add 2 Tbsp. of turmeric into 1 cup of boiling water and 2 tsp. of white vinegar. These little beauties take only about 20 minutes to get a deep yellow color. As you leave them in there, they'll get richer and richer, so pull them out when they've reached the desired color. 7. Yellow Onion To make these eggs, peel the skin from a few yellow onions and simmer in 2 cups of water for about 15 minutes. You'll notice the water becoming very yellow. Once the desired color is reached, strain the water, and add 1 Tbsp. of white vinegar. They'll become a pale yellow color and get darker as they soak. This dye works best when it is warm. 8. Red Wine This dye takes the longest to set, but it is always a favorite because it's a beautiful dark color! Pour about a cup and a half of red wine into a cup to just cover the egg. Let sit for an hour or more (or overnight). The color will become pink-red and will become darker over time. Remove from the wine when desired color is reached. Our egg sat overnight in the fridge to get that dark crimson color. It even has a sparkle to it! 9. Blueberries We're switching it up! This time, you'll need a cup of frozen blueberries. Add the blueberries to a cup, and pour in some water to cover the egg. As the blueberries thaw, the water will become dark blue. Strain the blueberries, and add 1 Tbsp. of white vinegar. In about 30 minutes, the eggs will be a lovely sky blue, and they'll become darker over time. We left them in the fridge overnight for the color we got! 10. Beet Juice We used the juice from a can of sliced beets. Pour the juice into a cup, add an egg, and make sure it is completely covered. Allow to soak for several hours or overnight. We were surprised to see that the color came out a light speckled tan, not at all the pink we were expecting! Extra Tips! If you want to add some designs to the eggs, wrap a rubber band around the eggs and place into the dye. They'll come out with a tie-dye look. If your kids want to show off their creative side, they can draw on the eggs with white crayon before placing in the dye. The wax will leave the drawing white, yet still dye the egg. Remember to store your eggs in the refrigerator once you have them all colored until you enjoy eating them! Post Your Pics! We had fun dyeing Easter eggs the natural way, and we hope you can have some cooking and dyeing fun with the kids! Post your pics on social media and tag us. We'd love to see what you create #fromtheheart. Happy Easter! |

Welcome to Tailored Tidbits!If I'm not in the kitchen cooking up new items for my shop, I'm sewing fabric baskets, taking care of our honeybees, pitching in on the latest project at my son's, or planning a trip somewhere with my daughter. Here, I'll share a "day in the life" at Tailored Touches! 
Sign up for the newsletter for an instant 10% off coupon.
Categories
All
Archives
February 2019
|


 RSS Feed