|
With summer here, it’s the perfect time to spend more time out in the sunshine. It’s also the best time for the pesky bugs to be out, too. There are so many products on the market to repel insects from outdoor activities and to keep them from coming into your home, but so many of them contain strong chemicals such as DEET. YUK! Have you thought of trying all natural ways to repel insects without needing to use any harmful chemicals? Many of these are already found in your home. Here are some ways to repel insects both inside and out… naturally! What Spices Certain Bugs HateAnts
Spiders, Fleas, and Ticks
Mosquitoes
Pesky Flies
Camping Tip
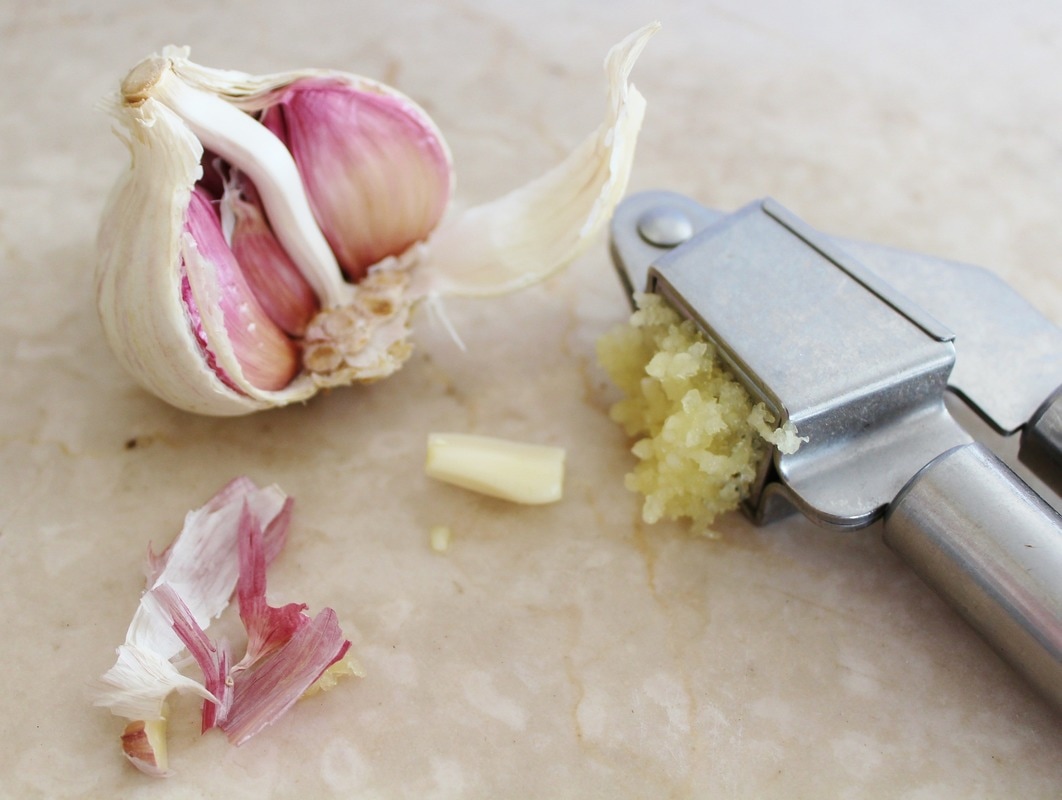
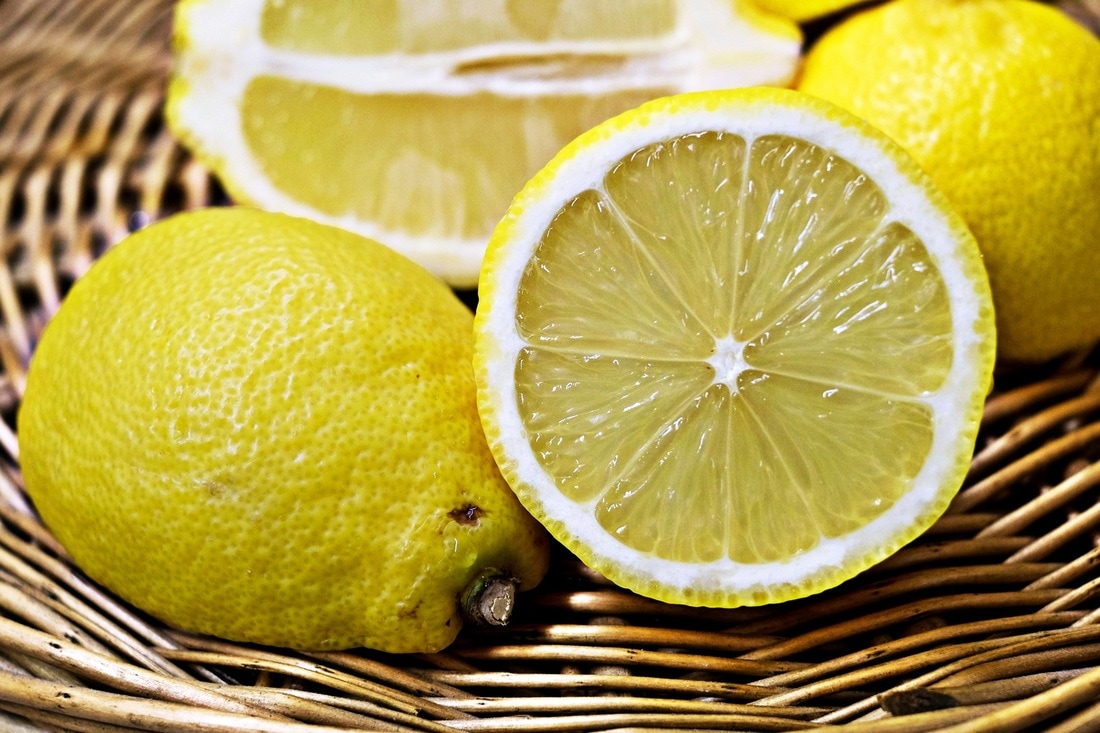
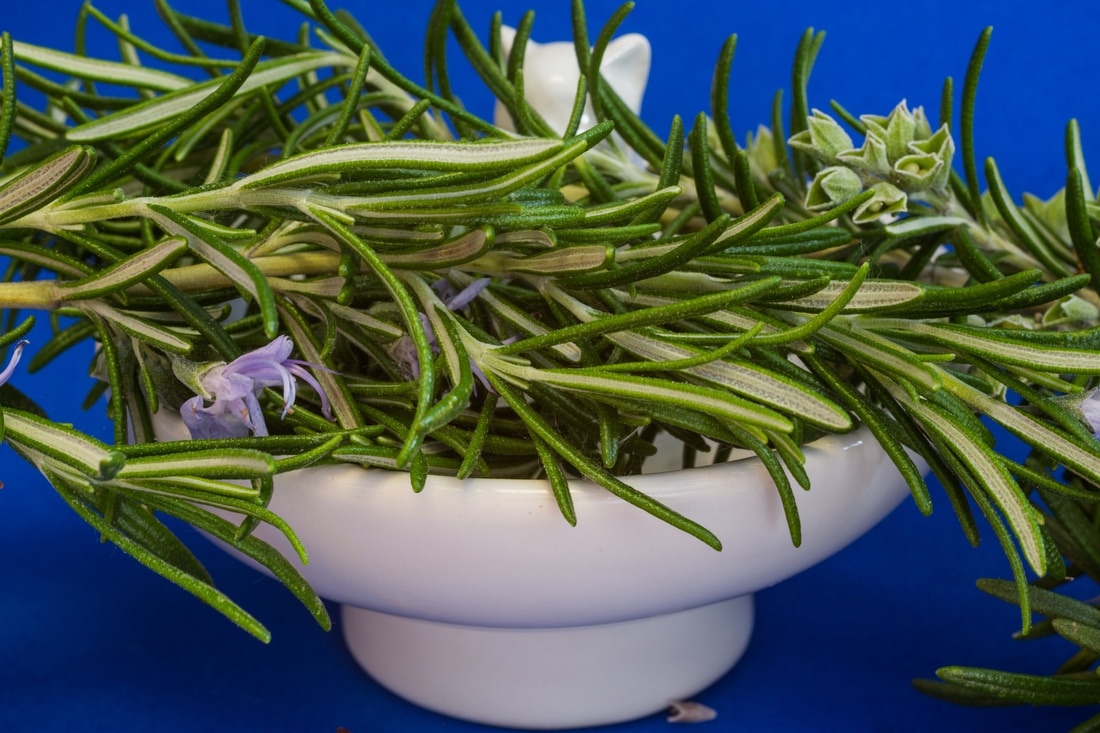
Want a Natural Solution?Our See Ya! line of outdoor products are made with a special blend of 9 essential oils that include citronella, lavender, lemon, and others. We've got three options to protect yourself this summer: soap, spray, or a lotion bar! 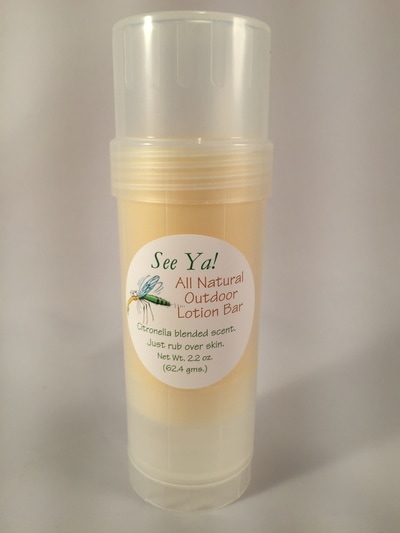 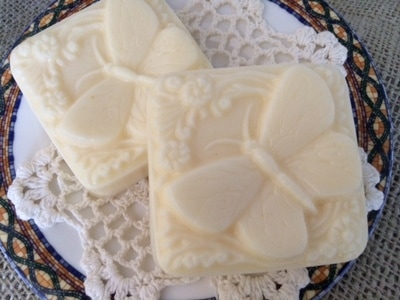 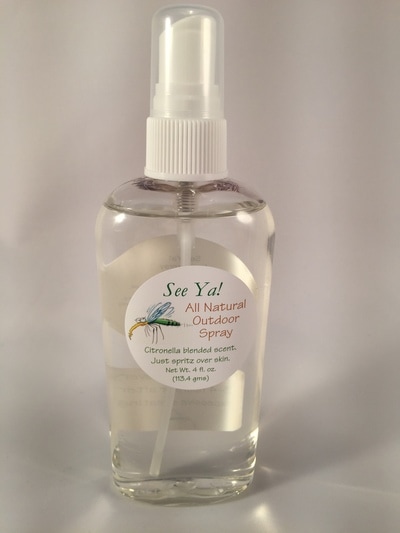
2 Comments
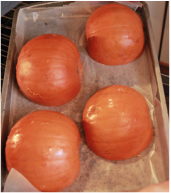
Homemade pumpkin Years ago, I decided to try my hand at using fresh pumpkin to make my pumpkin pie instead of buying the grocery-store canned pumpkin. So off I went in search of some pumpkins. Now pumpkins that you want to use for baking or eating are a bit different than those used for carving out jack-o-lanterns. So make sure you get the right kind. My first adventure ended up a bit of a disaster since I didn't realize that! Plus I thought you just peeled the pumpkin and cut it up, then boiled it until it cooked soft. Again, not a good idea...pumpkin skin is very tough and will kill your peeling hands! Roasting pumpkins I have since found an easier way to make fresh pumpkin by roasting them in the oven until soft. Ready? Let's do it!
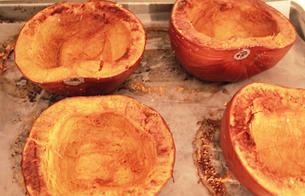
Step 1: Get some fresh baking pumpkins that are a medium size (big ones may be a bit tough). Make sure they are not carving pumpkins! Step 2: Preheat oven to 400 degrees. Step 3: Remove stems, wash the outside well and cut in half from top to bottom. Scoop out the seeds and inside goop. (Save the seeds if you'd like to have them roasted later for a great snack!) Sprinkle lightly with salt. Step 4: Place each half flesh-side down onto cookie sheets that have been lined with parchment paper. Roast in oven for 30-40 minutes or until the flesh is soft. Step 5: Let cool completely. Scoop out soft flesh and either mash (for a courser pumpkin) or puree in blender for a smoother pumpkin. If the pumpkin is too thick to puree, you might add a tiny bit of water. Storage: Store in tight-fitting container in fridge if you plan to use it within a few days...or store in freezer bags in the freezer for later use. Ta-da! Now you have some yummy pumpkin to make pies, or soups, or cookies....mmm, I'm headed to the kitchen now! The best part of making your own is that it is fresher and better for you than any canned you'll buy! ~~~~~~~~~~~~~~~~~~~~~~~~~~~~~~~~~~~~~~~~~~~~~~~~~~~~~~~~~~~~~~~~~~~~~~~~~~~~~~~~~~~~~~~~~~~ Growing up in a house of 5 kids, my Mom would bake up a storm all the time for us, but especially for the holidays. She always made 2 types of pumpkin pie...the traditional spice pie and her yummy Pumpkin Custard pie that her Mom used to make for a family of 8 kids! This version is a bit sweeter (my hands-down favorite!) and has a fluffy, almost meringue-type top since you beat the egg whites separately. Here's her recipe for you to try...it's awesome yum!
For some great benefits of pumpkin and a 15% off coupon on fall goodies, sign up for our free monthly newsletter...just click this link! Newsletter We don't share your info with anyone...nope, no one!
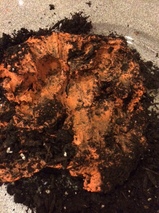
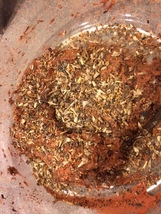
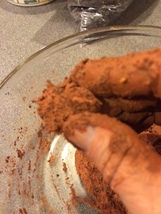
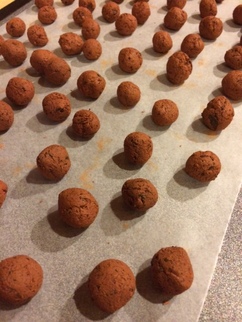
Until next time, Happy Fall! All summer, I've been so busy with making different soapy goodies that tonight I decided to get dirty and make some seed balls. Playing in the dirt can be so relaxing! Mixed with some clay and Honeybee Wildflower seeds, the organic soil has become an easy way to plant "bee" friendly flowers just about anywhere you can toss out a seed ball! Easy for you and loved by our precious honeybees. 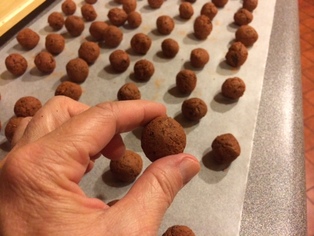 So what is a Seed Ball? It's a combination of rich soil, some regular air dry clay and seeds of your choice. A seed ball is so easy to plant. You toss them wherever you'd like to add some flowers...a flower bed, along a highway or median, along pathways...get creative! It's a perfect activity to do with kids of all ages. The combination of soil and clay holds the seeds safely until Mother Nature provides the right amount of moisture and warm temperatures for proper germination. Seed balls can be planted any time of year. 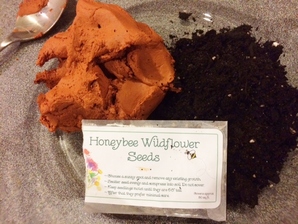 How to make Seed Balls... Start out with some rich organic soil, some plain ol' air-dry clay, and Honeybee Wildflower Seeds.
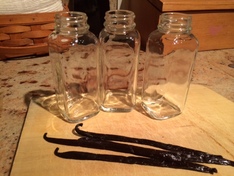
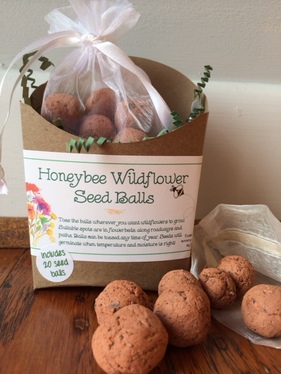 Each package has 20 hand-rolled seed balls ready for tossing. Each ball covers about 1 square foot. You can find them here...Honeybee Wildflower Seed Balls. Seed Balls can be planted anytime of year, so toss some now to enjoy a bright wildflower spring! Until next time...Happy Planting! ~~~~~~~~~~~~~~~~~~~~~~~~~~~~~~~~~~~~~~~~~~~~~~~~~~ Ok, I know it's only August, but some things take time to make really yummy...so tonight I put together some extracts for Christmas gifts. On the menu are organic Vanilla extract and organic Peppermint extract. Both for baking or flavoring drinks...the possibilities are endless!
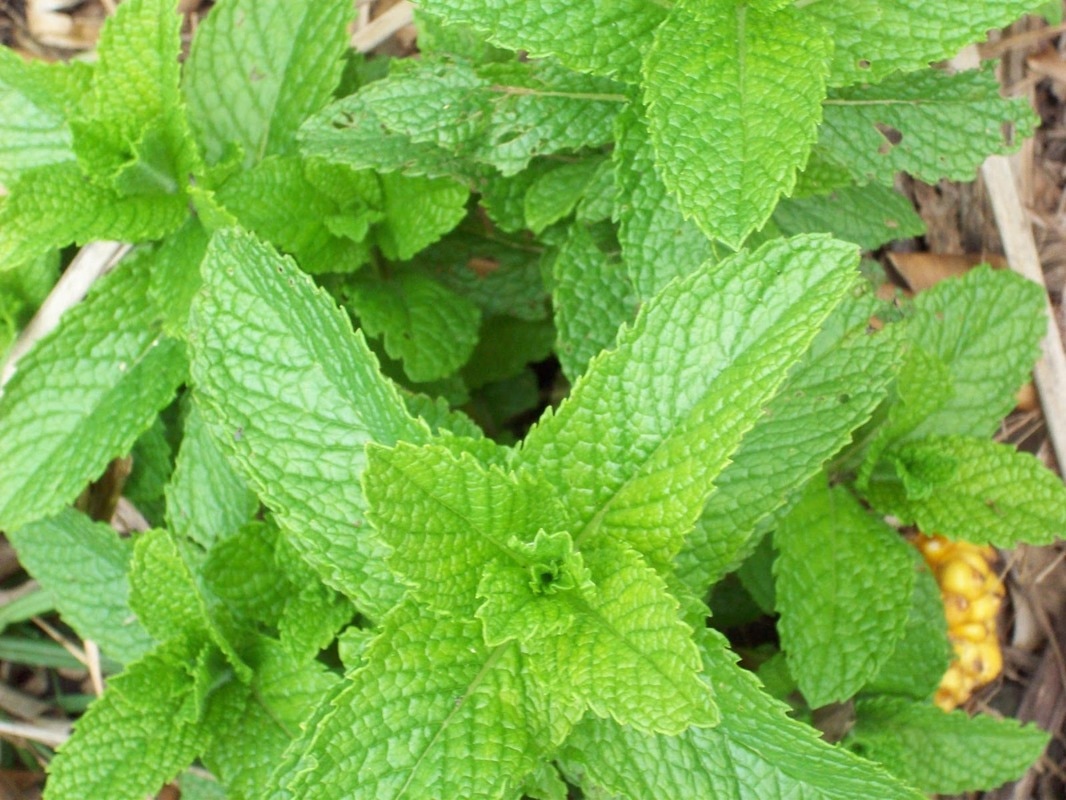
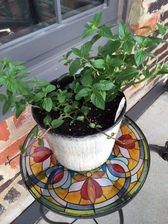
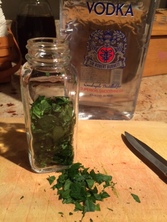
Ingredients Extracts are surprisingly easy to make with the right ingredients. For the Vanilla extract, I used an organic Madagascar Vanilla bean that has a smooth, creamy vanilla smell. The peppermint leaves came from my peppermint plant on the back porch. Both are extracted with vodka that is at least 80 proof. You can use the less expensive vodka since all the alcohol evaporates in cooking so don't waste money on the "good" stuff. Package the extracts in glass jars. Do not use plastic since plastic might absorb some of the yummy oils and it shortens the shelf life considerably. I used 4 oz. French square glass jars since they look stylish and make a fancier gift presentation. 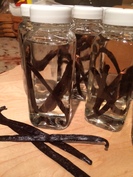 Vanilla Extract Take 2-3 Vanilla beans and cut lengthwise to expose all the yummy vanilla bean. Cut them in half. Place in a small glass jar that holds 4 oz. Cover with vodka and screw on cap. Shake.  Peppermint Extract Remove all stems from peppermint leaves. Wash and pat dry. Coarsely chop and bruise slightly to expose oils. Place in a 4 oz. glass jar. Top off with vodka. Screw on cap. Shake. Optional: Place 1 prepared Vanilla bean in the bottle to make a Vanilla Mint extract! Yum! Storage
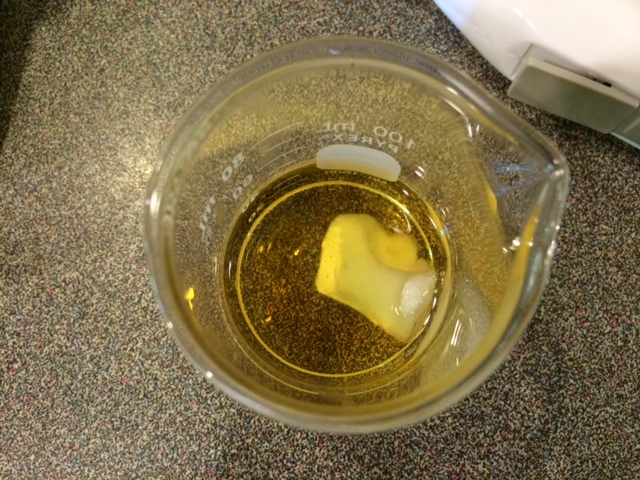
Take your freshly made extracts and place them in a dark, cool cabinet or pantry....and wait...shake each week. Patience! ~ The Vanilla extract will be ready in about 8 weeks. The vodka will turn from a clear liquid to a rich brown as the vanilla oils are drawn into the vodka. The Vanilla beans can then be removed, dried, chopped and made into Vanilla sugar or they can stay in the bottle. ~ The Peppermint extract will be ready in about 4 weeks. Taste it after 3-4 weeks to see if it's strong enough for your liking. If it is, then filter out the peppermint leaves with a strainer and re-bottle. Once the extracts are finished, make up a cute label and voila! Now you have some wonderfully rich, homemade organic extracts for a fraction of the cost at the grocery store. They both make great hostess gifts or holiday gifts that any cook would love! P.S. If you haven't already done so, sign up for our monthly newsletter and you might receive (hint, hint) a coupon code good for one of these yummy extracts closer to the holidays...sign up here... :) Do you ever wonder what is in some of the products you put onto your skin? Well, lately I have gotten a bit paranoid about many of the products that are available. So when my dearest friend's son had his first child with his wife, I wanted to make sure that what they put on that new baby bum was all natural and not that nasty petroleum based gel (you know what one I mean) that really is not a good choice at all! I was on a mission to come up with a recipe that was all natural, gentle enough for a new baby's bum, had good-for-the-skin ingredients and did the job on rashes and minor skin irritations. It was a tall order but follow along and you'll see what I found! 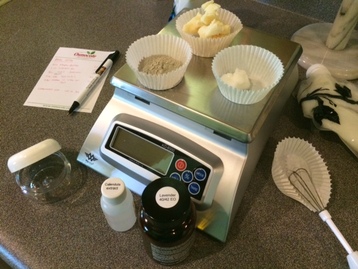 In my research, I found that clays are a wonderful source of nutrients for the skin with the natural drying and de-toxifying properties I was looking for. In this recipe, I decided to use bentonite clay for its healing properties, its ability to draw out toxins from the skin and its release of needed minerals. Plus it has been found to be effective against Candida albicans which is a fungus that grows as a yeast infection targeting baby bums and the genitalia and oral areas of humans in general. Along with some bentonite clay, I used Mango butter and coconut oil for their skin-softening properties, the anti-bacterial properties of coconut oil and Lavender essential oil, and healing and soothing Calendula extract. Let's get started!
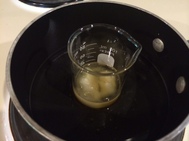
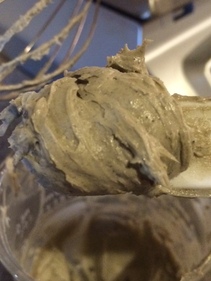
Time to chill out! Once all these ingredients are mixed in well, it's time to chill the mixture until it starts to set up. By chilling it, I can speed up the process a bit but it will solidify on its own at room temperatue...just a lot slower. As it is, chilling can take 30-60 minutes! 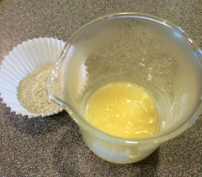 As you can see in this photo, the oils and butter have turned from a golden yellow to a butter yellow. It's about the consistency of semi-stiff butter. The bentonite clay on the left is an all natural clay that is grayish in color due to its aged volcanic ash makeup. I use this unrefined clay to keep all the natural nutrients intact. Some bentonite clay on the market is whiter and more refined losing many of its nutrients.
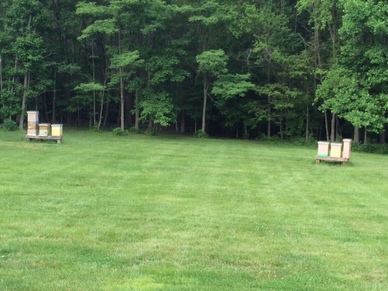
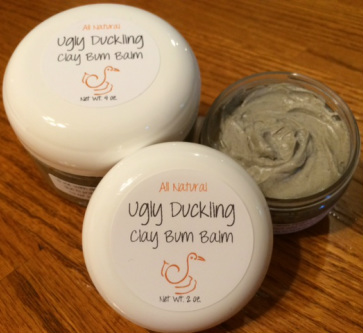 It's all in a name....
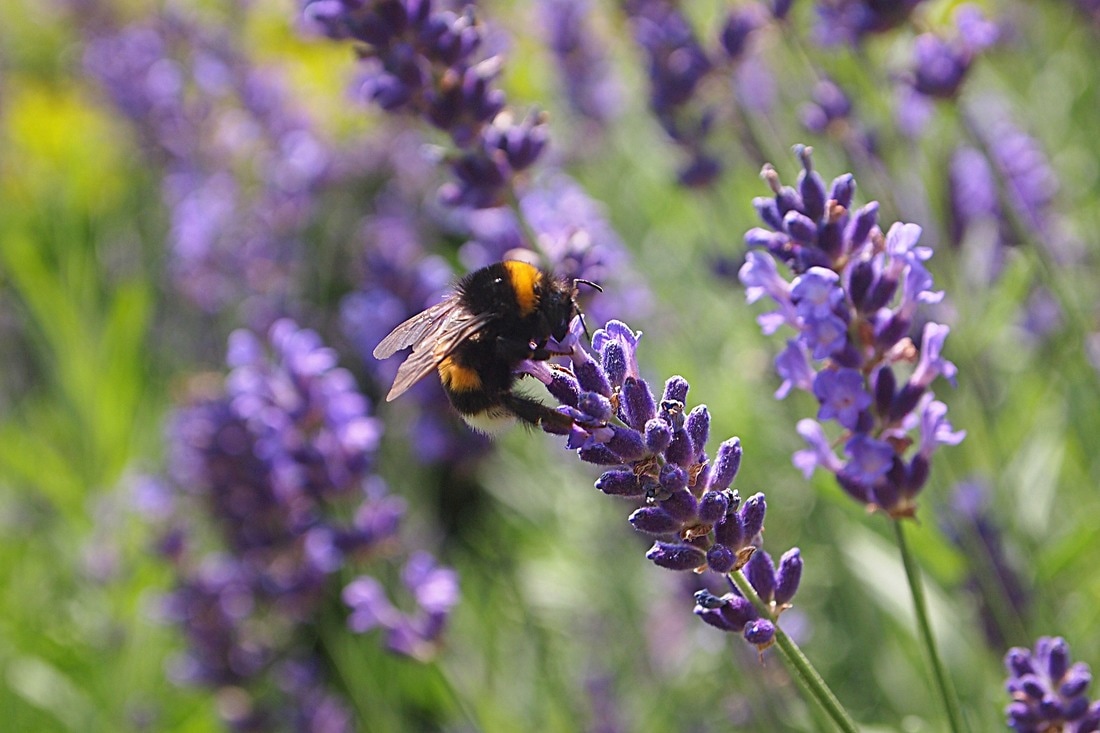
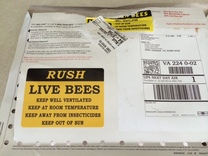
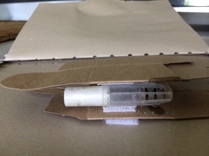
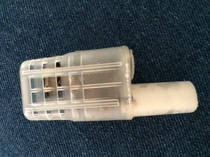
Naming this new creation was a challenge since the balm is chock full of good ingredients all chosen for their special properties, but it really is U...G...L...Y. My son who has been best friends with the new dad since kindergarten days was the one who suggested the name of "Ugly Duckling"...so you can see that this new bum balm was truly a family project! Labels were then designed and applied making it all ready for the next tiny bum that needs a little TLC! ~ Thanks to little Leah Ryan Y. who was the inspiration behind "Ugly Duckling Clay Bum Balm"! ~ 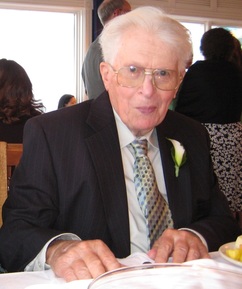 Dad, Master Beekeeper Dad, Master Beekeeper My Dad was a beekeeper most of his life. He learned the skills from his grandfather when he was a kid. He dabbled with the bees as his 5 children grew up (but my Mom found that bees and kids didn't always mix well). So it wasn't until he retired at 65 that he got into full-fledged beekeeping again. Over the next 29 years, he was active with the bees each day and night, building all the equipment needed to manage his hives, supplying beekeeping products for local beekeepers, mentoring new beekeepers, bottling and selling his honey and loving life with his bees in central PA. In the spring of 2012, Dad had gotten his grandson (my son) into the world of beekeeping by making all the supers and frames needed to set up a new hive and mentored him with his first colony at his home in VA. He was passing on his love of these incredible creatures to his grandson like his grandfather had done for him so many years before. He adored the "girls", a nickname most beekeepers have for their hard-working bees, and was distraught when he was diagnosed with liver cancer at the tender age of 94 in June 2012 and had only days to live. It was bittersweet, but he asked my son if he would look after his hives for him. It was such a relief to him to know that the "girls" and his legacy would carry on. So that's how Dad's 6 hives of bees decided to make the move to the sunny south and I was recruited as "assistant" Bee-Mom.  Little did I know what we were getting into! Once you get over the initial fear of all the buzzing around your head, the bees are incredibly addicting and managing them is an exciting adventure. My son sure is a chip off his Pap's block...what a natural! During the spring and early summer, honeybees will increase their numbers quite quickly to build up the colony so more honey stores can be gathered. If they get too large for the space they are in, they will "swarm". Swarming happens when they get too crowded and the Queen basically tells them that she is taking some of the colony with her and moving out to another space. Those bees that are left behind will then generate a new Queen and build up their numbers yet again when, all the while, the old Queen has found another suitable space (i.e. a hollow tree, an old building, your attic, etc.) to settle into with her part of the colony that followed her. As a beekeeper, one must monitor this "swarming" activity before it happens and split the colony. If the colony swarms, the beekeeper will lose half of the bees, but if the colony is split before the swarm, two colonies can be made from the original one. Once a split is done, often-times a beekeeper will introduce a new Queen into the old colony so their "downtime" in minimized. This past week, I was able to help with that introduction (ok, so I stood back and watched...but I was ready to jump in if Luke needed help).
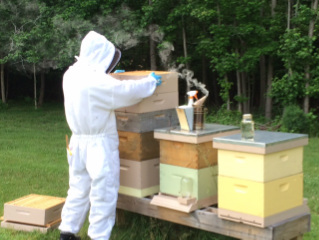 Once the real beekeeper got home, we were able to install each Queen into her new home. It's done by placing her in her cage within the frames of the lower super (box). As the bees in the hive cluster around the Queen's cage, they smell each other and get familiar. The bees eat away at the sugar plug which can take 24-48 hours depending on the number of bees and release the Queen. By the time the Queen is set free, all the bees are friends (well, we hope so!) and the Queen gets to work laying more eggs and building up the colony!
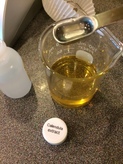
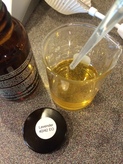
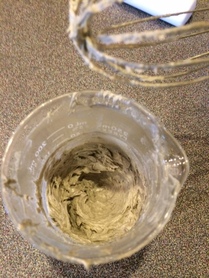
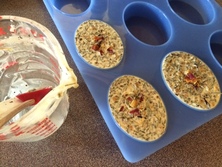
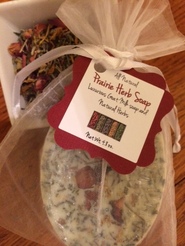
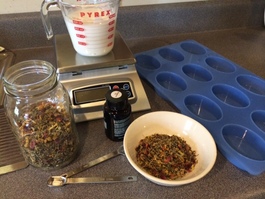 As my first blog post, I thought I'd start with a typical day in the kitchen here at Tailored Touches! So what's cookin' today? As with any of our items, we develop recipes then tweak them to get just the right ratios. As you can see on the left, I'm just starting to make up our newest soap...Prairie Herb soap. It consists of a special blend of dried herbs that are chock full of skin-loving properties, a Goat milk soap that has a lather to die for and Bergamot essential oil that has antiseptic and antibacterial properties...plus it just smells gooood! First step to making this wonderful all natural soap is to start with all the ingredients. Tweaking and mixing the herb blend was done the day before, so I decided to store the blend in a canning jar for ease of use. I also will need the goat milk soap, the Bergamot essential oil, the large oval mold, my scale to get the correct measurements and assorted measuring spoons. 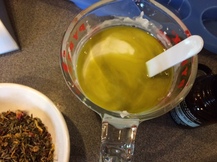 Once the goat milk soap is melted, the essential oil is added. As you can see in the picture, Bergamot essential oil has a greenish-yellow tint to it. It smells like orange citrus and herbs, just like Earl Grey tea. It needs to be fully mixed in before adding the dried herbs. 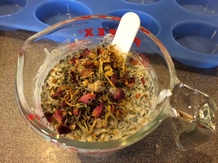 Now it's time to mix in the herbs and get ready to pour into the molds. As the herbs mix in and the soap begins to cool, I need to move quickly. Timing is everything when pouring soap. If it's too warm, all the herbs will either float to the top if they are light, or sink to the bottom if heavy. So waiting until they all seem to be suspended is the perfect time to pour. But the soap can start to set up...so get pourin'!
|

Welcome to Tailored Tidbits!If I'm not in the kitchen cooking up new items for my shop, I'm sewing fabric baskets, taking care of our honeybees, pitching in on the latest project at my son's, or planning a trip somewhere with my daughter. Here, I'll share a "day in the life" at Tailored Touches! 
Sign up for the newsletter for an instant 10% off coupon.
Categories
All
Archives
February 2019
|


 RSS Feed