|
Ok, I know it's only August, but some things take time to make really yummy...so tonight I put together some extracts for Christmas gifts. On the menu are organic Vanilla extract and organic Peppermint extract. Both for baking or flavoring drinks...the possibilities are endless!
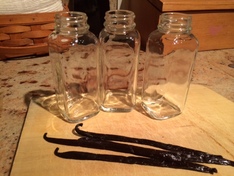
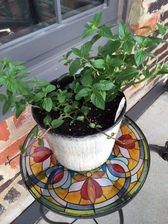
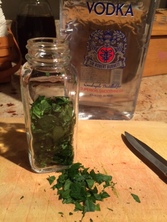
Ingredients Extracts are surprisingly easy to make with the right ingredients. For the Vanilla extract, I used an organic Madagascar Vanilla bean that has a smooth, creamy vanilla smell. The peppermint leaves came from my peppermint plant on the back porch. Both are extracted with vodka that is at least 80 proof. You can use the less expensive vodka since all the alcohol evaporates in cooking so don't waste money on the "good" stuff. Package the extracts in glass jars. Do not use plastic since plastic might absorb some of the yummy oils and it shortens the shelf life considerably. I used 4 oz. French square glass jars since they look stylish and make a fancier gift presentation. 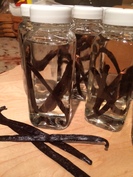 Vanilla Extract Take 2-3 Vanilla beans and cut lengthwise to expose all the yummy vanilla bean. Cut them in half. Place in a small glass jar that holds 4 oz. Cover with vodka and screw on cap. Shake.  Peppermint Extract Remove all stems from peppermint leaves. Wash and pat dry. Coarsely chop and bruise slightly to expose oils. Place in a 4 oz. glass jar. Top off with vodka. Screw on cap. Shake. Optional: Place 1 prepared Vanilla bean in the bottle to make a Vanilla Mint extract! Yum! Storage
Take your freshly made extracts and place them in a dark, cool cabinet or pantry....and wait...shake each week. Patience! ~ The Vanilla extract will be ready in about 8 weeks. The vodka will turn from a clear liquid to a rich brown as the vanilla oils are drawn into the vodka. The Vanilla beans can then be removed, dried, chopped and made into Vanilla sugar or they can stay in the bottle. ~ The Peppermint extract will be ready in about 4 weeks. Taste it after 3-4 weeks to see if it's strong enough for your liking. If it is, then filter out the peppermint leaves with a strainer and re-bottle. Once the extracts are finished, make up a cute label and voila! Now you have some wonderfully rich, homemade organic extracts for a fraction of the cost at the grocery store. They both make great hostess gifts or holiday gifts that any cook would love! P.S. If you haven't already done so, sign up for our monthly newsletter and you might receive (hint, hint) a coupon code good for one of these yummy extracts closer to the holidays...sign up here... :)
0 Comments
Do you ever wonder what is in some of the products you put onto your skin? Well, lately I have gotten a bit paranoid about many of the products that are available. So when my dearest friend's son had his first child with his wife, I wanted to make sure that what they put on that new baby bum was all natural and not that nasty petroleum based gel (you know what one I mean) that really is not a good choice at all! I was on a mission to come up with a recipe that was all natural, gentle enough for a new baby's bum, had good-for-the-skin ingredients and did the job on rashes and minor skin irritations. It was a tall order but follow along and you'll see what I found! 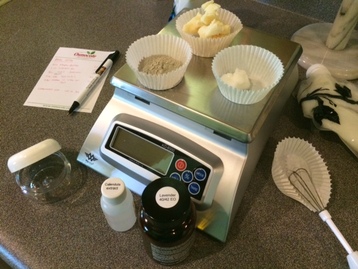 In my research, I found that clays are a wonderful source of nutrients for the skin with the natural drying and de-toxifying properties I was looking for. In this recipe, I decided to use bentonite clay for its healing properties, its ability to draw out toxins from the skin and its release of needed minerals. Plus it has been found to be effective against Candida albicans which is a fungus that grows as a yeast infection targeting baby bums and the genitalia and oral areas of humans in general. Along with some bentonite clay, I used Mango butter and coconut oil for their skin-softening properties, the anti-bacterial properties of coconut oil and Lavender essential oil, and healing and soothing Calendula extract. Let's get started!
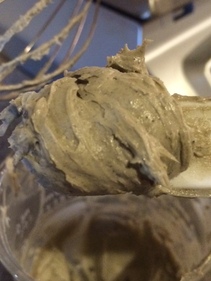
Time to chill out! Once all these ingredients are mixed in well, it's time to chill the mixture until it starts to set up. By chilling it, I can speed up the process a bit but it will solidify on its own at room temperatue...just a lot slower. As it is, chilling can take 30-60 minutes! 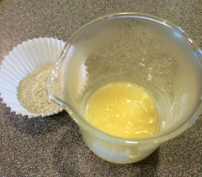 As you can see in this photo, the oils and butter have turned from a golden yellow to a butter yellow. It's about the consistency of semi-stiff butter. The bentonite clay on the left is an all natural clay that is grayish in color due to its aged volcanic ash makeup. I use this unrefined clay to keep all the natural nutrients intact. Some bentonite clay on the market is whiter and more refined losing many of its nutrients.
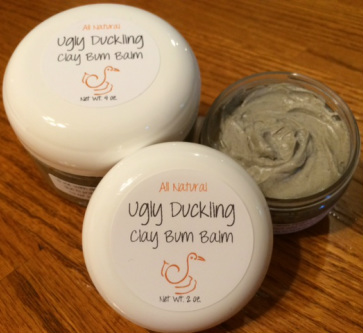 It's all in a name....
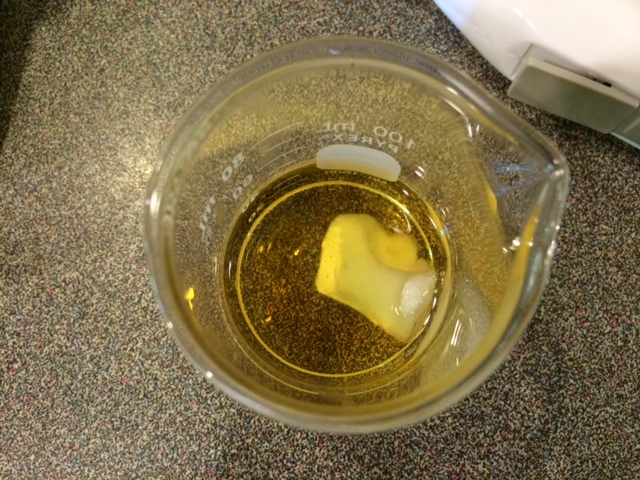
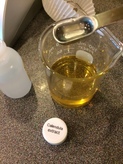
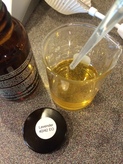
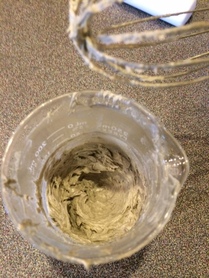
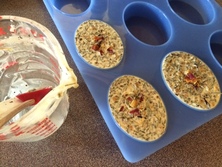
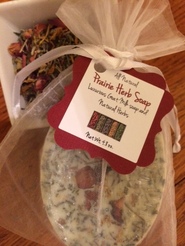
Naming this new creation was a challenge since the balm is chock full of good ingredients all chosen for their special properties, but it really is U...G...L...Y. My son who has been best friends with the new dad since kindergarten days was the one who suggested the name of "Ugly Duckling"...so you can see that this new bum balm was truly a family project! Labels were then designed and applied making it all ready for the next tiny bum that needs a little TLC! ~ Thanks to little Leah Ryan Y. who was the inspiration behind "Ugly Duckling Clay Bum Balm"! ~ 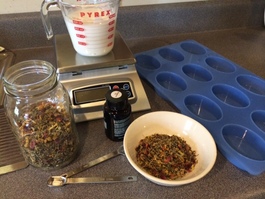 As my first blog post, I thought I'd start with a typical day in the kitchen here at Tailored Touches! So what's cookin' today? As with any of our items, we develop recipes then tweak them to get just the right ratios. As you can see on the left, I'm just starting to make up our newest soap...Prairie Herb soap. It consists of a special blend of dried herbs that are chock full of skin-loving properties, a Goat milk soap that has a lather to die for and Bergamot essential oil that has antiseptic and antibacterial properties...plus it just smells gooood! First step to making this wonderful all natural soap is to start with all the ingredients. Tweaking and mixing the herb blend was done the day before, so I decided to store the blend in a canning jar for ease of use. I also will need the goat milk soap, the Bergamot essential oil, the large oval mold, my scale to get the correct measurements and assorted measuring spoons. 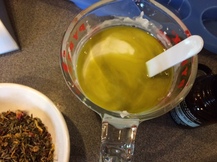 Once the goat milk soap is melted, the essential oil is added. As you can see in the picture, Bergamot essential oil has a greenish-yellow tint to it. It smells like orange citrus and herbs, just like Earl Grey tea. It needs to be fully mixed in before adding the dried herbs. 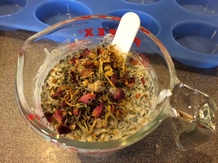 Now it's time to mix in the herbs and get ready to pour into the molds. As the herbs mix in and the soap begins to cool, I need to move quickly. Timing is everything when pouring soap. If it's too warm, all the herbs will either float to the top if they are light, or sink to the bottom if heavy. So waiting until they all seem to be suspended is the perfect time to pour. But the soap can start to set up...so get pourin'!
|

Welcome to Tailored Tidbits!If I'm not in the kitchen cooking up new items for my shop, I'm sewing fabric baskets, taking care of our honeybees, pitching in on the latest project at my son's, or planning a trip somewhere with my daughter. Here, I'll share a "day in the life" at Tailored Touches! 
Sign up for the newsletter for an instant 10% off coupon.
Categories
All
Archives
February 2019
|
 RSS Feed