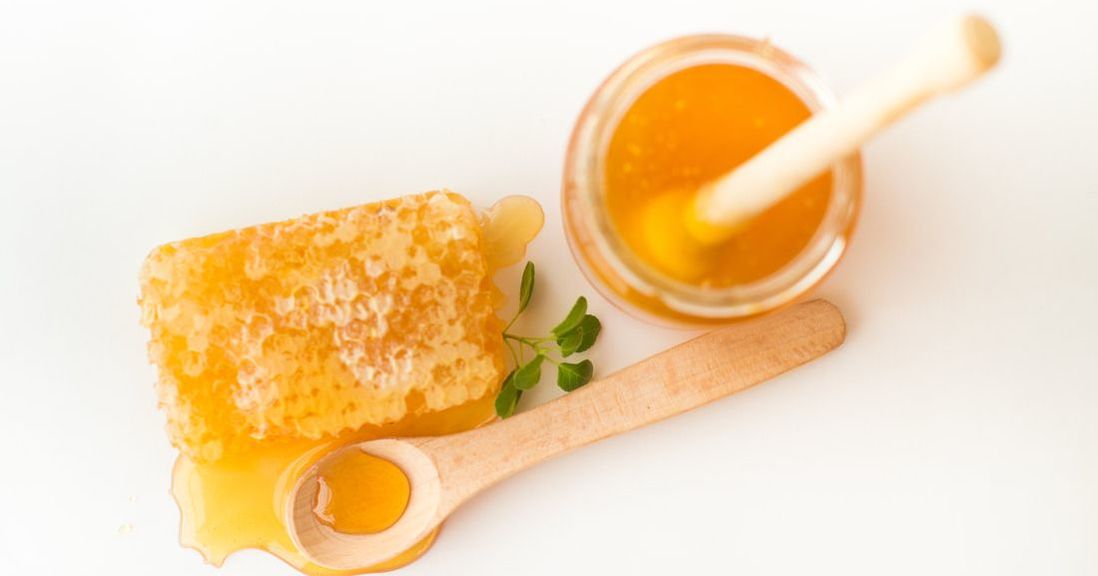
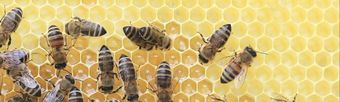
 Ingredients: Honey & Beeswax We decided to start this series off with ingredients that are near and dear to our hearts: honey and beeswax! We come from a long line of beekeepers. My dad was one, his grandfather before him, and now we keep the tradition going with my son’s bee hives. In addition to our love for bees, honey and beeswax happen to be “good for you” ingredients, too. What a good place to start!  Honey
Beeswax
For all these reasons - our love of honey and bees plus the “good for you” qualities - we use these ingredients a lot.  Honey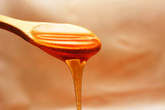 Honey is effective in soaps because the naturally high sugar content boosts the lather, which we all love. Given this, the natural instinct is to use a lot of honey in soap recipes. But beware! The downside is that the high sugar content can cause from-scratch soaps to overheat after they are poured into their mold, leading to cracks and discoloration. We can counter that by putting the soaps in a fridge or monitoring temperatures carefully. Like so many other tricks of the trade, we learned through a lot of trial and error! It is a trick to find that exact balance between using enough honey to get the soapy lather we all like and not using so much that it ruins the soap with unsightly cracks or discoloration. Beeswax If the amount of honey determines the amount of lather on a soap, the amount of beeswax determines the hardness of the product. The hardness allows us to create a lotion that is portable, for example, yet the heat from your hands melts the butters and oils ever so slightly each time you use it so you get a little moisture at a time. For products that require a softer feel - such as balms - we use less beeswax. We want them to be soft and spreadable. Lip balms also use less so they easily glide over your lips. Each recipe has been tested for the optimal amount to get the right result. Lots of trial and error… and eventually… our very own, from scratch recipes.
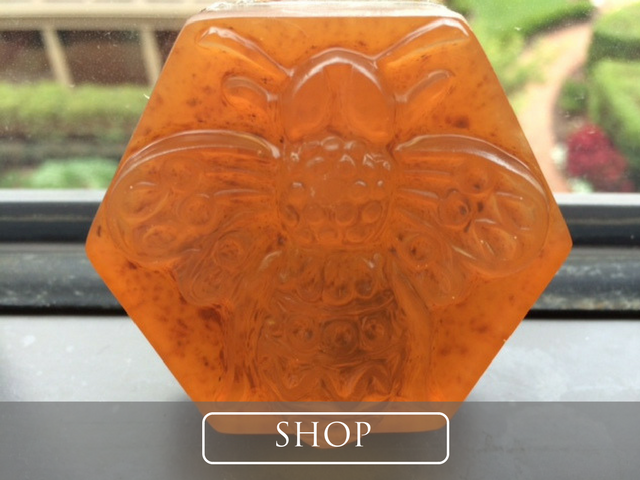
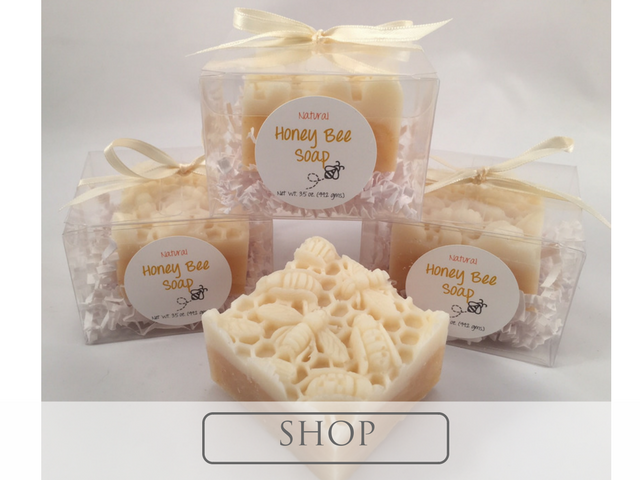
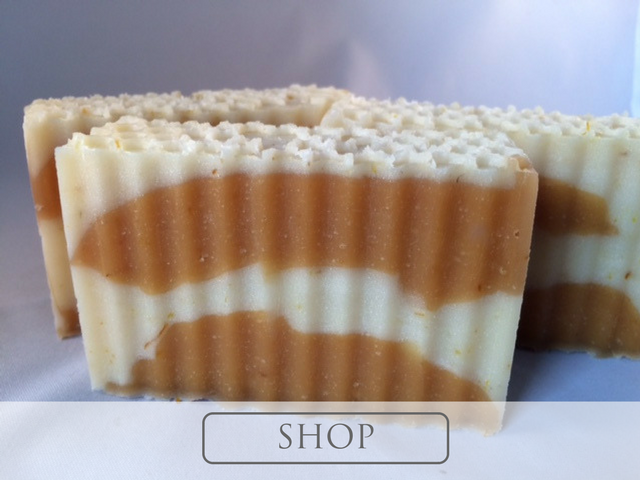
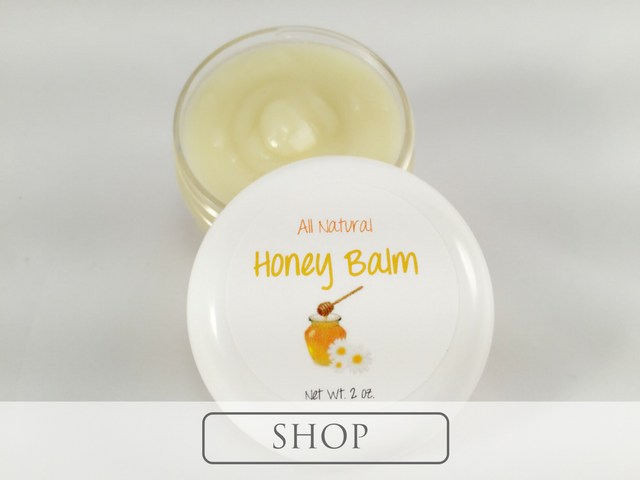
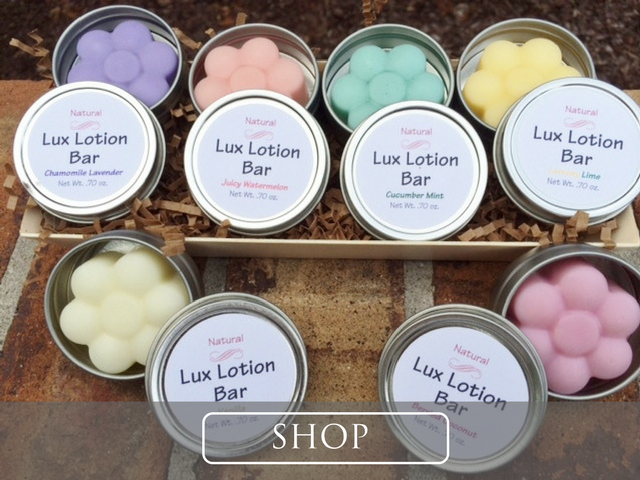
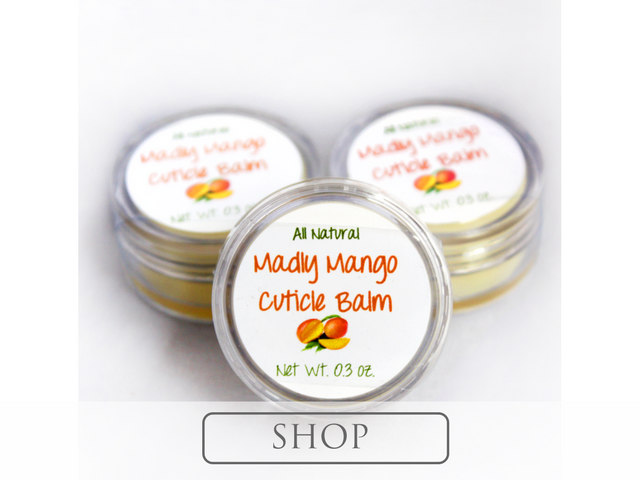
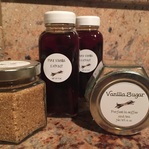
 So, once we have a “good for you” ingredient that we know how to use, we get to work! Because honey and beeswax offer some unique properties that are so good for your skin, we use these ingredients in a lot of products. We use honey in soaps because of the incredible lather…. and also in one of our bath bombs. We also use a lot of beeswax, often in conjunction with honey. For our lotion bars, such as the Lux Lotion Bars, up to one-third of the total recipe is actually beeswax! For products that require a softer feel - such as our Honey Balm, our lip balms, or our Madly Mango Cuticle Balm - we use a bit less. Want to try some honey and beeswax products? Buy now by clicking on the pictures below!
Click your favorite product above or...
1 Comment
This week we have a guest blogger. My daughter, Elana, wanted to talk about her experiences seeing vanilla close up in Zanzibar and Madagascar!
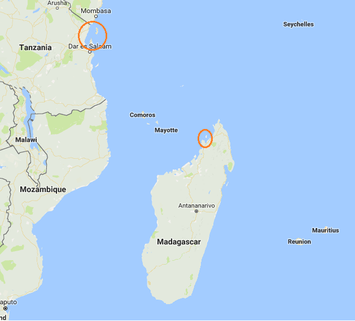
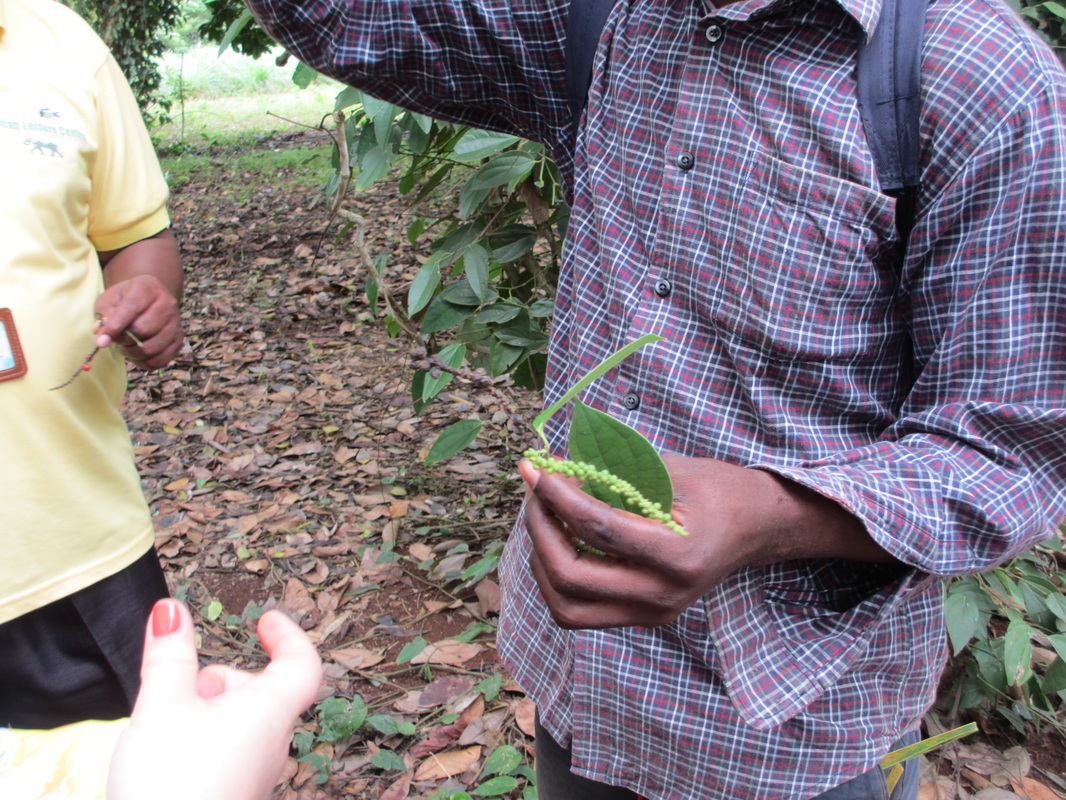
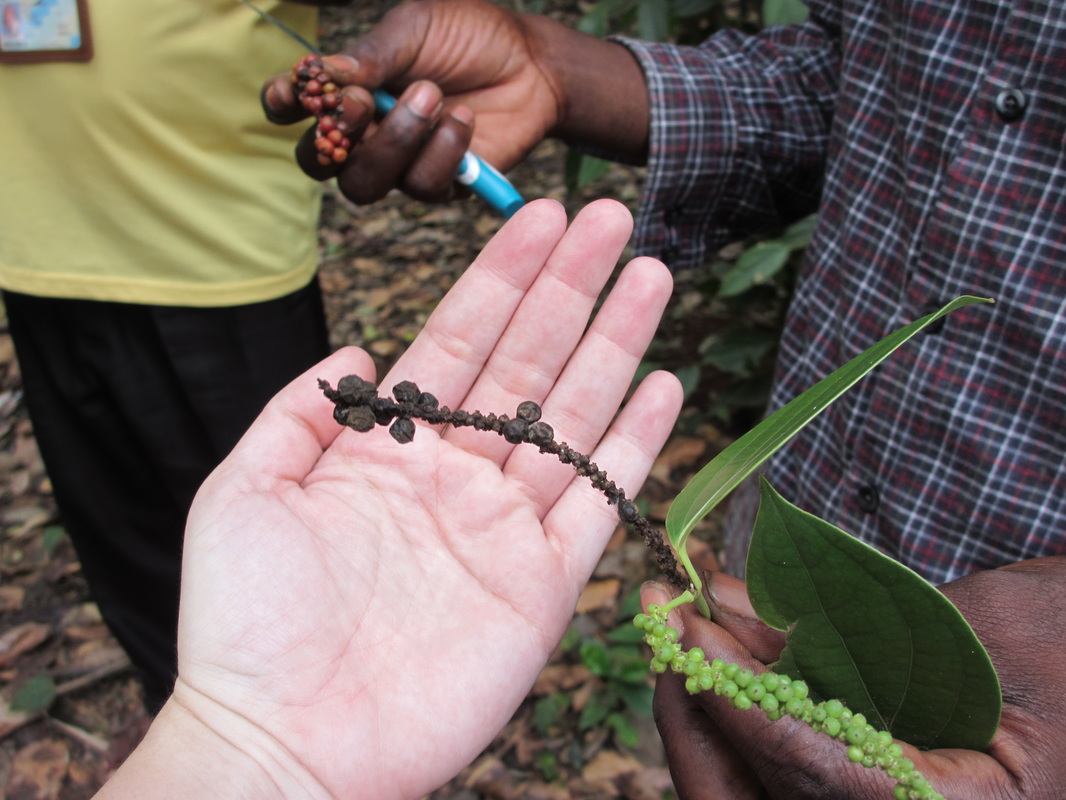
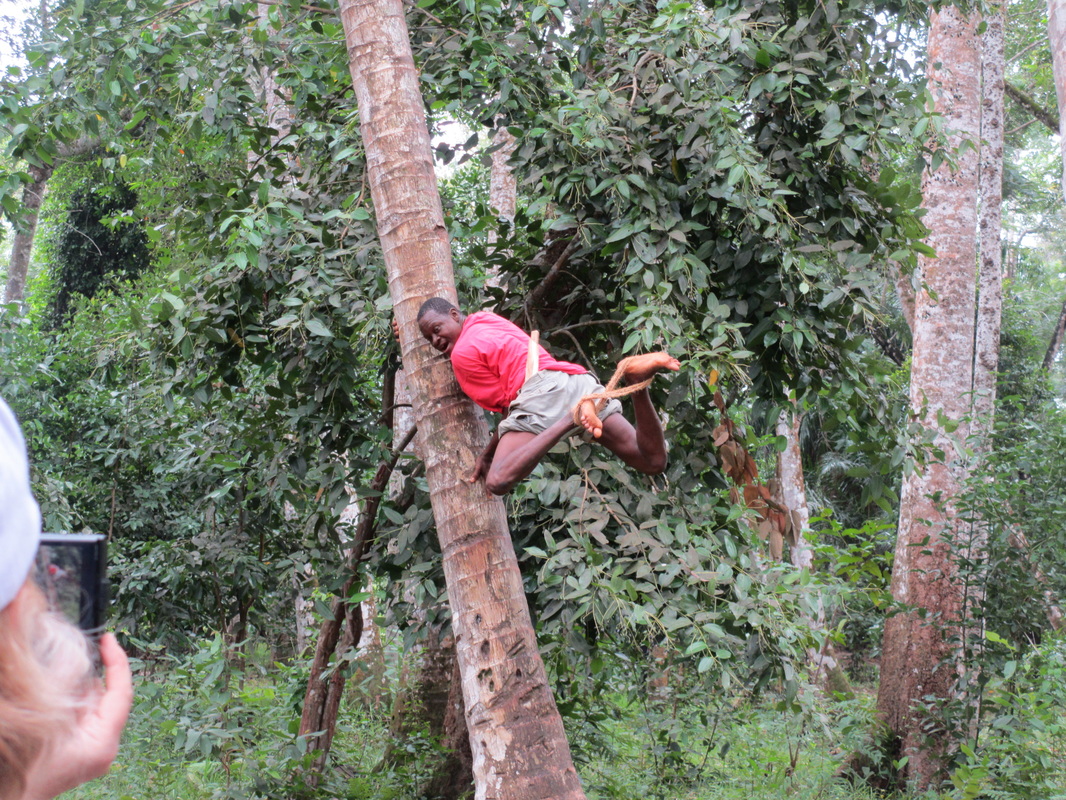
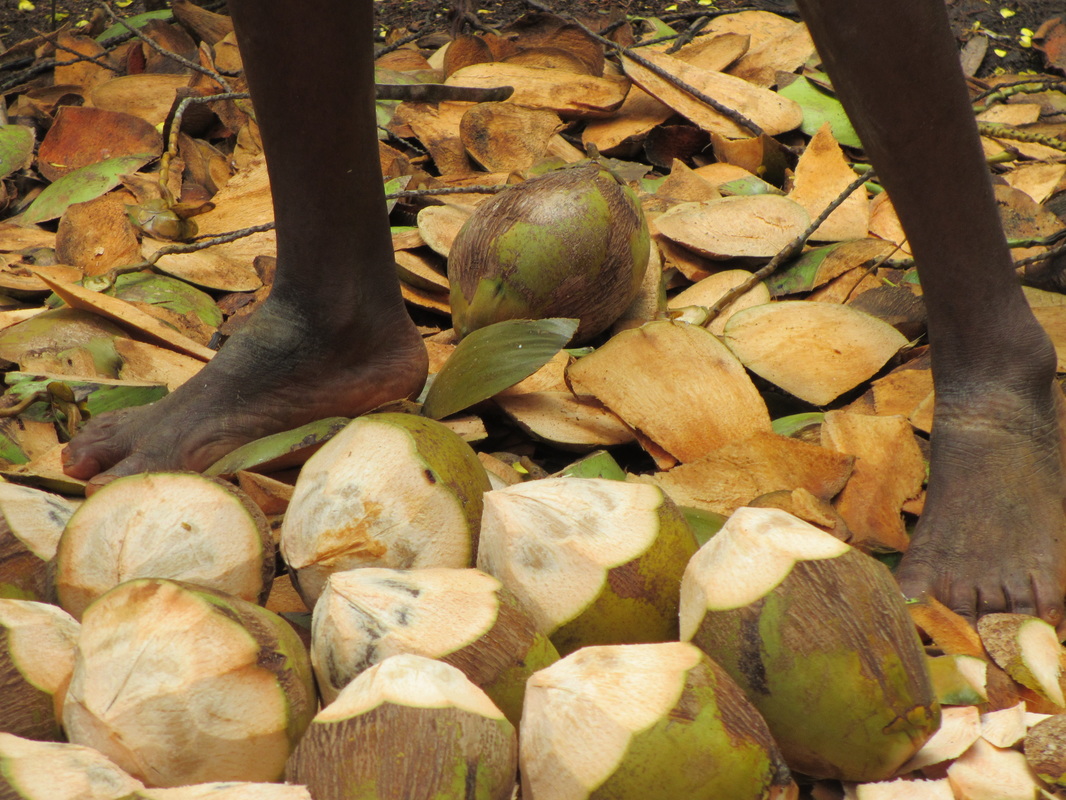
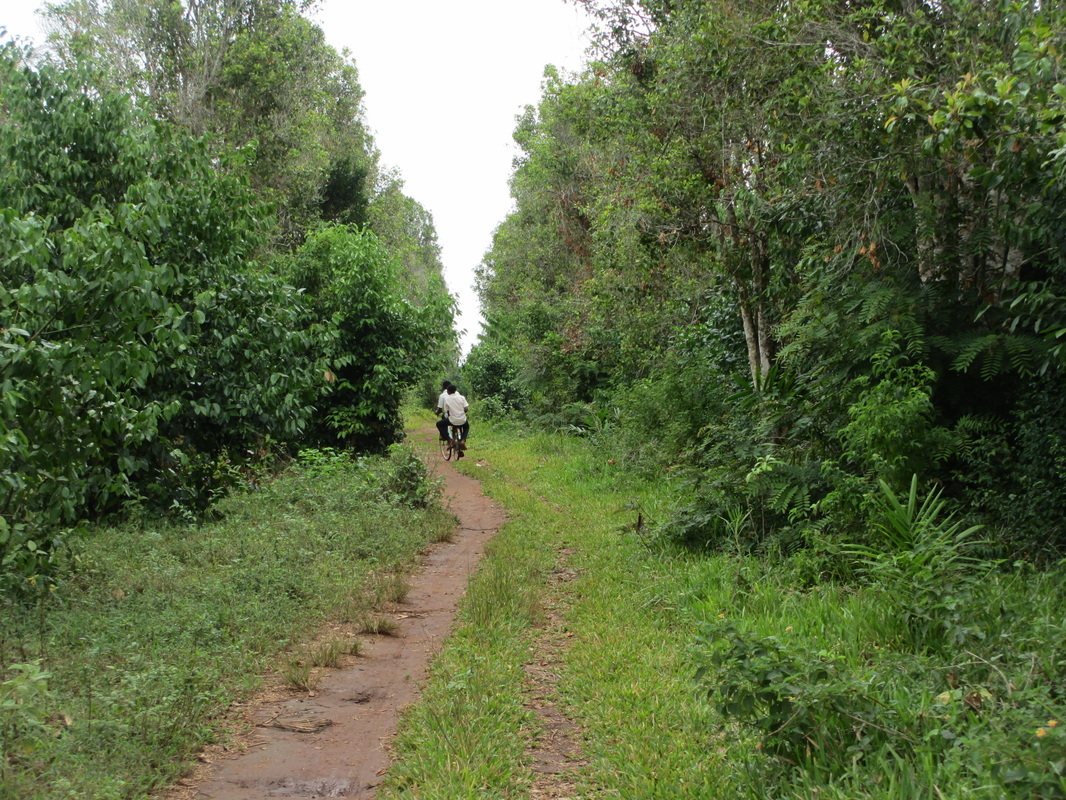
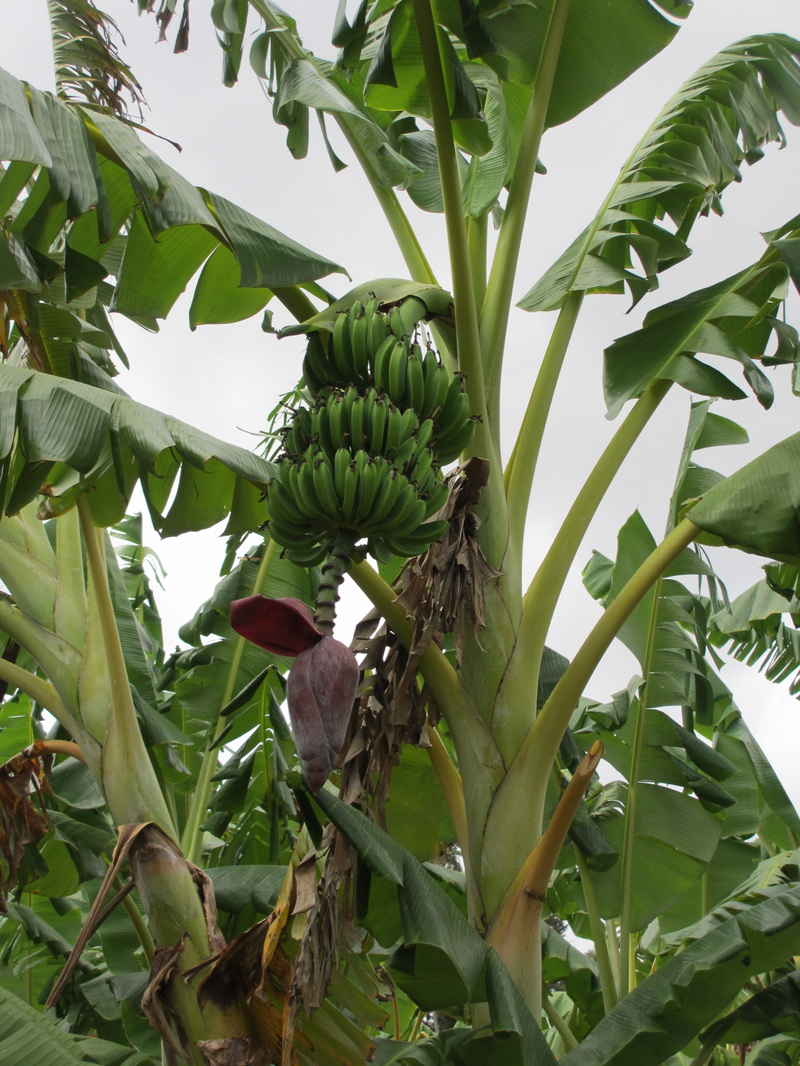
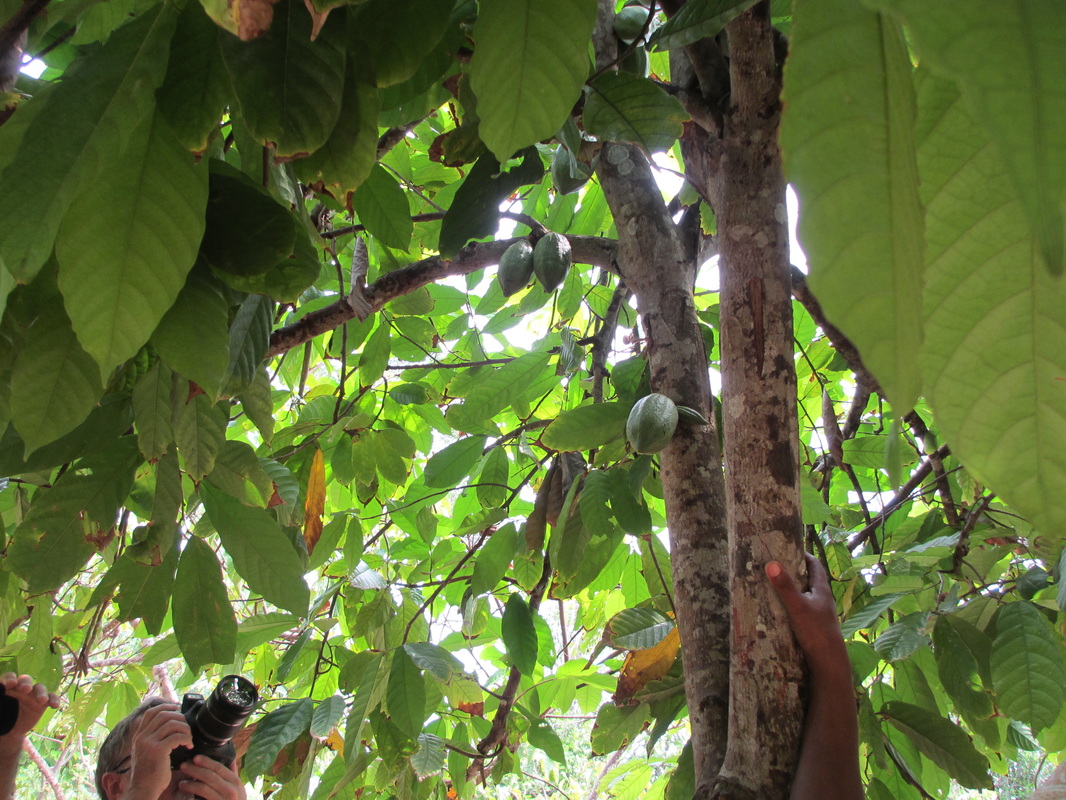
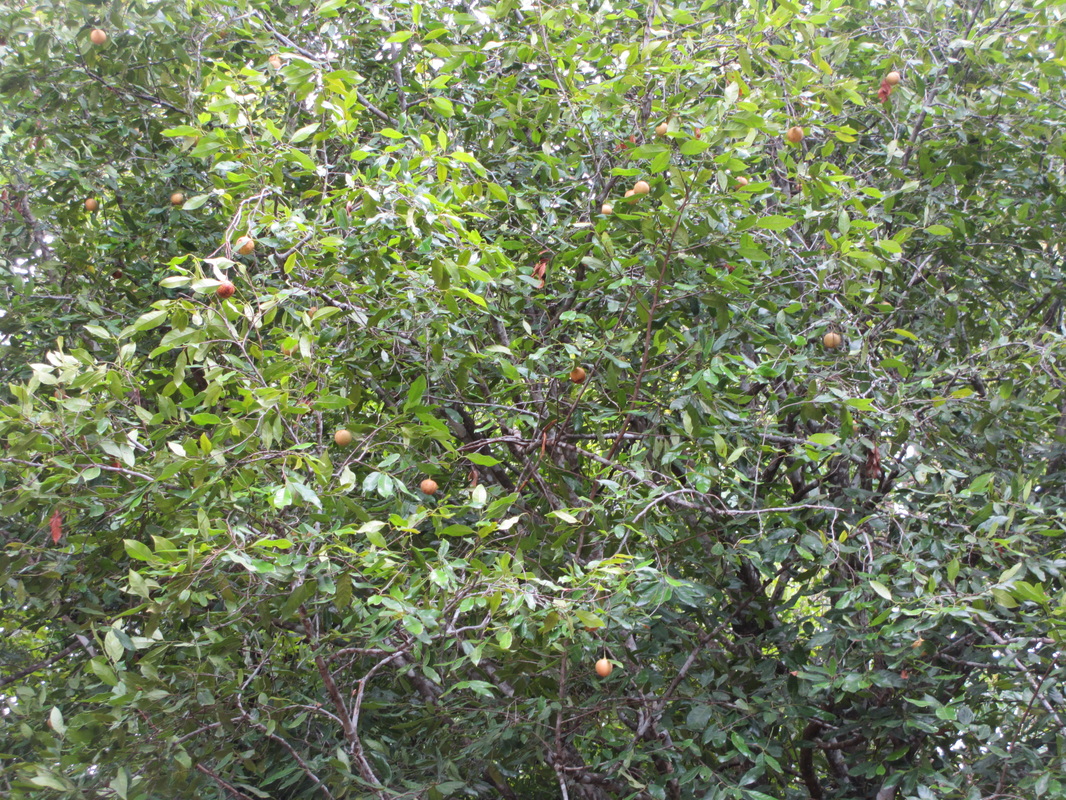
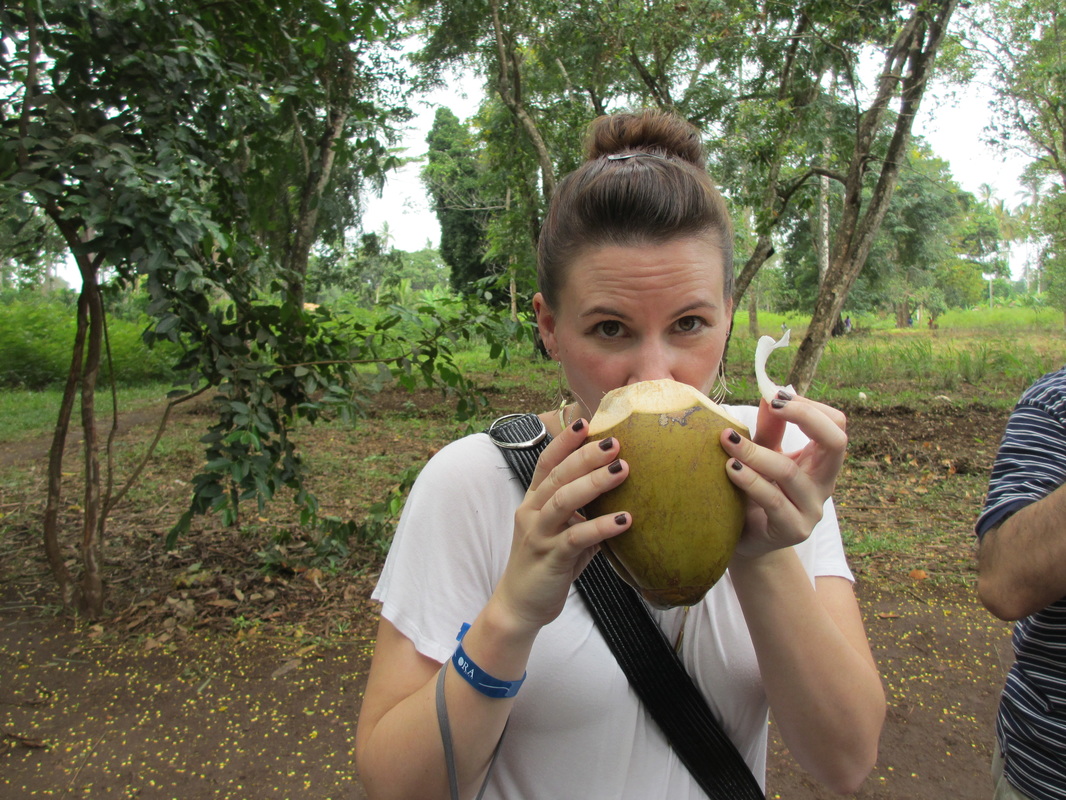
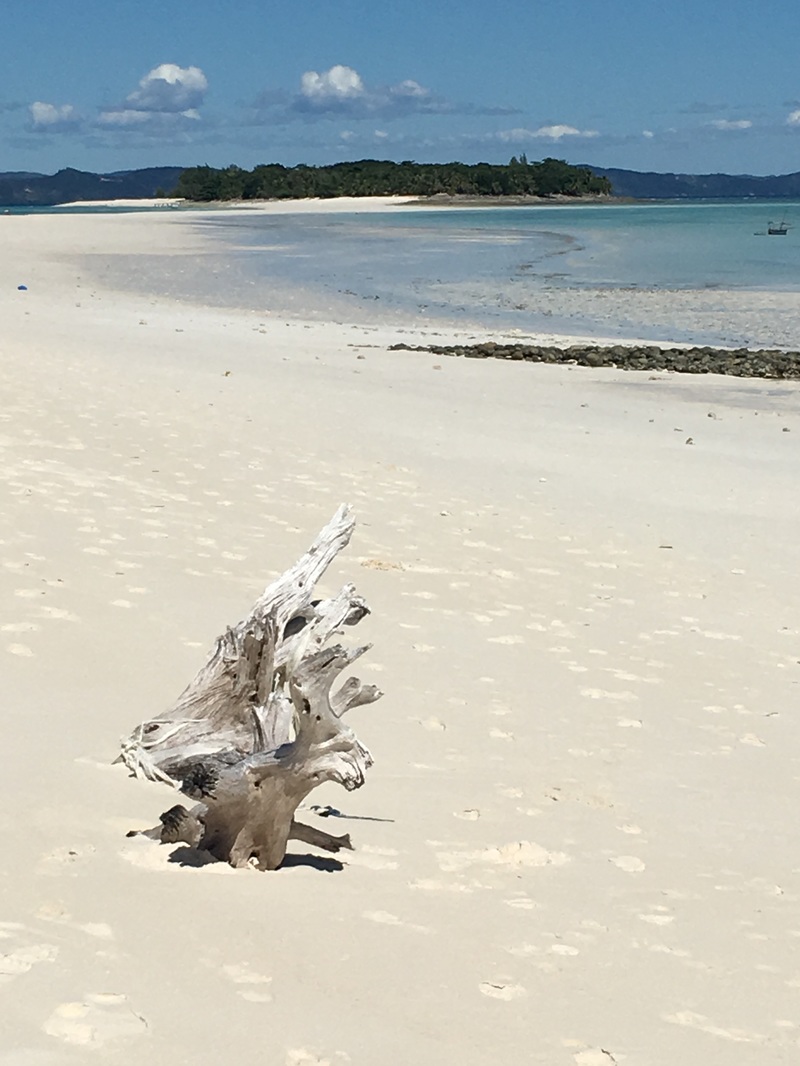
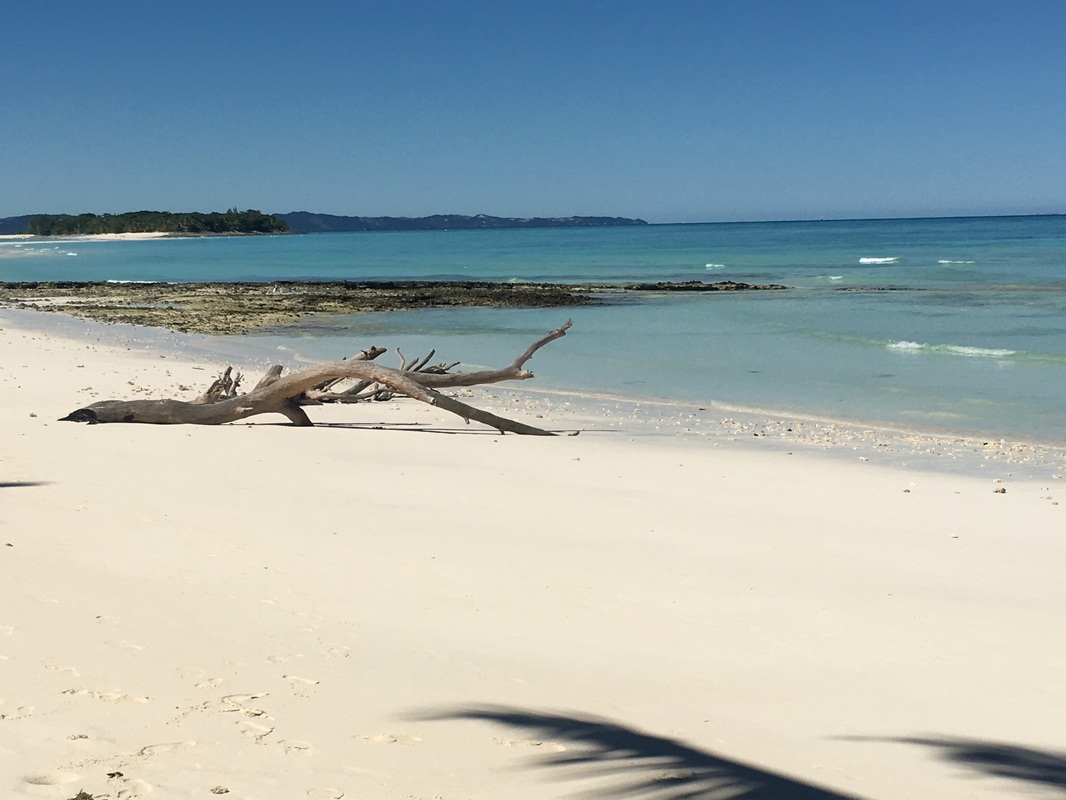
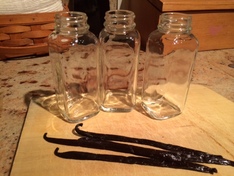
My Favorite Spice: Vanilla!Vanilla is my favorite spice. I love the smell so much, and always ask for all my Tailored Touches products in that scent (no, really!) I put vanilla in EVERYTHING. But did you know that most vanilla we use is manufactured?? Real vanilla is so difficult to harvest that the industry is propped up by companies that produce vanilla in a lab. Unless you're careful, you're probably buying synthetic vanilla! Try the real stuff and you should notice a difference (warning: it's a little pricey!). The fact that vanilla is difficult to harvest (and thus expensive) may explain why it has been around for centuries - since at least the 15th century - but didn't reportedly enter recipe books until the early 1800s. Vanilla in the wild is rare because the flower that must be pollinated is open for pollination for only 24 hours! If that window is missed, there's no vanilla that season. No kidding! If pollination works, you get a 6-10 inch pod filled with vanilla bean seeds and eventually vanilla sticks. Thankfully, locals have discovered how to "hand pollinate" the flower. According to the National Geographic, "Transplants of vanilla to tropical and presumably vanilla-friendly regions around the globe [was lacking until] Edmond Albius, a 12-year-old slave boy on the island of Réunion in the Indian Ocean, figured out how to hand-pollinate the vanilla blooms using a stick and a flip of the thumb. The simple technique had far-reaching implications. Vanilla plantations sprang up across the globe, from Madagascar to India, Tahiti, and Indonesia. Today about 75 percent of the world’s vanilla comes from Madagascar and Réunion." Still, because of the complications in growing vanilla, we humans only produce around 2000 metric tons per year, which is very little relative to demand, so 99% of vanilla we see in America is synthetic. So, what does it look like in the wild? Is Madagascar-ian vanilla really superior? Let's find out! Zanzibar: A Spice Farm TourIn Zanzibar, we went on an incredible spice farm tour. I had no idea what spices looked like on the vine! You'll see vanilla on the second row on left. From left to right/top to bottom: cocoa; green and black pepper; vanilla beans; a guy showing off climbing a tree to get coconuts!; the coconuts (look at his feet!); the farm's path; bananas; nutmeg, a nutmeg tree, and an open nutmeg; and finally, me drinking a fresh coconut! Madagascar: The Home of VanillaMadagascar is one of the main homes of vanilla (along with Reunion Island). My trip to Madagascar in May 2016 was just amazing. I didn't go on a spice tour, but I did get some fresh vanilla from some locals on a remote island. Before we talk about the vanilla, can we talk about this island? Look at this... 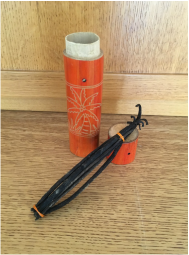 As you can see from the photo on the left, this beach is actually a strip of sand between two islands. It's INCREDIBLE. The sand forms a peak, so the water washes up on both sides but not over. It's one giant sandbar. It's about a 90 minute boat ride from shore... and boy, was it worth it. I spent an afternoon on this sandbar trying to avoid a sunburn and swimming in the perfectly clear water. The locals were so incredible. And, of course, I bought some vanilla! I passed it to my mom this past weekend, and hopefully she'll make some good vanilla extract out of it! One site describes Madagascar vanilla as: The ‘classic’ vanilla. Madagascar Bourbon Vanilla Beans are superior with flavor and aromatic qualities that make these beans the most popular. The flavor is rich, dark, and creamy with an overwhelming sweet, buttery aroma. Yum! So once you've got your hands on some amazing, fresh, REAL vanilla... now what? Well, my ever-creative mother - the founder of Tailored Touches - puts it to good use. Here's what she does to make her own vanilla extract for cooking: ~ Take an organic plump vanilla bean. Make a slice from top to bottom without cutting entirely through and pull the bean slightly open. Place 2-3 beans in each jar and fill with 80+ proof vodka. Cap tightly, and store in a cool, dark place for 2-3 months, shaking once a week or so. The vodka will draw the vanilla out and grow darker in time. Use in cooking as you use any other vanilla extract. ~ You may dry the vanilla beans and run through a food processor to make a powder that can then be used in cookies or breads! Or mix 1 T. vanilla powder per lb. of organic sugar to make organic vanilla sugar.
You may be wondering... what's the Kahlua doing there in the picture? Well... we have to keep some tricks up our sleeve. A future blog post on making Kahlua with vanilla perhaps...! In the meantime, enjoy your fresh vanilla!
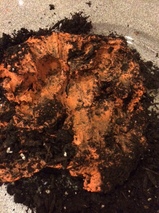
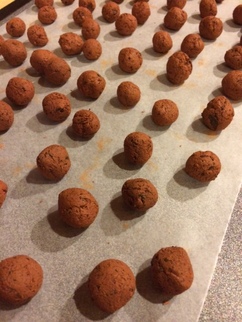
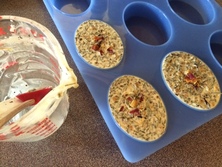
All summer, I've been so busy with making different soapy goodies that tonight I decided to get dirty and make some seed balls. Playing in the dirt can be so relaxing! Mixed with some clay and Honeybee Wildflower seeds, the organic soil has become an easy way to plant "bee" friendly flowers just about anywhere you can toss out a seed ball! Easy for you and loved by our precious honeybees. 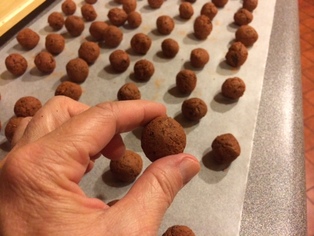 So what is a Seed Ball? It's a combination of rich soil, some regular air dry clay and seeds of your choice. A seed ball is so easy to plant. You toss them wherever you'd like to add some flowers...a flower bed, along a highway or median, along pathways...get creative! It's a perfect activity to do with kids of all ages. The combination of soil and clay holds the seeds safely until Mother Nature provides the right amount of moisture and warm temperatures for proper germination. Seed balls can be planted any time of year. 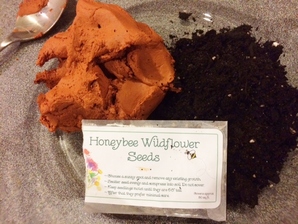 How to make Seed Balls... Start out with some rich organic soil, some plain ol' air-dry clay, and Honeybee Wildflower Seeds.
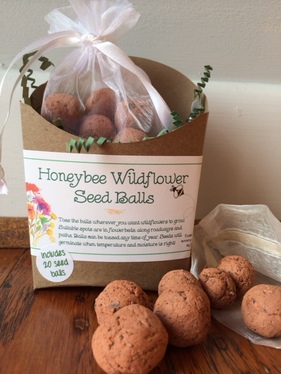 Each package has 20 hand-rolled seed balls ready for tossing. Each ball covers about 1 square foot. You can find them here...Honeybee Wildflower Seed Balls. Seed Balls can be planted anytime of year, so toss some now to enjoy a bright wildflower spring! Until next time...Happy Planting! ~~~~~~~~~~~~~~~~~~~~~~~~~~~~~~~~~~~~~~~~~~~~~~~~~~ Ok, I know it's only August, but some things take time to make really yummy...so tonight I put together some extracts for Christmas gifts. On the menu are organic Vanilla extract and organic Peppermint extract. Both for baking or flavoring drinks...the possibilities are endless!
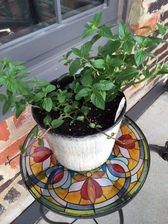
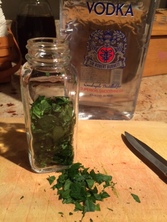
Ingredients Extracts are surprisingly easy to make with the right ingredients. For the Vanilla extract, I used an organic Madagascar Vanilla bean that has a smooth, creamy vanilla smell. The peppermint leaves came from my peppermint plant on the back porch. Both are extracted with vodka that is at least 80 proof. You can use the less expensive vodka since all the alcohol evaporates in cooking so don't waste money on the "good" stuff. Package the extracts in glass jars. Do not use plastic since plastic might absorb some of the yummy oils and it shortens the shelf life considerably. I used 4 oz. French square glass jars since they look stylish and make a fancier gift presentation. 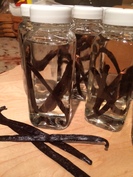 Vanilla Extract Take 2-3 Vanilla beans and cut lengthwise to expose all the yummy vanilla bean. Cut them in half. Place in a small glass jar that holds 4 oz. Cover with vodka and screw on cap. Shake.  Peppermint Extract Remove all stems from peppermint leaves. Wash and pat dry. Coarsely chop and bruise slightly to expose oils. Place in a 4 oz. glass jar. Top off with vodka. Screw on cap. Shake. Optional: Place 1 prepared Vanilla bean in the bottle to make a Vanilla Mint extract! Yum! Storage
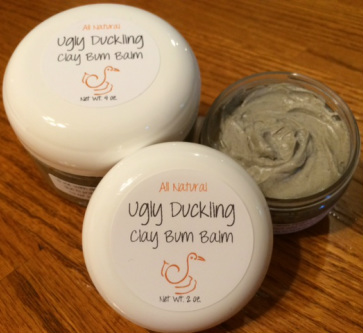
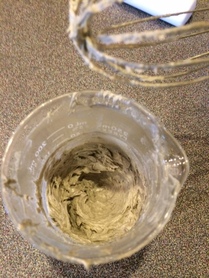
Take your freshly made extracts and place them in a dark, cool cabinet or pantry....and wait...shake each week. Patience! ~ The Vanilla extract will be ready in about 8 weeks. The vodka will turn from a clear liquid to a rich brown as the vanilla oils are drawn into the vodka. The Vanilla beans can then be removed, dried, chopped and made into Vanilla sugar or they can stay in the bottle. ~ The Peppermint extract will be ready in about 4 weeks. Taste it after 3-4 weeks to see if it's strong enough for your liking. If it is, then filter out the peppermint leaves with a strainer and re-bottle. Once the extracts are finished, make up a cute label and voila! Now you have some wonderfully rich, homemade organic extracts for a fraction of the cost at the grocery store. They both make great hostess gifts or holiday gifts that any cook would love! P.S. If you haven't already done so, sign up for our monthly newsletter and you might receive (hint, hint) a coupon code good for one of these yummy extracts closer to the holidays...sign up here... :) Do you ever wonder what is in some of the products you put onto your skin? Well, lately I have gotten a bit paranoid about many of the products that are available. So when my dearest friend's son had his first child with his wife, I wanted to make sure that what they put on that new baby bum was all natural and not that nasty petroleum based gel (you know what one I mean) that really is not a good choice at all! I was on a mission to come up with a recipe that was all natural, gentle enough for a new baby's bum, had good-for-the-skin ingredients and did the job on rashes and minor skin irritations. It was a tall order but follow along and you'll see what I found! 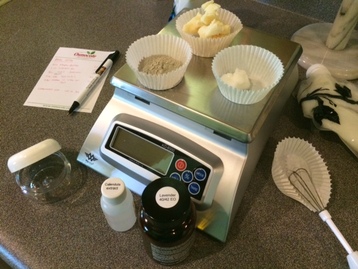 In my research, I found that clays are a wonderful source of nutrients for the skin with the natural drying and de-toxifying properties I was looking for. In this recipe, I decided to use bentonite clay for its healing properties, its ability to draw out toxins from the skin and its release of needed minerals. Plus it has been found to be effective against Candida albicans which is a fungus that grows as a yeast infection targeting baby bums and the genitalia and oral areas of humans in general. Along with some bentonite clay, I used Mango butter and coconut oil for their skin-softening properties, the anti-bacterial properties of coconut oil and Lavender essential oil, and healing and soothing Calendula extract. Let's get started!
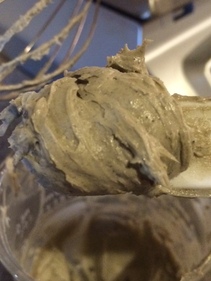
Time to chill out! Once all these ingredients are mixed in well, it's time to chill the mixture until it starts to set up. By chilling it, I can speed up the process a bit but it will solidify on its own at room temperatue...just a lot slower. As it is, chilling can take 30-60 minutes! 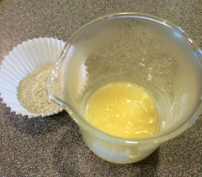 As you can see in this photo, the oils and butter have turned from a golden yellow to a butter yellow. It's about the consistency of semi-stiff butter. The bentonite clay on the left is an all natural clay that is grayish in color due to its aged volcanic ash makeup. I use this unrefined clay to keep all the natural nutrients intact. Some bentonite clay on the market is whiter and more refined losing many of its nutrients.
 It's all in a name....
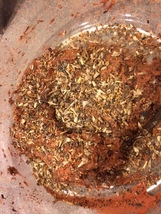
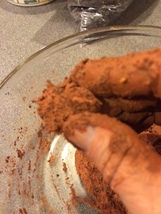
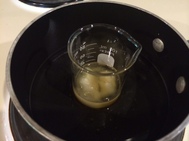
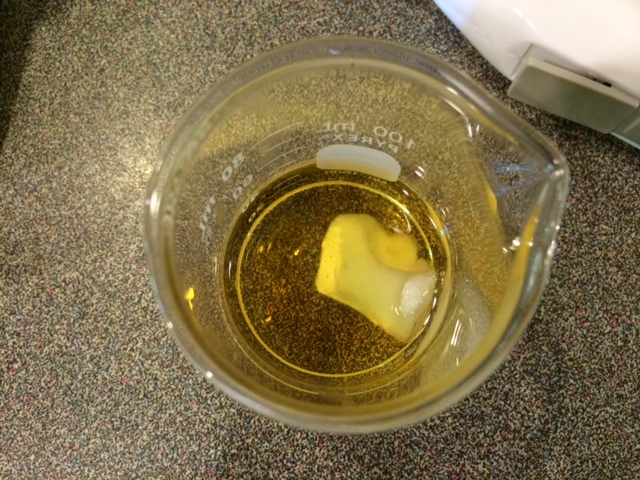
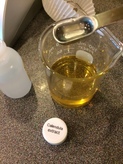
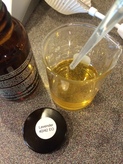
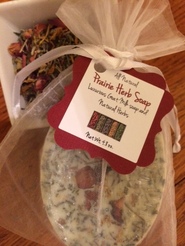
Naming this new creation was a challenge since the balm is chock full of good ingredients all chosen for their special properties, but it really is U...G...L...Y. My son who has been best friends with the new dad since kindergarten days was the one who suggested the name of "Ugly Duckling"...so you can see that this new bum balm was truly a family project! Labels were then designed and applied making it all ready for the next tiny bum that needs a little TLC! ~ Thanks to little Leah Ryan Y. who was the inspiration behind "Ugly Duckling Clay Bum Balm"! ~ 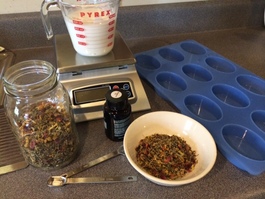 As my first blog post, I thought I'd start with a typical day in the kitchen here at Tailored Touches! So what's cookin' today? As with any of our items, we develop recipes then tweak them to get just the right ratios. As you can see on the left, I'm just starting to make up our newest soap...Prairie Herb soap. It consists of a special blend of dried herbs that are chock full of skin-loving properties, a Goat milk soap that has a lather to die for and Bergamot essential oil that has antiseptic and antibacterial properties...plus it just smells gooood! First step to making this wonderful all natural soap is to start with all the ingredients. Tweaking and mixing the herb blend was done the day before, so I decided to store the blend in a canning jar for ease of use. I also will need the goat milk soap, the Bergamot essential oil, the large oval mold, my scale to get the correct measurements and assorted measuring spoons. 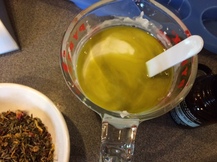 Once the goat milk soap is melted, the essential oil is added. As you can see in the picture, Bergamot essential oil has a greenish-yellow tint to it. It smells like orange citrus and herbs, just like Earl Grey tea. It needs to be fully mixed in before adding the dried herbs. 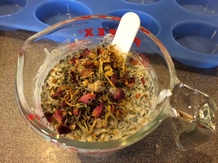 Now it's time to mix in the herbs and get ready to pour into the molds. As the herbs mix in and the soap begins to cool, I need to move quickly. Timing is everything when pouring soap. If it's too warm, all the herbs will either float to the top if they are light, or sink to the bottom if heavy. So waiting until they all seem to be suspended is the perfect time to pour. But the soap can start to set up...so get pourin'!
|

Welcome to Tailored Tidbits!If I'm not in the kitchen cooking up new items for my shop, I'm sewing fabric baskets, taking care of our honeybees, pitching in on the latest project at my son's, or planning a trip somewhere with my daughter. Here, I'll share a "day in the life" at Tailored Touches! 
Sign up for the newsletter for an instant 10% off coupon.
Categories
All
Archives
February 2019
|


 RSS Feed