|
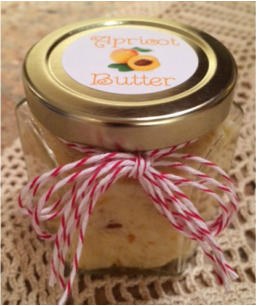
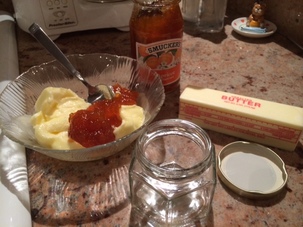
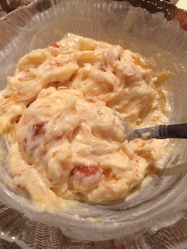
No matter how much we plan, we always need just one more quick last-minute gift! Here’s an easy and quick, handmade goodie that will make you a hero in under 5 minutes!
0 Comments
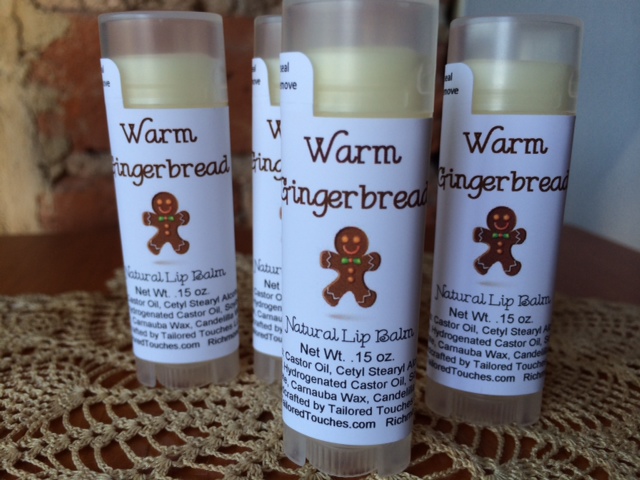
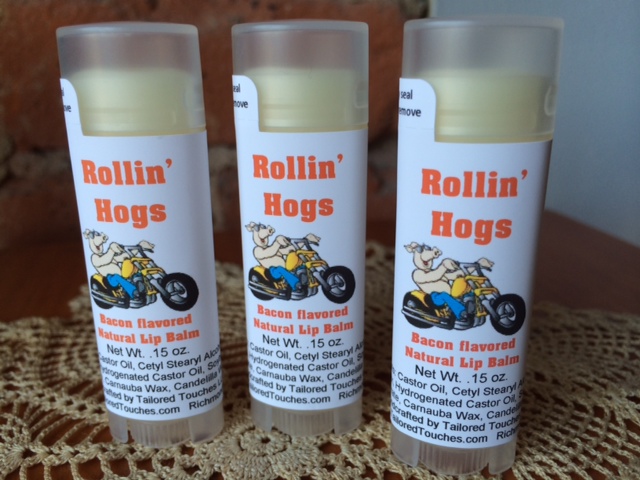
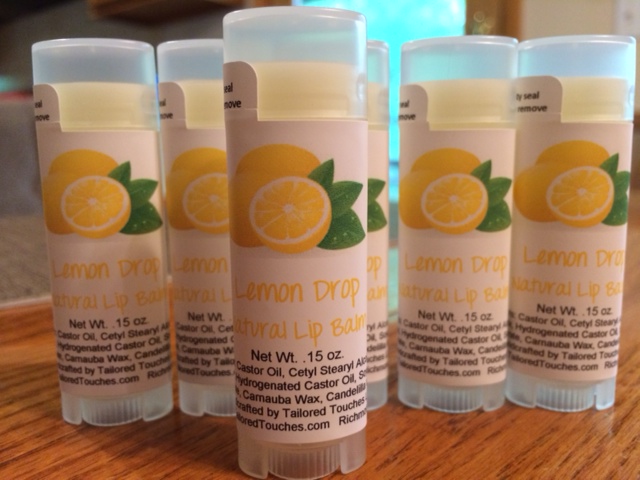
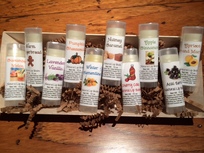 Sooo many flavors! Sooo many flavors! Ok, so I admit that I used to be a true Chap**** addict. Yes, it's true. I could not function without that little stick of balm in my pocket. My friends and family teased me, yet I just "had" to have it nearby. I even started to make my own recipe with all natural ingredients and kept getting rave reviews... "It's the best lip balm I've ever used" reviews...yet, I was still stuck on the competition's balm. Try as I might, I could not make the switch. After a day or two of using my own lip balm, I'd find myself sneaking the other. Until my daughter finally said that I really needed to switch. But "Why?" I asked??? Well, for starters, the "other" brand used petroleum products in their balm...ewww. My recipe was all natural except for a pinch of flavoring. So finally I decided to kick my Chap*** habit and use my own. Honestly, I actually had a withdrawal of sorts...my lips hurt, were dry and chapped, and I was just not a happy camper. But then all of a sudden, it dawned on me one day that I was actually leaving the house and forgetting my lip balm in my pocket! It wasn't the first thing I put on when I jumped out of bed in the morning. (Ok, the "jumped out of bed" line might be a stretch) It wasn't something that I used literally a couple of times per hour! Wow! I really was addicted to the other lip balm. And now I was free! How crazy is that? Now, all is good with the world. I'm using my own natural lip balm which makes my conscience feel better and my lips feel awesome! I'm so glad I kicked the habit. So if you have that nasty little habit, try our lip balms...they come in a flurry of flavors and you really will be doing a good thing for your lips! And for the record...there really is a website called Lip Balm Anonymous...ha!
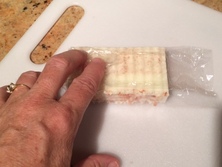
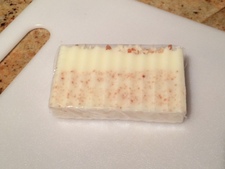
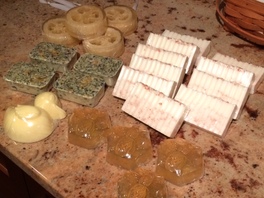
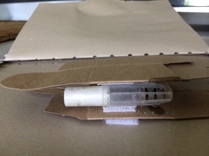
Sorry, no Julia Roberts or George Clooney clips here... But you will see what it takes to get your products to you, wrapped, tagged and ready to go! Anything from Tailored Touches has been lovingly handcrafted one-at-a-time. The most frequent question I am asked is "Have you made all of these things yourself!?" And the answer is Yep! Researching, creating and making the products is just the beginning of the many steps needed before one of our soaps hits your anxious hands. Once the products are "born" they need to be wrapped and tagged before they are ready to go. Ahh, ya kno, Uncle Sam wants to make sure that you know just what you're buying. Plus we do, too! 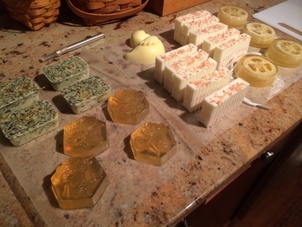 A flurry of soaps lined up ready to wrap... Packaging... For anyone who has done any marketing, they know that the initial impression of a product can make or break a product no matter how cool it is. So I spend a huge amount of time trying to come up with packaging that is eye-catching, yet won't break the bank. It needs to show you what you're buying, what's in the product, and what it's used for. Sounds easy, right? Not always! As a consumer, I look to buy products that do what I need them to do, are made with high quality ingredients, that are attractive-looking, and give me a value for the dollar. Now that I'm on the production-side that can be a tall order! But any time I make something new, I look at it from the consumer's point of view. Will it work? Does it smell good? Is it made from as many natural ingredients as possible with no extra added chemicals? 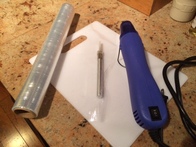 Supplies Once a batch...or 2...or 3...of soaps are made, they all need to be wrapped to keep them clean and fresh until they arrive at your door! So I use a heat gun, a bunch of shrink wrap, a cutting board and a very sharp knife. Wrapping Each soap is taken and fitted with shrink wrap. I then carefully wrap it around before using the heat gun to shrink it all into place. Once it is wrapped, I apply heat in spurts to quickly shrink the plastic to the soap shape, being careful not to melt the wrap or the soap!
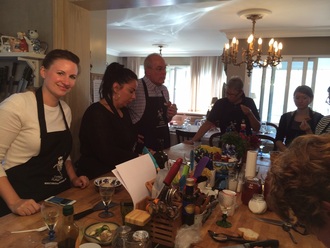
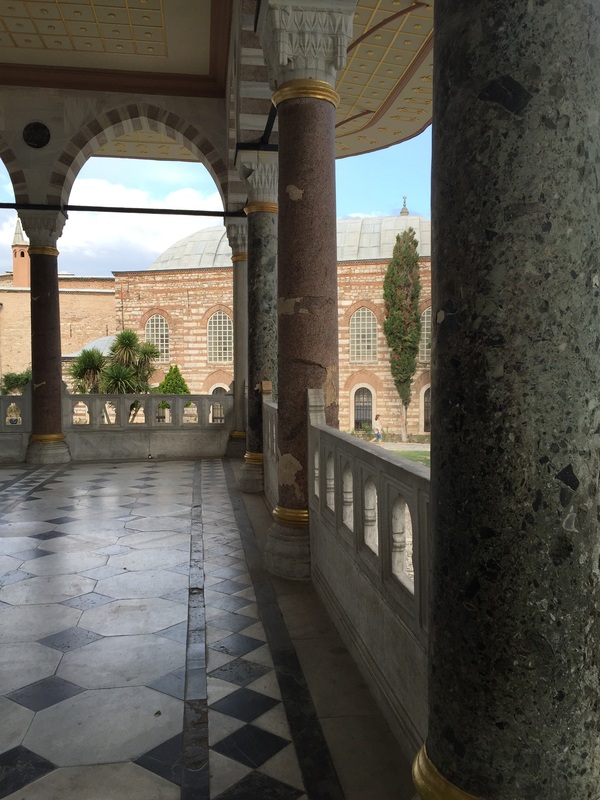
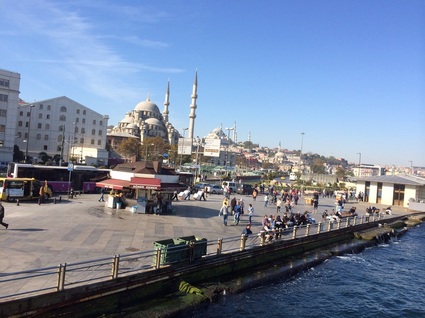 Leaving the dock on the "European" side of the city, we were headed to the "Asian" side for a cooking class! Europe and Asia Istanbul is an old, old city that has been called Constantinople and Byzantium before that. It is a transcontinental city which means that part of it lies on the continent of Europe and part of it lies in Asia. It is the only such city in the world that does that. Today it boasts a population of over 14 million people! As a comparison, NYC has about 7 million people living there. The city has a diverse group of people from all walks of life. Having been the capital of four different empires, the city is an eclectic mix of many cultures. It has been home to the Roman Empire, the Byzantine Empire, the Latin Empire and the Ottoman Empire. History Greeks (660 BC - 330 BC): First settled by the Greeks around 660 BC, it was known as Byzantium under the rule of King Byzas. It may have been inhabited much earlier than this, but King Byzas was the first to start to develop the area due to the strategic location along the Bosporus Strait. He named the city Byzantium after himself. Roman Empire (330 BC - 395 BC): Constantine the Great conquered the city and set out to rebuild it entirely to make it stand out much like Rome. In 330 BC he declared the city as the capital of the entire Roman Empire and renamed it Constantinople (ahh, can you see a name trend here? The conqueror renames it after himself...talk about egos...hehe) It remained under Roman control until 395 BC. Byzantine Empire (395 BC - 1204 AD): After the death of Emperor Theodosius I, there was a great amount of upheaval within the Roman empire and the empire was permanently divided by his sons into the Roman and Eastern Roman (or Byzantine) Empires. Constantinople became the center of the Byzantine Empire which was predominantly Greek. This period is when the Hagia Sophia was built (532 AD) and was a Greek Orthodox church.
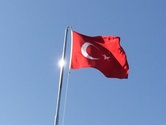
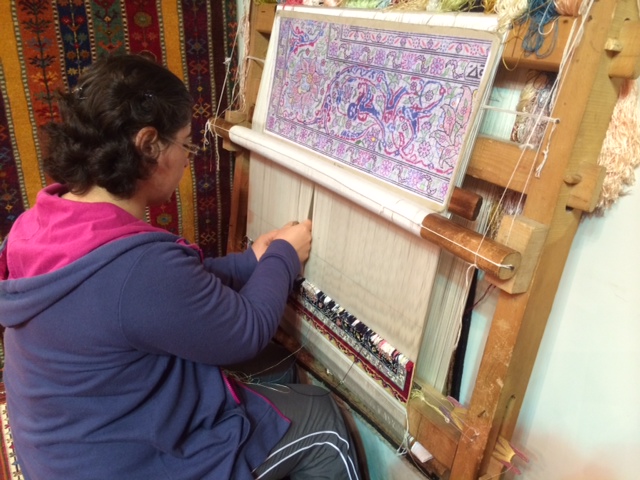
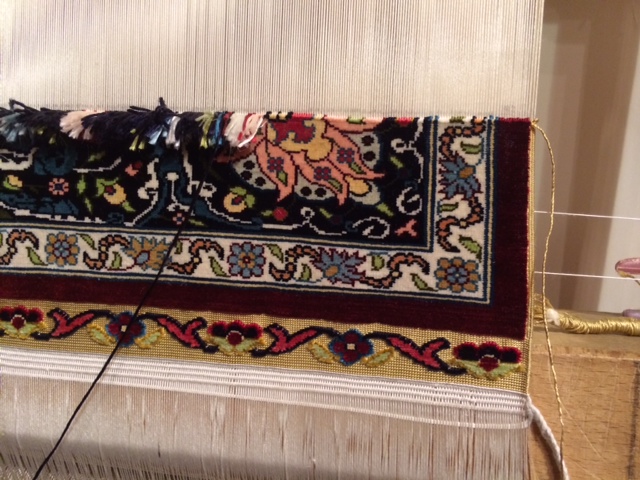
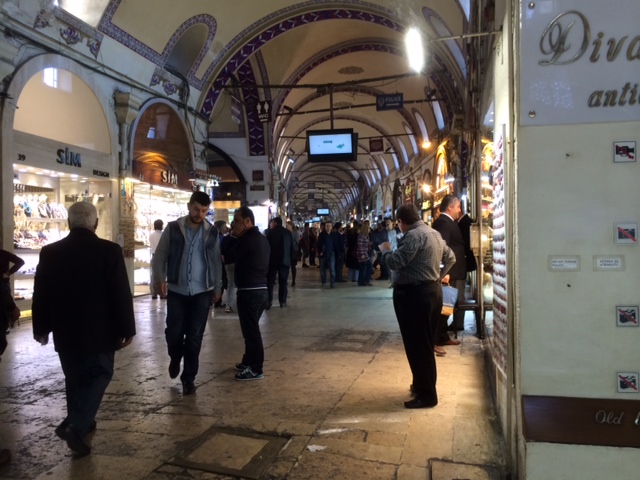
Latin Catholic Empire (1204 - 1261 AD): Even though the city prospered and grew, its location was in a lucrative spot which caused the city to be the target of other conquering cultures. For hundreds of years, it was attacked by troops from all over the Middle East. For awhile it was controlled by the members of the Fourth Crusade. The city started to crumble from the constant turmoil between the Latin Catholics and the Greek Orthodox. Ottoman Turk Empire (1261 - 1922 AD): About this time, the Ottoman Turks began to cut off the city by conquering all the neighboring towns. Officially conquered in May 1453 by the Ottoman Turks, the city was renamed Istanbul and came under the rule of Sultan Mehmed II. He wanted to rejuvenate the city so he brought back the refugee Catholics and Greek Orthodox as well as Jewish, Muslim and Christian families to add diversity to the city. He built the Grand Bazaar which was and still is one of the largest covered marketplaces in the world. Republic of Turkey (1923 - present): During WWI, the allies took over the Ottoman Empire and Istanbul became part of the Republic of Turkey. A bit of Trivia One of the mosaics that was in the Hagia Sophia is the earliest known example of 3D drawing. If you look at the platform that Mary, the Blessed Mother, is sitting on, you can see that it was drawn as a 3D box form. This mosaic started a craze of sorts for drawing three-dimensionally as opposed to that period's flat drawing. 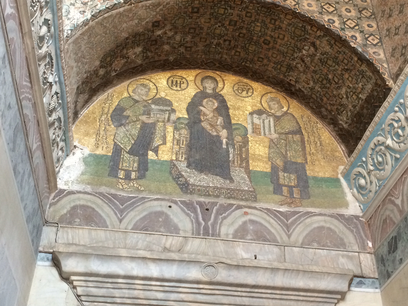 Turkish Rugs While we were walking the streets, we stopped by a Turkish rug store and were able to see just how genuine silk rugs are woven. Wow, what an art! The pattern was complex, the colors were gorgeous, and the lady working on the rug was so very talented. As you can see in the picture below to the left, she is working off a pattern that is secured above her. It takes a great deal of focus to stay on track so we were careful not to talk or bother her as she worked. Notice the detail and colors in the photo on the right. It was breathtaking!
Cooking Class!
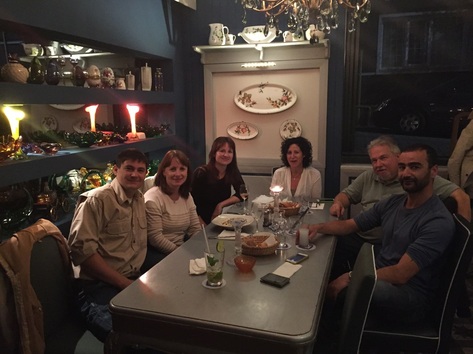
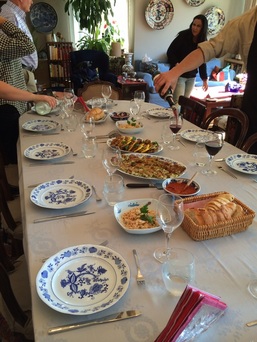
We chopped, zested, stirred, sauteed, baked and passed the bottle of wine around as we all pitched in and made a 6-course lunch of Turkish dishes...many were variations of the dishes Selin's Jewish grandmother passed down to her. So we learned something new and made new friends. Once the dishes were ready it was time to eat!
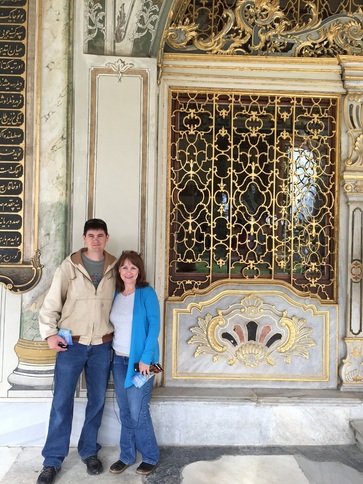
 The Sultans Palace - Topkapi Palace This palace is a gorgeous estate where the ruling sultans resided for almost 400 years of their 624 year reign. They held state dinners and official functions there. It is now a museum which houses many ancient artifacts. The coolest, yet most ordinary, was the staff of Moses. Yep, the very one that parted the Red Sea, that turned into a snake and back and did all sorts of other miracles according to the Bible. It's a simple, well-worn, rather short cane. I guess I was imagining a 6' tall big stick! But to see it was really, really cool...no picture though since we weren't allowed to take any in this part of the museum.
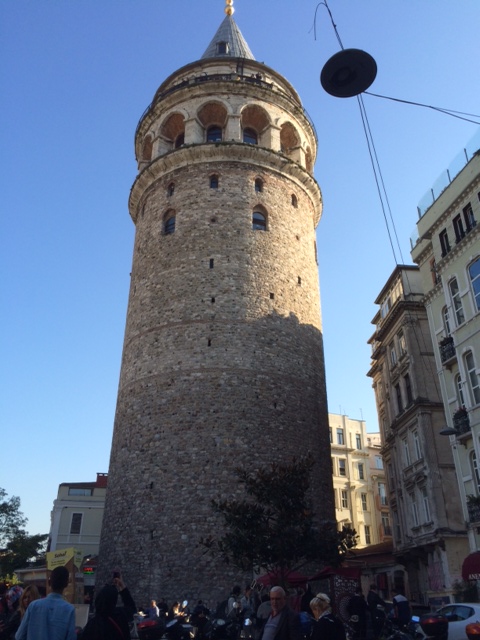
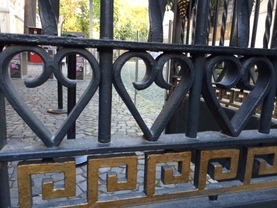
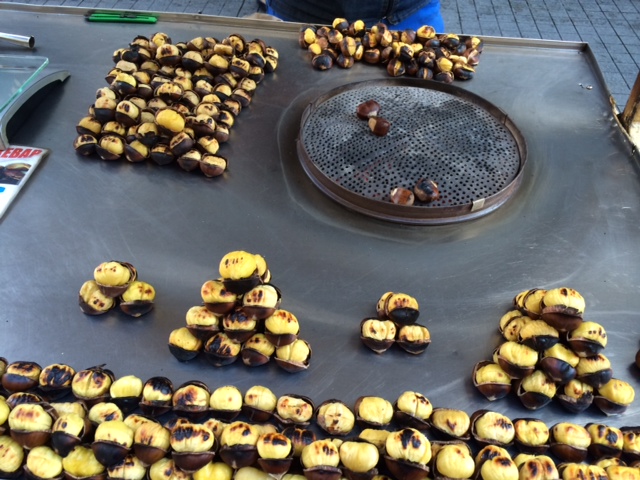
Random Turkish Delights... There were so many things to do and see in the city. The streets are full of activity...taxis and motorcycles whizzing by, cats and dogs on the streets everywhere, folks walking on the street between passing trolleys and cars, dinners with friends, roasted chestnuts, food...excitement! Below are just some of the sights of the city...truly a destination to see. It also helps to have a daughter who is just so darn good at setting up super cool trips! Thanks Lane!
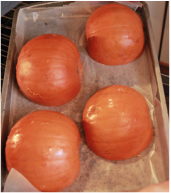
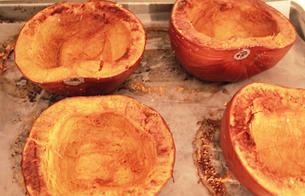
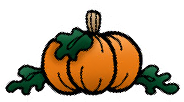
 Dinner with new and old friends...what a great time! Our trip to Istanbul was awesome! Thanks again to Lane for booking and arranging such a full, fun trip...:) We saw so much in the 3.5 days we were there...next up is what we did in Abu Dhabi! Did I mention the private pool on the lagoon...or the dune buggy ride in the desert... yea...stay tuned..... 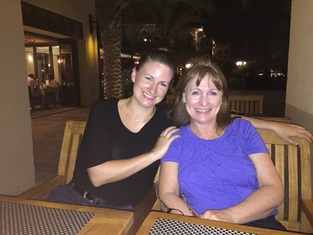 The absolute best tour guide! Homemade pumpkin Years ago, I decided to try my hand at using fresh pumpkin to make my pumpkin pie instead of buying the grocery-store canned pumpkin. So off I went in search of some pumpkins. Now pumpkins that you want to use for baking or eating are a bit different than those used for carving out jack-o-lanterns. So make sure you get the right kind. My first adventure ended up a bit of a disaster since I didn't realize that! Plus I thought you just peeled the pumpkin and cut it up, then boiled it until it cooked soft. Again, not a good idea...pumpkin skin is very tough and will kill your peeling hands! Roasting pumpkins I have since found an easier way to make fresh pumpkin by roasting them in the oven until soft. Ready? Let's do it!
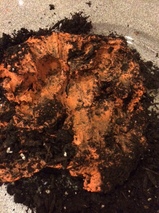
Step 1: Get some fresh baking pumpkins that are a medium size (big ones may be a bit tough). Make sure they are not carving pumpkins! Step 2: Preheat oven to 400 degrees. Step 3: Remove stems, wash the outside well and cut in half from top to bottom. Scoop out the seeds and inside goop. (Save the seeds if you'd like to have them roasted later for a great snack!) Sprinkle lightly with salt. Step 4: Place each half flesh-side down onto cookie sheets that have been lined with parchment paper. Roast in oven for 30-40 minutes or until the flesh is soft. Step 5: Let cool completely. Scoop out soft flesh and either mash (for a courser pumpkin) or puree in blender for a smoother pumpkin. If the pumpkin is too thick to puree, you might add a tiny bit of water. Storage: Store in tight-fitting container in fridge if you plan to use it within a few days...or store in freezer bags in the freezer for later use. Ta-da! Now you have some yummy pumpkin to make pies, or soups, or cookies....mmm, I'm headed to the kitchen now! The best part of making your own is that it is fresher and better for you than any canned you'll buy! ~~~~~~~~~~~~~~~~~~~~~~~~~~~~~~~~~~~~~~~~~~~~~~~~~~~~~~~~~~~~~~~~~~~~~~~~~~~~~~~~~~~~~~~~~~~ Growing up in a house of 5 kids, my Mom would bake up a storm all the time for us, but especially for the holidays. She always made 2 types of pumpkin pie...the traditional spice pie and her yummy Pumpkin Custard pie that her Mom used to make for a family of 8 kids! This version is a bit sweeter (my hands-down favorite!) and has a fluffy, almost meringue-type top since you beat the egg whites separately. Here's her recipe for you to try...it's awesome yum!
For some great benefits of pumpkin and a 15% off coupon on fall goodies, sign up for our free monthly newsletter...just click this link! Newsletter We don't share your info with anyone...nope, no one!
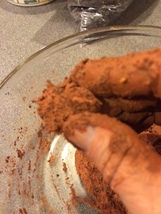
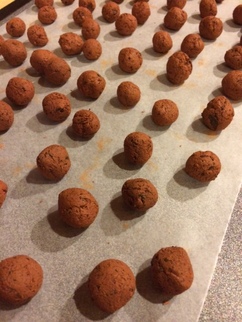
Until next time, Happy Fall! All summer, I've been so busy with making different soapy goodies that tonight I decided to get dirty and make some seed balls. Playing in the dirt can be so relaxing! Mixed with some clay and Honeybee Wildflower seeds, the organic soil has become an easy way to plant "bee" friendly flowers just about anywhere you can toss out a seed ball! Easy for you and loved by our precious honeybees. 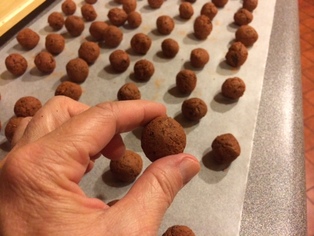 So what is a Seed Ball? It's a combination of rich soil, some regular air dry clay and seeds of your choice. A seed ball is so easy to plant. You toss them wherever you'd like to add some flowers...a flower bed, along a highway or median, along pathways...get creative! It's a perfect activity to do with kids of all ages. The combination of soil and clay holds the seeds safely until Mother Nature provides the right amount of moisture and warm temperatures for proper germination. Seed balls can be planted any time of year. 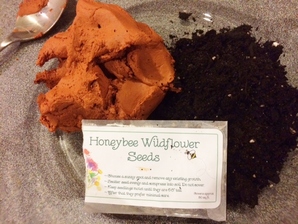 How to make Seed Balls... Start out with some rich organic soil, some plain ol' air-dry clay, and Honeybee Wildflower Seeds.
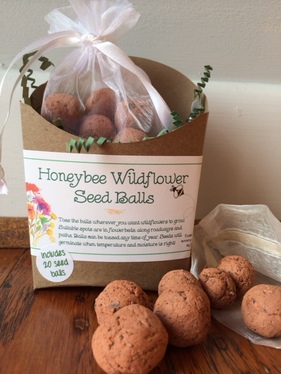 Each package has 20 hand-rolled seed balls ready for tossing. Each ball covers about 1 square foot. You can find them here...Honeybee Wildflower Seed Balls. Seed Balls can be planted anytime of year, so toss some now to enjoy a bright wildflower spring! Until next time...Happy Planting! ~~~~~~~~~~~~~~~~~~~~~~~~~~~~~~~~~~~~~~~~~~~~~~~~~~
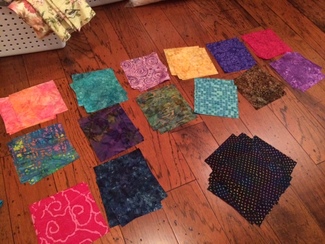
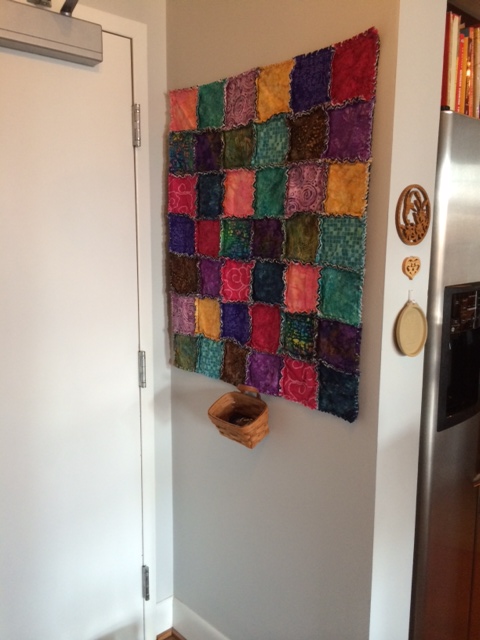
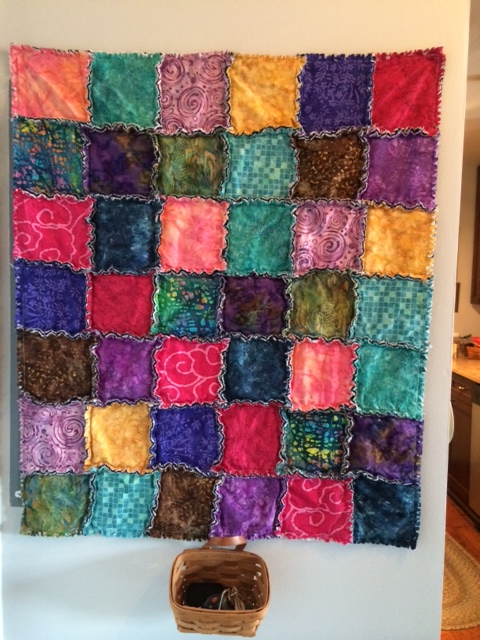
Looking through all my fabrics trying to come up with something to brighten that spot, I spied all my batik fabrics that are a myriad of colors, bright and cheerful. Needing a set size that would fit the spot, I took to my pencil and paper and started to design a rag quilt. What is a Rag Quilt? Rag quilts are really comfy and cozy types of quilts that only get softer in time after many washings. Instead of sewing the seams with the fabric edges inside, a rag quilt exposes the raw edges of the fabrics. As the fabrics fray over time, the seams get fluffy and softer. Most times, rag quilts are made with flannel fabric since they are super soft and fray well in time. I chose the batiks for the pop of color and because most batiks do not have a right or wrong side (the color and pattern is the same on both sides). Since I was going to expose the raw edges of the fabric, I wanted both sides to have the same color intensity.
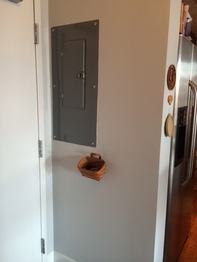
Assembly Sewing the quilt together is pretty straightforward. My quilt needed to be 6 squares wide by 7 squares tall. Each square is made by placing the backing fabric face down, lining up a white flannel square on top and then placing the top square face up into a "sandwich". Then take 2 sandwich squares and place them back to back, sewing them together along one side with a 1/2" seam. Add another sandwich until you have a row of 6 squares sewn together. Make 7 rows total, making sure you maintain your original pattern that you designed when the fabrics were laid out. Once the rows are sewn together, each row is sewn to the adjoining row along the long side of the rows by placing the backs of each row together. Once all your rows are sewn together into a 6 square by 7 square patchwork, sew along the outside edge to secure all the loose fabric edges with a 1/2" seam. Finishing Once all the sewing is done, each exposed seam needs to be cut perpendicular to the seam stitching about every 1/4". Just get crazy with cutting those seams since that is what will cause the fabric to fray into a soft, fluffy edge! Be careful that you don't cut the stitching line though! Toss the quilt into the washer and wash with cold water and fabric softener. Dry in the dryer to fluff and voila! A super snugly rag quilt... Awww, doesn't that look better than the ugly electrical panel? I think so! It is the perfect size to use as a baby quilt when made up in soft flannel baby prints.. Guess it's time for a trip to the fabric store to get some more flannel in cute baby prints. Check out the Batik quilt here...or the Baby quilt here... Now where are my car keys??? :)
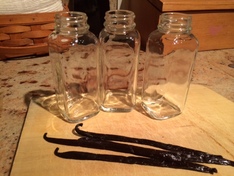
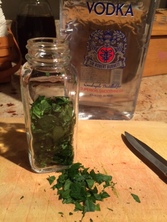
Ok, I know it's only August, but some things take time to make really yummy...so tonight I put together some extracts for Christmas gifts. On the menu are organic Vanilla extract and organic Peppermint extract. Both for baking or flavoring drinks...the possibilities are endless!
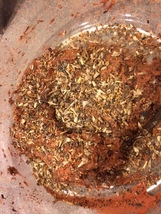
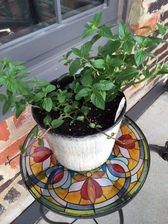
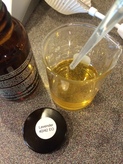
Ingredients Extracts are surprisingly easy to make with the right ingredients. For the Vanilla extract, I used an organic Madagascar Vanilla bean that has a smooth, creamy vanilla smell. The peppermint leaves came from my peppermint plant on the back porch. Both are extracted with vodka that is at least 80 proof. You can use the less expensive vodka since all the alcohol evaporates in cooking so don't waste money on the "good" stuff. Package the extracts in glass jars. Do not use plastic since plastic might absorb some of the yummy oils and it shortens the shelf life considerably. I used 4 oz. French square glass jars since they look stylish and make a fancier gift presentation. 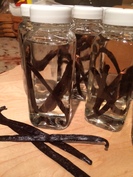 Vanilla Extract Take 2-3 Vanilla beans and cut lengthwise to expose all the yummy vanilla bean. Cut them in half. Place in a small glass jar that holds 4 oz. Cover with vodka and screw on cap. Shake.  Peppermint Extract Remove all stems from peppermint leaves. Wash and pat dry. Coarsely chop and bruise slightly to expose oils. Place in a 4 oz. glass jar. Top off with vodka. Screw on cap. Shake. Optional: Place 1 prepared Vanilla bean in the bottle to make a Vanilla Mint extract! Yum! Storage
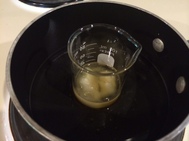
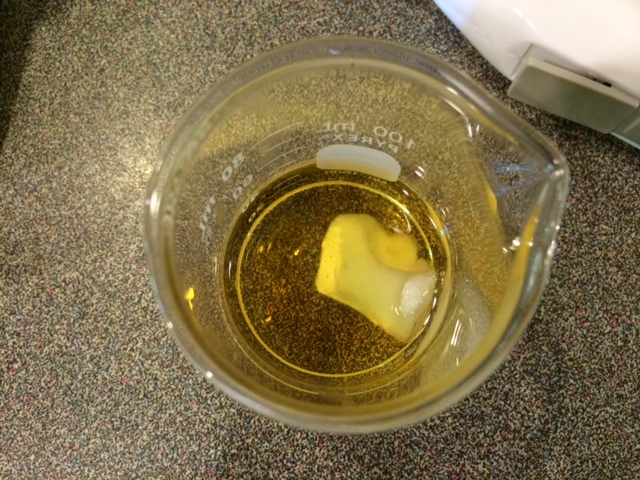
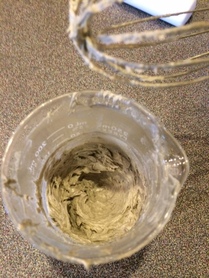
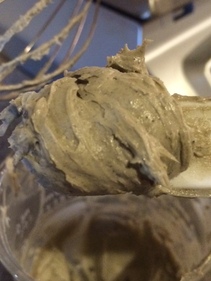
Take your freshly made extracts and place them in a dark, cool cabinet or pantry....and wait...shake each week. Patience! ~ The Vanilla extract will be ready in about 8 weeks. The vodka will turn from a clear liquid to a rich brown as the vanilla oils are drawn into the vodka. The Vanilla beans can then be removed, dried, chopped and made into Vanilla sugar or they can stay in the bottle. ~ The Peppermint extract will be ready in about 4 weeks. Taste it after 3-4 weeks to see if it's strong enough for your liking. If it is, then filter out the peppermint leaves with a strainer and re-bottle. Once the extracts are finished, make up a cute label and voila! Now you have some wonderfully rich, homemade organic extracts for a fraction of the cost at the grocery store. They both make great hostess gifts or holiday gifts that any cook would love! P.S. If you haven't already done so, sign up for our monthly newsletter and you might receive (hint, hint) a coupon code good for one of these yummy extracts closer to the holidays...sign up here... :) Do you ever wonder what is in some of the products you put onto your skin? Well, lately I have gotten a bit paranoid about many of the products that are available. So when my dearest friend's son had his first child with his wife, I wanted to make sure that what they put on that new baby bum was all natural and not that nasty petroleum based gel (you know what one I mean) that really is not a good choice at all! I was on a mission to come up with a recipe that was all natural, gentle enough for a new baby's bum, had good-for-the-skin ingredients and did the job on rashes and minor skin irritations. It was a tall order but follow along and you'll see what I found! 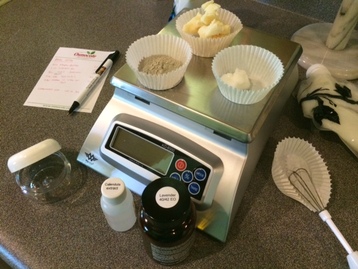 In my research, I found that clays are a wonderful source of nutrients for the skin with the natural drying and de-toxifying properties I was looking for. In this recipe, I decided to use bentonite clay for its healing properties, its ability to draw out toxins from the skin and its release of needed minerals. Plus it has been found to be effective against Candida albicans which is a fungus that grows as a yeast infection targeting baby bums and the genitalia and oral areas of humans in general. Along with some bentonite clay, I used Mango butter and coconut oil for their skin-softening properties, the anti-bacterial properties of coconut oil and Lavender essential oil, and healing and soothing Calendula extract. Let's get started!
Time to chill out! Once all these ingredients are mixed in well, it's time to chill the mixture until it starts to set up. By chilling it, I can speed up the process a bit but it will solidify on its own at room temperatue...just a lot slower. As it is, chilling can take 30-60 minutes! 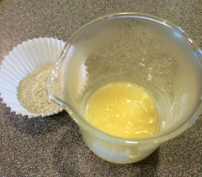 As you can see in this photo, the oils and butter have turned from a golden yellow to a butter yellow. It's about the consistency of semi-stiff butter. The bentonite clay on the left is an all natural clay that is grayish in color due to its aged volcanic ash makeup. I use this unrefined clay to keep all the natural nutrients intact. Some bentonite clay on the market is whiter and more refined losing many of its nutrients.
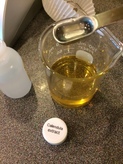
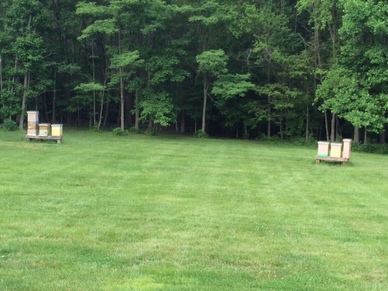
 It's all in a name....
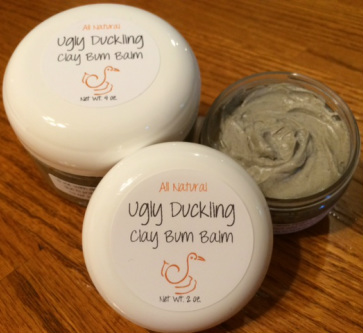
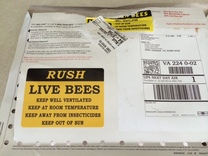
Naming this new creation was a challenge since the balm is chock full of good ingredients all chosen for their special properties, but it really is U...G...L...Y. My son who has been best friends with the new dad since kindergarten days was the one who suggested the name of "Ugly Duckling"...so you can see that this new bum balm was truly a family project! Labels were then designed and applied making it all ready for the next tiny bum that needs a little TLC! ~ Thanks to little Leah Ryan Y. who was the inspiration behind "Ugly Duckling Clay Bum Balm"! ~ 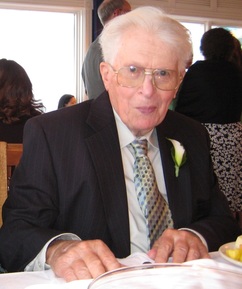 Dad, Master Beekeeper Dad, Master Beekeeper My Dad was a beekeeper most of his life. He learned the skills from his grandfather when he was a kid. He dabbled with the bees as his 5 children grew up (but my Mom found that bees and kids didn't always mix well). So it wasn't until he retired at 65 that he got into full-fledged beekeeping again. Over the next 29 years, he was active with the bees each day and night, building all the equipment needed to manage his hives, supplying beekeeping products for local beekeepers, mentoring new beekeepers, bottling and selling his honey and loving life with his bees in central PA. In the spring of 2012, Dad had gotten his grandson (my son) into the world of beekeeping by making all the supers and frames needed to set up a new hive and mentored him with his first colony at his home in VA. He was passing on his love of these incredible creatures to his grandson like his grandfather had done for him so many years before. He adored the "girls", a nickname most beekeepers have for their hard-working bees, and was distraught when he was diagnosed with liver cancer at the tender age of 94 in June 2012 and had only days to live. It was bittersweet, but he asked my son if he would look after his hives for him. It was such a relief to him to know that the "girls" and his legacy would carry on. So that's how Dad's 6 hives of bees decided to make the move to the sunny south and I was recruited as "assistant" Bee-Mom.  Little did I know what we were getting into! Once you get over the initial fear of all the buzzing around your head, the bees are incredibly addicting and managing them is an exciting adventure. My son sure is a chip off his Pap's block...what a natural! During the spring and early summer, honeybees will increase their numbers quite quickly to build up the colony so more honey stores can be gathered. If they get too large for the space they are in, they will "swarm". Swarming happens when they get too crowded and the Queen basically tells them that she is taking some of the colony with her and moving out to another space. Those bees that are left behind will then generate a new Queen and build up their numbers yet again when, all the while, the old Queen has found another suitable space (i.e. a hollow tree, an old building, your attic, etc.) to settle into with her part of the colony that followed her. As a beekeeper, one must monitor this "swarming" activity before it happens and split the colony. If the colony swarms, the beekeeper will lose half of the bees, but if the colony is split before the swarm, two colonies can be made from the original one. Once a split is done, often-times a beekeeper will introduce a new Queen into the old colony so their "downtime" in minimized. This past week, I was able to help with that introduction (ok, so I stood back and watched...but I was ready to jump in if Luke needed help).
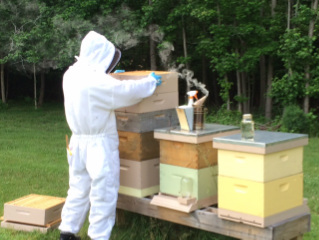 Once the real beekeeper got home, we were able to install each Queen into her new home. It's done by placing her in her cage within the frames of the lower super (box). As the bees in the hive cluster around the Queen's cage, they smell each other and get familiar. The bees eat away at the sugar plug which can take 24-48 hours depending on the number of bees and release the Queen. By the time the Queen is set free, all the bees are friends (well, we hope so!) and the Queen gets to work laying more eggs and building up the colony!
|

Welcome to Tailored Tidbits!If I'm not in the kitchen cooking up new items for my shop, I'm sewing fabric baskets, taking care of our honeybees, pitching in on the latest project at my son's, or planning a trip somewhere with my daughter. Here, I'll share a "day in the life" at Tailored Touches! 
Sign up for the newsletter for an instant 10% off coupon.
Categories
All
Archives
February 2019
|


 RSS Feed