|
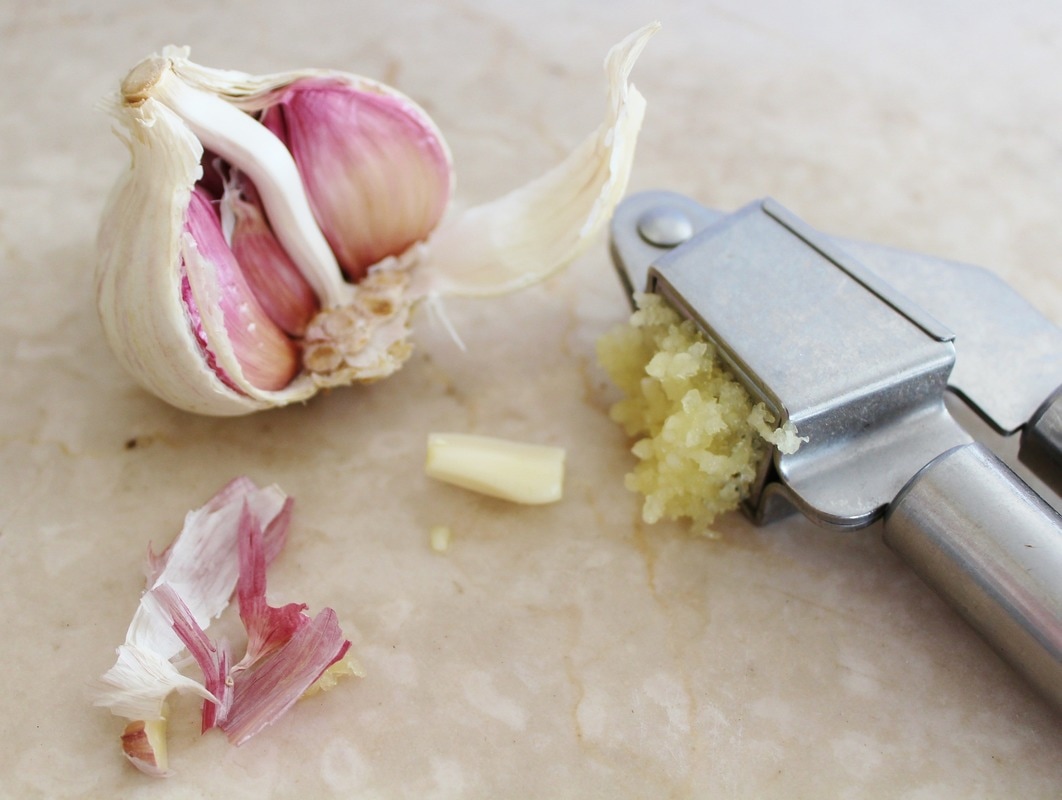
With summer here, it’s the perfect time to spend more time out in the sunshine. It’s also the best time for the pesky bugs to be out, too. There are so many products on the market to repel insects from outdoor activities and to keep them from coming into your home, but so many of them contain strong chemicals such as DEET. YUK! Have you thought of trying all natural ways to repel insects without needing to use any harmful chemicals? Many of these are already found in your home. Here are some ways to repel insects both inside and out… naturally! What Spices Certain Bugs HateAnts
Spiders, Fleas, and Ticks
Mosquitoes
Pesky Flies
Camping Tip
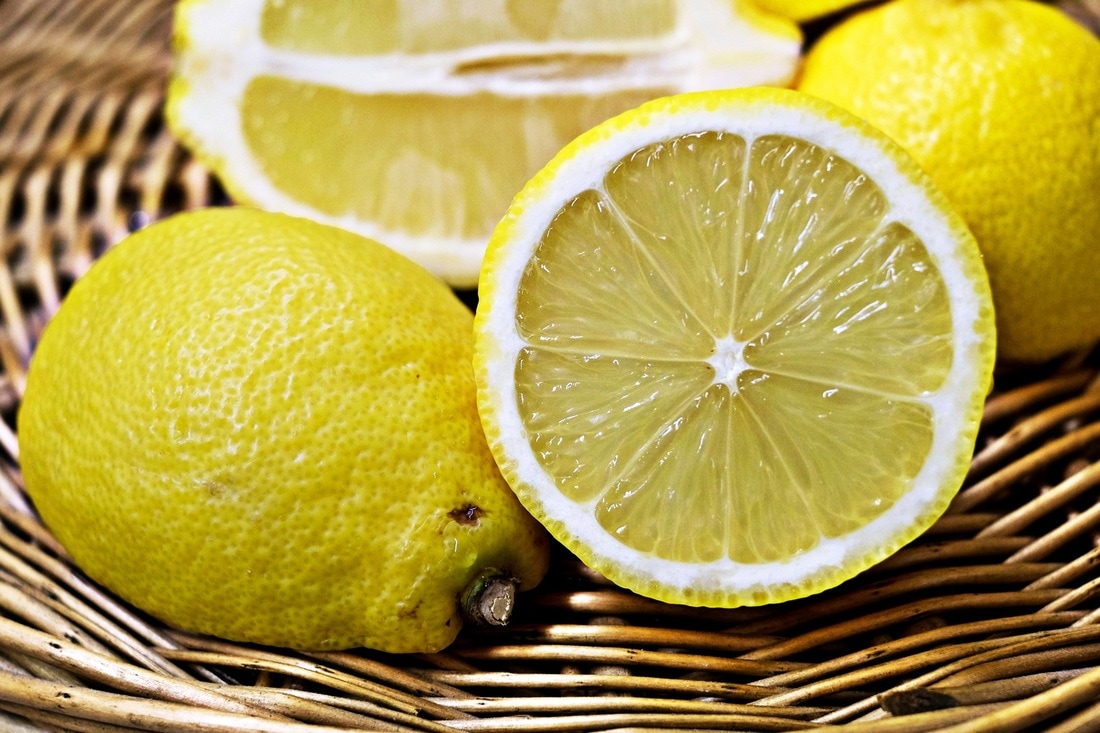
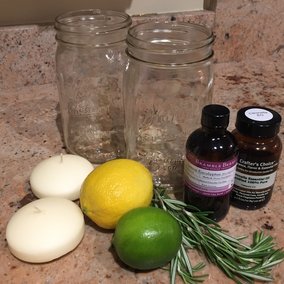
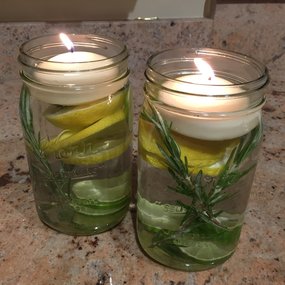
Want a Natural Solution?Our See Ya! line of outdoor products are made with a special blend of 9 essential oils that include citronella, lavender, lemon, and others. We've got three options to protect yourself this summer: soap, spray, or a lotion bar! 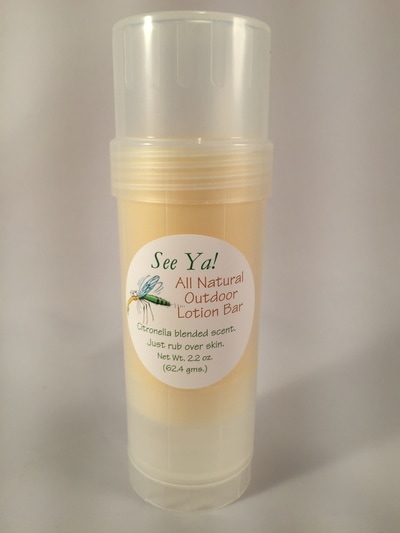 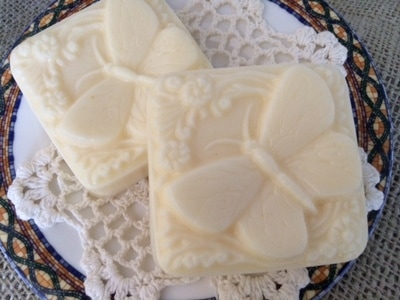 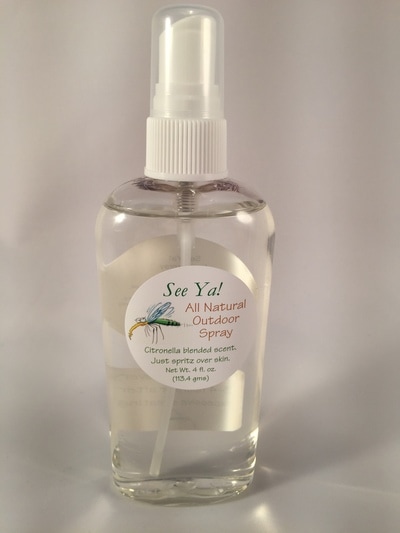
2 Comments
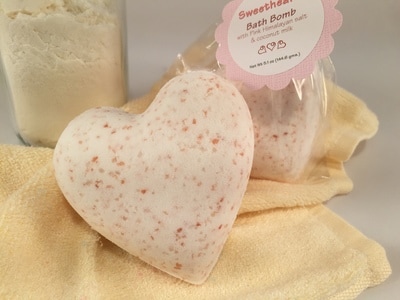
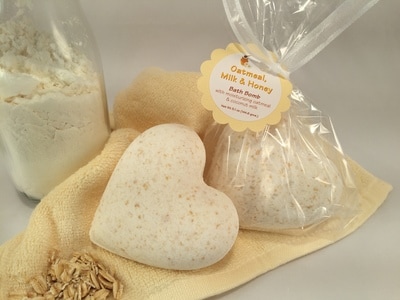
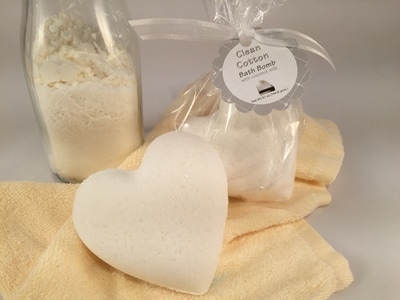
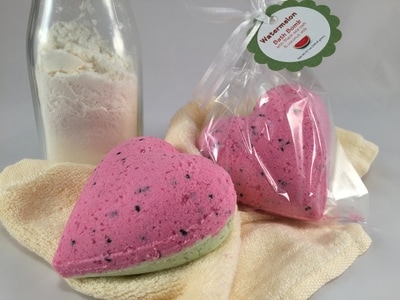
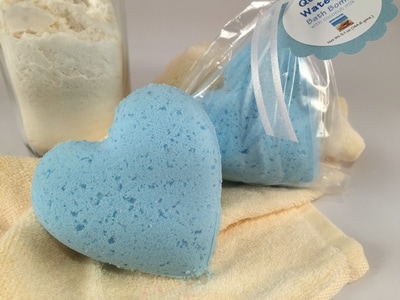
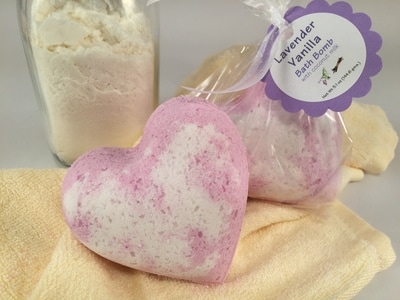
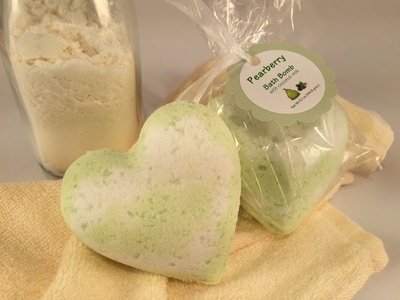
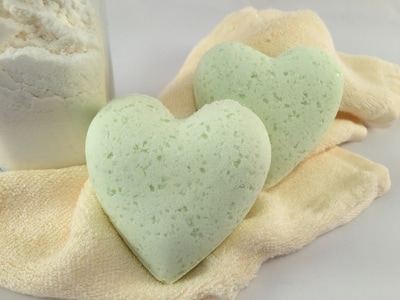
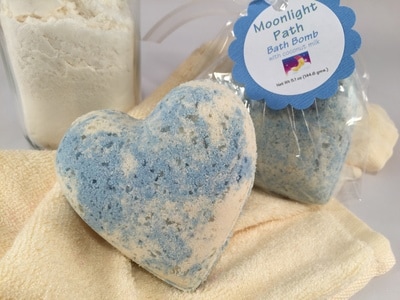
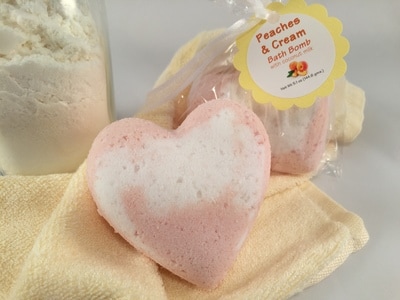
Our Good For You IngredientsBaking soda: Baking soda makes the bomb fizz when mixed with citric acid... but it's more than just that! Baking soda is great for exfoliating the skin. It helps remove all the dirt and dead cells from your body, leaving your skin soft and smooth. It helps balance the pH of oily skin, too, which some people say prevents breakouts for them. Citric acid: Citric acid helps make the bath bomb fizz! Don't let the name "acid" scare you... it's a weak acid found in citrus fruits. It's also wonderful for adjusting and balancing the acidity of your skin. It promotes healthy skin re-growth. It is said to prevent mild acne, pigmentation, and clogged pores while minimizing wrinkles and dark spots.
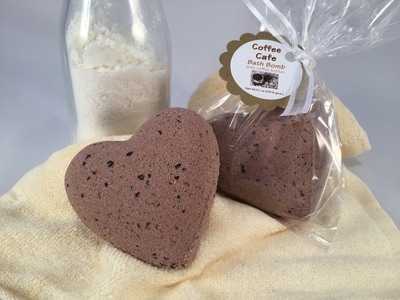
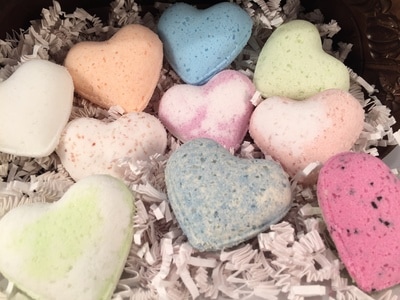
Coconut oil: This oil is naturally anti-bacterial and anti-fungal, and it is a great moisturizer for all skin types. Coconut milk: Coconut milk has high levels of Vitamin C. This vitamin is said to maintain the flexibility of skin to prevent wrinkles, sagging skin, and even age spots. We hope so! Cleopatra is said to have loved milk baths, so we couldn't resist adding this rich ingredient! Coffee butter: This ingredient is said to be highly moisturizing. It'll make your skin feel oh-so-soft, which is especially great if you have dry skin. Coffee is a natural mood-lifter, so the espresso scent is heavenly! A variety of salts: Pink Himalayan, Epsom, Black Sea salts, oh my! The salts are made of magnesium and sulfate, which are absorbed through the skin to reportedly relieve muscle tension and inflammation. They are even said to alleviate tension headaches and abdominal cramps! Fun fact: Our Black Sea salts are harvested in Hawaii and include activated charcoal! Colloidal oatmeal: Oats were said to have skin-soothing properties for years. The FDA cites oatmeal and other oats as effective for relieving the feeling of dry skin and inflammation. You can use oats on stings, rashes, and even eczema. "Colloidal" simply refers to the finely powdered particles of oatmeal. In bath bombs, oatmeal can soothe the body and moisturize your skin. Mmmm... Honey granules: Honey is naturally anti-bacterial, not to mention full of antioxidants and moisturizing! The honey granules in our bath bombs are sure to give you a glow. For Special EventsHave a special event coming up? Here's some ideas for favors. So cute!
Disclaimer (the FDA makes us do it!): We use only the finest, good-for-you ingredients in our products, but we cannot claim to treat, cure, or prevent any disease. Moreover, while all of our ingredients are skin-safe, some people have sensitivities or allergies to certain ingredients or essential oils. We recommend you do a skin test prior to using a new product.
Surviving WinterOur winter in VA this year has been downright weird with warm 60-70 degree days that change into 20-30 degree days over the course of a single week. It’s tough enough for us humans to know what to wear to keep warm, so it’s no wonder the bees have no idea what to do within their hives! You see... when the weather starts to warm, each Queen begins to lay eggs to build up the colony in anticipation of spring. But when the weather turns cold again, that means there are more mouths to feed and keep warm. Such fluctuations in the weather add undue stress on each hive of bees. This stress can cause the hive to die if conditions become too extreme. Within each hive, the optimal temperature at any one time is 95 degrees Fahrenheit. It is the best temperature for the emerging brood (baby bees) to develop normally. When the temperature outside is below that, the bees keep the internal hive temperature at 89-95 degrees by clustering together and beating their wings to cause friction and maintain the heat. In the summer, when temps go above 95 degrees, the bees will stand outside the entrance of the hive and beat their wings to fan cool air into the hive as a sort of air-conditioning. They maintain a temp of around 95 degrees year-round!
Any seasoned beekeeper knows in the fall that some of his hives may not make it through the winter. Many conditions can determine how well a hive weathers the winter. How strong is the Queen and her laying capabilities? How strong is the overall colony of bees? Are they disease-free? Do they have ample stores of honey as their winter food source? They need anywhere from 40 lbs of honey for southern bees to 90 lbs for northern bees per colony or hive! During the warmer months, a beekeeper will inspect his/her hives regularly to make sure (a) the Queen is strong, (b) there are no signs of small hive beetles that can destroy a hive if left unmanaged, (c) the bees are building up their stores of honey, and (d) that the overall health of the colony is good. The problem is: unless temperatures are at least 50 degrees, a beekeeper is unable to open the hive for an inspection. Imagine if someone threw open all your windows and pulled off the roof of your house so they could look inside in the dead of winter… yikes! You’d be freezing in no time! The same goes for a hive of bees. They need to maintain their 95 degrees. If baby brood gets chilled, the larva will die. So what happens in winter? Well, the beekeeper waits and hopes that everything is well within each hive. There are ways to surmise if they are ok, but until they are opened up, it’s mostly a guessing game.
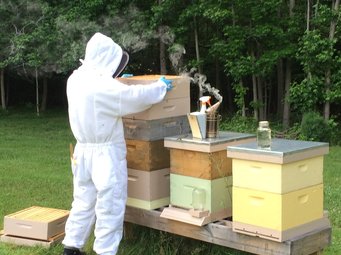
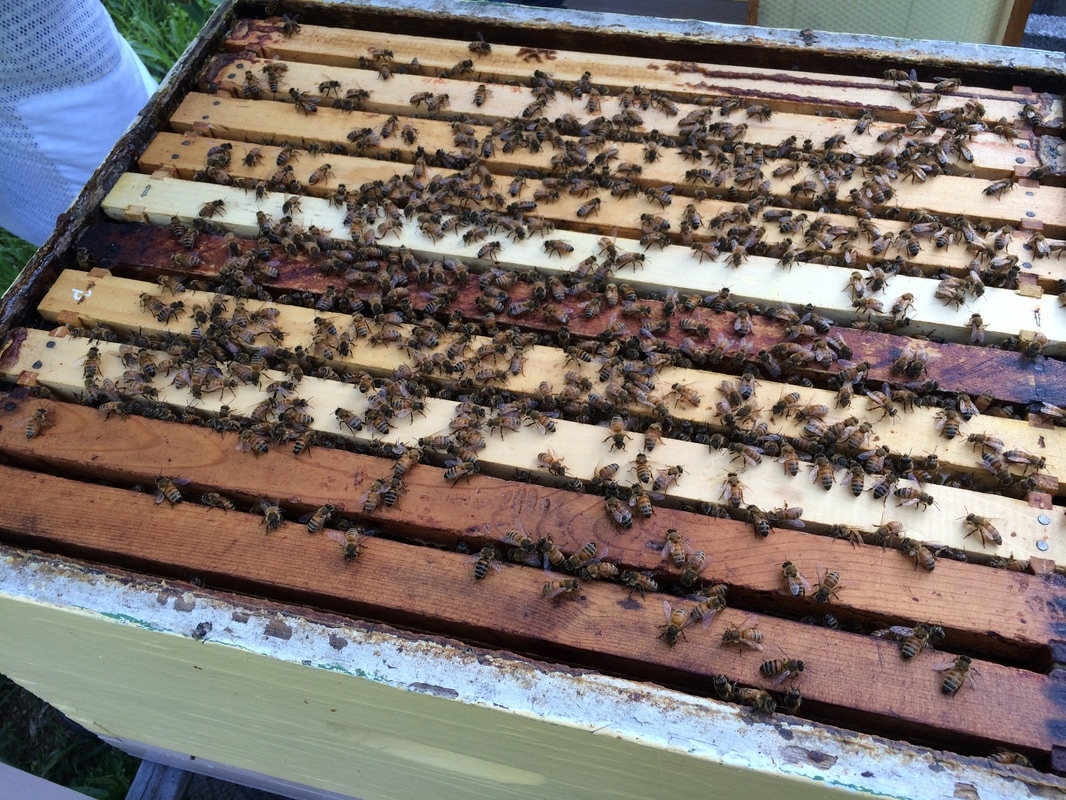
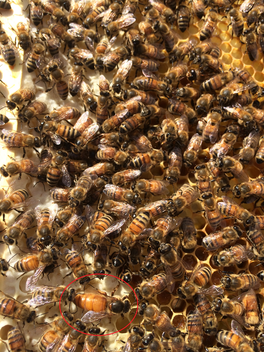
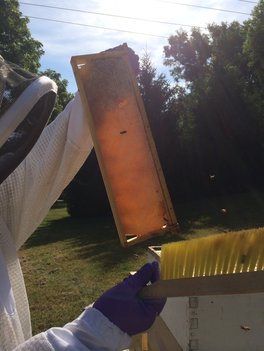
My son had gone into the winter with 16 beehives. Once the weather started to warm up a few weeks ago, he was down to what he thought was 12. It looked like he lost 4 hives due to the weather, but he wouldn’t know for sure until he inspected them. He hadn’t seen any activity around the 4 hives for weeks, which is a clear sign of trouble. Then the weather warmed up, and we enjoyed some 70 degree days. All of a sudden, the 4 hives that he thought were dead started to show signs of life again. It could mean that they had made it after all or that the healthy neighboring hives had built up their numbers enough to swarm into the empty space. A couple of weeks ago, I went to visit him and check in on the hives. Inspecting the hives can be a bit tricky since they are busy working and don't want us humans bothering them! So having an extra set of hands to aid in quickly making an inspection is always helpful. While I was there, I took the video that follows. Bee Hive Reducers and Multiple Entrances
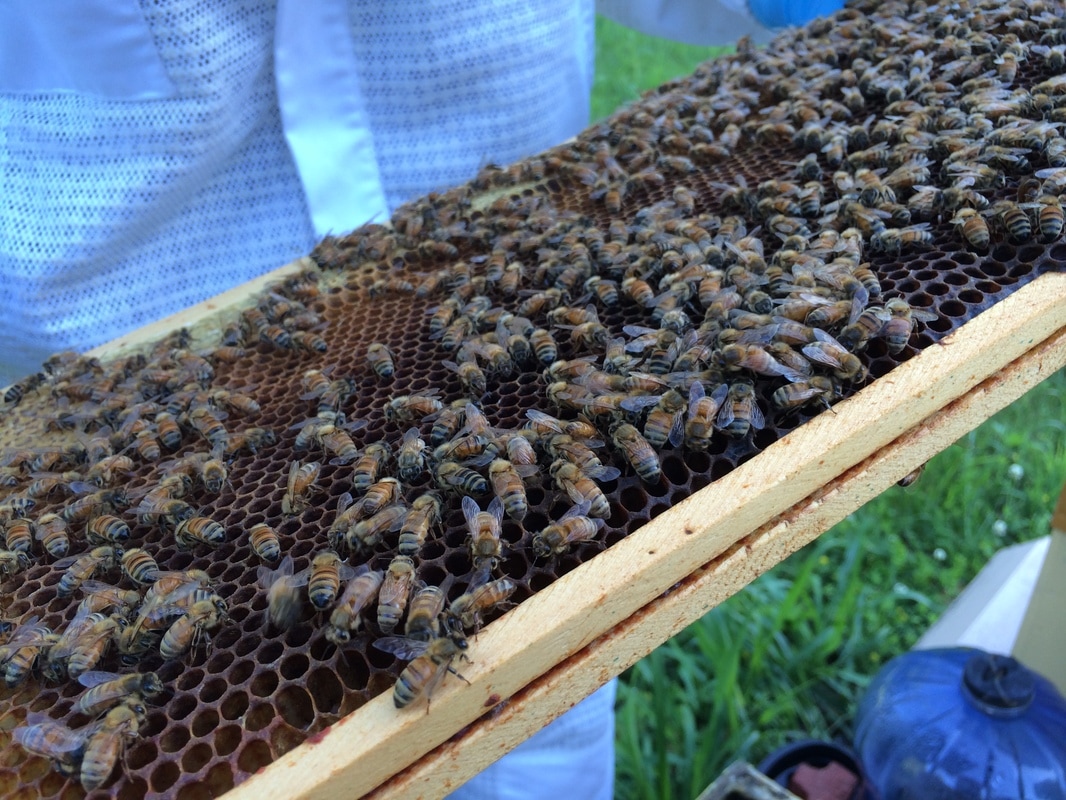
As the weather warms, the upper entrance may be left open to allow better ventilation and to help the bees control the inside from getting too warm. Having two entrances can also help with the overall colony movement. Remember that a healthy hive can include between 20,000 and 80,000 bees. So bee traffic can get crazy! SwarmsWith the warm weather, the Queen starts to lay her daily average of 1500 - 2000 eggs (yes, that many!). So it doesn't take long for the colony to outgrow its space. When the Queen feels like the space is getting too crowded, she will take half of the colony population and fly off in search of another home, leaving the other half to raise a new Queen. This is called "swarming." It is the colony's way of reproducing another colony while maintaining the old colony. Swarms can happen quickly and will keep a beekeeper busy trying to catch the swarm or building up the hive body to accommodate the growing colony. Over the past two weeks, my son has been trying to keep up with his "girls," as I affectionately like to call the bees. He has been busy building more hive boxes and frames, plus catching swarms that have decided to take flight. So far, he has dealt with 5 swarms.
#savethebees
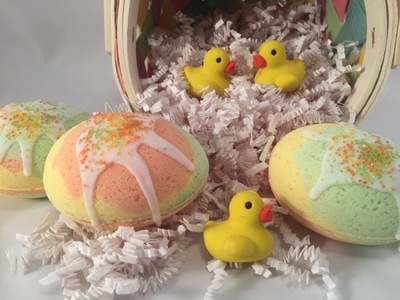
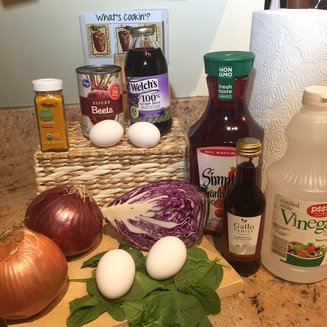
Easter is just around the corner. Are you ready? At our home, dyeing Easter eggs is one of our favorite traditions. But... instead of dyes made up of chemicals, preservatives, and who knows what else, we use several all-natural dyes that are 100% fun and 100% safe - kid-tested and mom-approved :-)
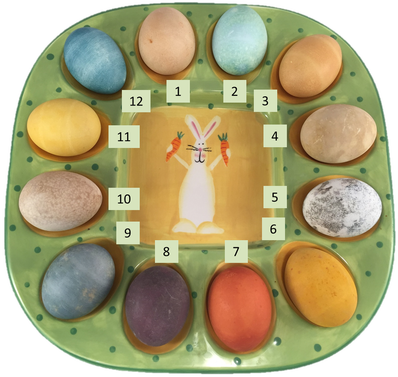
Let's Get Cookin'! This weekend, Maelee (our media lead) helped me dye some eggs... naturally! We had so much fun testing out different methods, and we've written up our favorites below. Try them, and tag us in any pics you post! In the below 'recipes,' we use vinegar a lot. Why? Because it helps the color spread evenly over the egg. Also, when we call for boiling water in a few recipes, feel free to use your microwave instead of the stove! #savetime Paper towels are needed to place the wet eggs on until dry. 1. Paprika Paprika! Add 2 Tbsp. of Paprika to 1 cup of boiling water and add 2 tsp. of white vinegar. These eggs take about an hour to dye, but they sure are beautiful. The Paprika seasoning leaves little dots covering the egg, making them look oh-so-natural and unique! If these specks aren't your thing, just wipe them off when the eggs are still wet. 2. Red Cabbage This one holds a surprise...! To make these eggs, chop a 1/4 head of red cabbage into chunks. Bring 2 cups of water and cabbage to a boil, stirring occasionally, and simmer for about 15 minutes. Strain the cabbage and add 1 Tbsp. of white vinegar. This dye will be warm, but that's ok! The color will be... surprisingly... a beautiful blue! 3. Red Onion To make these eggs, peel the skin from a few red onions and simmer in 2 cups of water for about 15 minutes. You'll notice the water will become very dark. Strain the water, and add 1 Tbsp. of white vinegar. Add in the eggs, and they'll become a pale orange color that get darker over time. Be careful though! The dye works best when the water is hot, but curious little fingers will get burned. 4. Spinach Leaves Tear or cut your spinach leaves into small pieces. Add about 1 cup of water and cook until simmering. Stir and cook for about 15-20 minutes until the water turns green. Cool the water for a few minutes, then carefully add the eggs, allowing the water and spinach to completely cover eggs. Soak for several hours. These eggs have a light sage color. 5. Grape Juice This one was one of our favorites. Grape juice takes a while to dye... but creates a beautiful surprise. Put the grape juice in a cup with the egg so that it just covers the egg. As the egg soaks, it became darker. This one sat overnight in the fridge. The next day, the color virtually wiped off to give the egg a mottled look. So cool!
6. Turmeric These lovely guys are made the exact same way as the paprika eggs, and they come out a rich mustard-yellow - perfect for Easter. To make them, add 2 Tbsp. of turmeric into 1 cup of boiling water and 2 tsp. of white vinegar. These little beauties take only about 20 minutes to get a deep yellow color. As you leave them in there, they'll get richer and richer, so pull them out when they've reached the desired color. 7. Yellow Onion To make these eggs, peel the skin from a few yellow onions and simmer in 2 cups of water for about 15 minutes. You'll notice the water becoming very yellow. Once the desired color is reached, strain the water, and add 1 Tbsp. of white vinegar. They'll become a pale yellow color and get darker as they soak. This dye works best when it is warm. 8. Red Wine This dye takes the longest to set, but it is always a favorite because it's a beautiful dark color! Pour about a cup and a half of red wine into a cup to just cover the egg. Let sit for an hour or more (or overnight). The color will become pink-red and will become darker over time. Remove from the wine when desired color is reached. Our egg sat overnight in the fridge to get that dark crimson color. It even has a sparkle to it! 9. Blueberries We're switching it up! This time, you'll need a cup of frozen blueberries. Add the blueberries to a cup, and pour in some water to cover the egg. As the blueberries thaw, the water will become dark blue. Strain the blueberries, and add 1 Tbsp. of white vinegar. In about 30 minutes, the eggs will be a lovely sky blue, and they'll become darker over time. We left them in the fridge overnight for the color we got! 10. Beet Juice We used the juice from a can of sliced beets. Pour the juice into a cup, add an egg, and make sure it is completely covered. Allow to soak for several hours or overnight. We were surprised to see that the color came out a light speckled tan, not at all the pink we were expecting! Extra Tips! If you want to add some designs to the eggs, wrap a rubber band around the eggs and place into the dye. They'll come out with a tie-dye look. If your kids want to show off their creative side, they can draw on the eggs with white crayon before placing in the dye. The wax will leave the drawing white, yet still dye the egg. Remember to store your eggs in the refrigerator once you have them all colored until you enjoy eating them! Post Your Pics! We had fun dyeing Easter eggs the natural way, and we hope you can have some cooking and dyeing fun with the kids! Post your pics on social media and tag us. We'd love to see what you create #fromtheheart. Happy Easter! The Tailored Touches theme of the month this March is HONEY. To introduce this month of honey, we have to start with where it all begins: with the bees and the flowers they love.
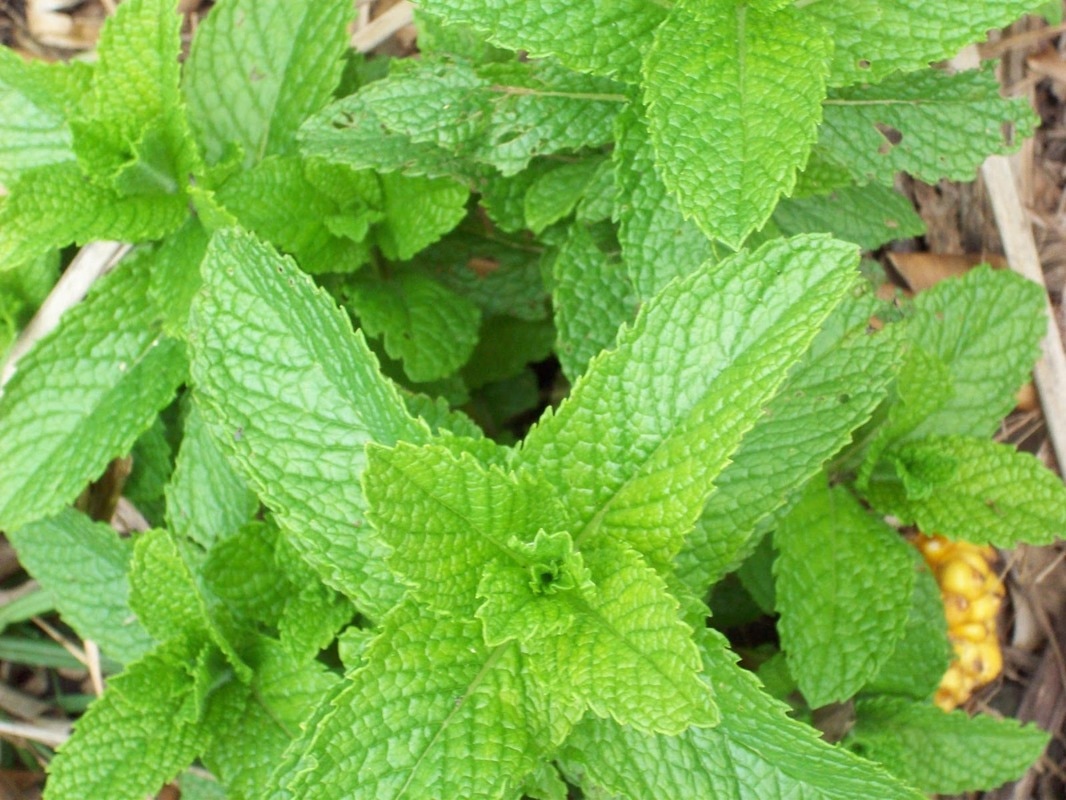
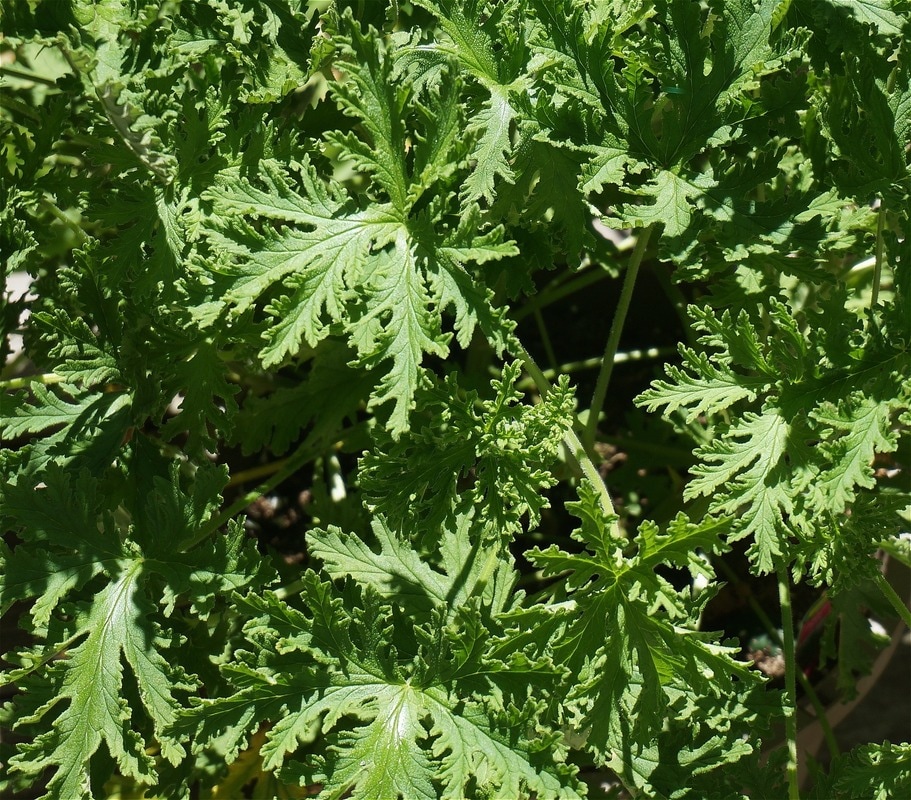
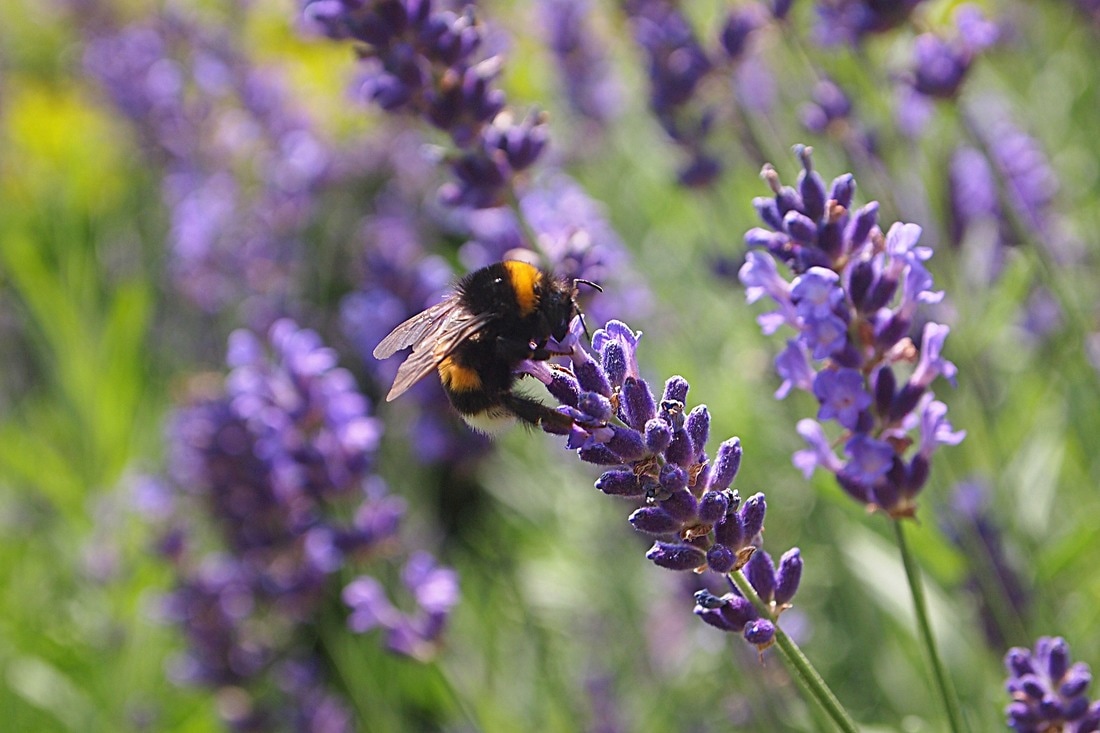
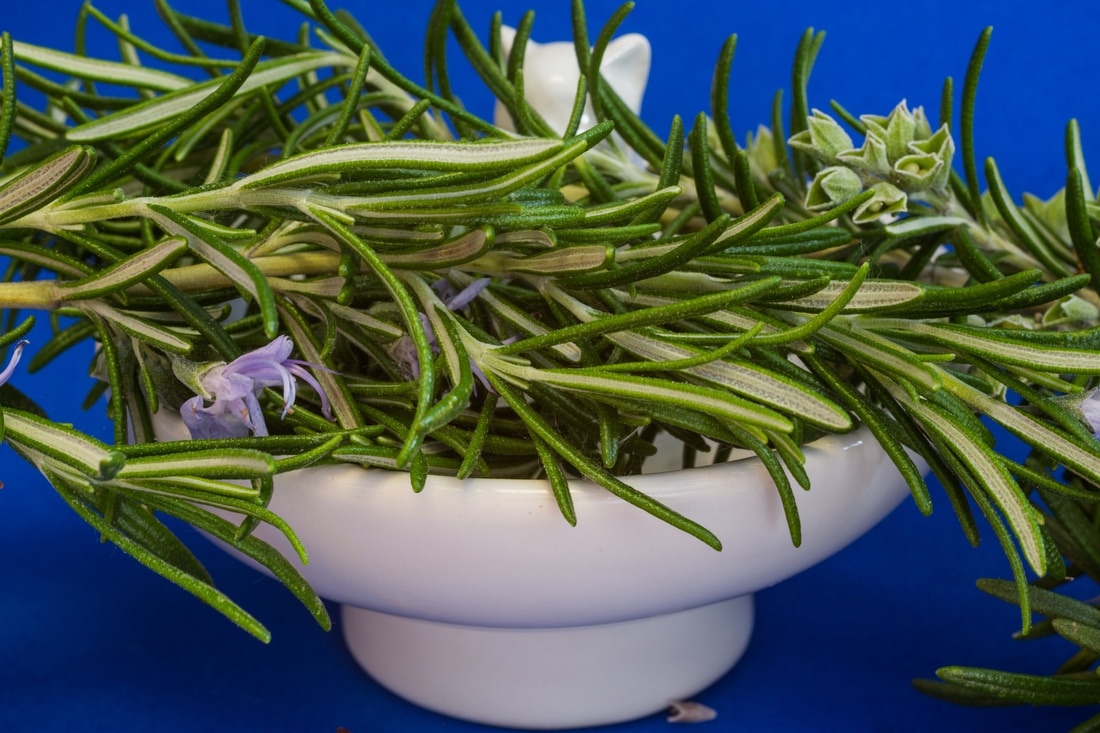
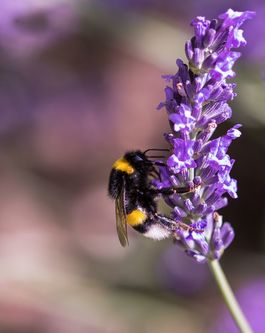
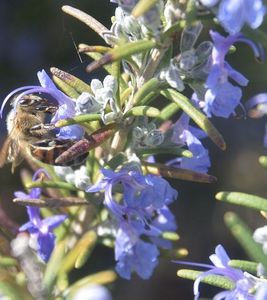
5 perfect plants for bees that you can plant in your backyard today! Except for sunflowers, the other four can also be planted in pots on the deck.
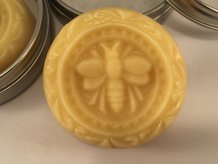
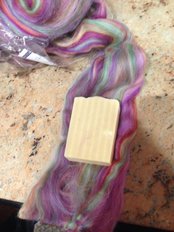
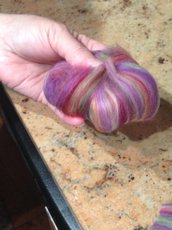
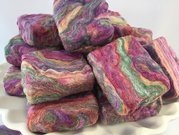 Several months ago, I was busy working on making soap for Tailored Touches orders when Callie, my ever-curious assistant, asked me what “felting” was and why I had decided to offer felted soap as a product. As I explained the process to her, she became just as intrigued in the technique as I had when I first tried it. Needless to say, we stopped what we were doing, pulled out some cured buttermilk soap and roving wool, and started felting! She got totally into it. We had a blast!
Callie's Questions on Felt!Callie had a million questions! Here are some of them... 1 – What is felt? Felt is a dense fabric made with natural wool fibers. By wetting the fibers with hot water and rolling, pressing, or agitating them with soap, the fibers all become interlocked and matted together permanently. This process has been used for at least 5500 years. It is resistant to wind and water, making felt an excellent choice for clothing in the colder climates. The Greeks taught the Romans how to felt. The Vikings passed their knowledge down to the people living in the British Isles. Because it is a natural fabric, much of the early examples of felt have decomposed over the centuries... but not all! In fact, one of the earliest felted garments found was in Coventry, England and traced to the 13th century! 2 – Do you have to use wool fibers? Can’t you use a plant fiber to make felt? Animal fibers will intertwine into felt, but plant fibers will not. So, felt is only made of animal fibers, most notably wool. You can use other types of animal fibers, but they can be more difficult to find or prohibitively expensive. So, wool is the most common fiber found in most any felt. 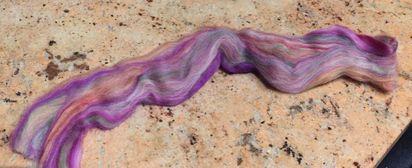 3 – What is “roving wool," and why is it a good choice for felted soap? Roving wool is a type of wool that has long fibers. This makes wrapping up the soap easier. In order to make a felted soap, you need to wrap up a bar or ball of soap much like a gift and then work it under very hot water.
4 – Why use felted soap instead of regular soap? Long before people used loofahs or washcloths for bathing, felted soap allowed you to get a creamy lather without using much soap and gave you a built-in washcloth. The felting helps to conserve the bar of soap so it lasts longer... plus the wool is anti-bacterial! The roughness of the wool acts as an exfoliant by removing dull, dead skin cells to expose new ones. This is great for the skin. So, felted soap is a practical, yet beautiful, way of getting clean! 5 – Uh oh. What do I do when the soap is all used up? If you are like me, you can’t ever throw away the last little sliver of soap! So, I usually just paste it onto the next new bar. With felted soap, you can always recycle by cutting a small slit into the felt and stuffing slivers of soap inside. That way, you don’t waste any soap slivers, and you can make your own felted soap!
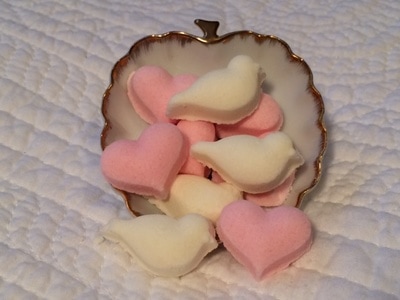
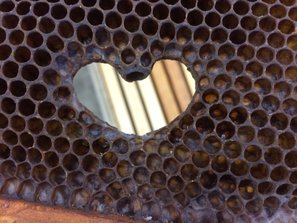
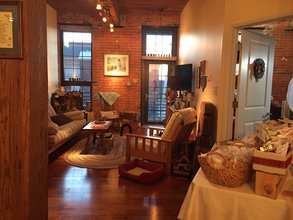
Happy Valentine's Day! I thought today was the most fitting day to write this post about my heart collection. It is one that has taken me years to gather, and all of my hearts hold some special story. So I'll share some of my favorites!
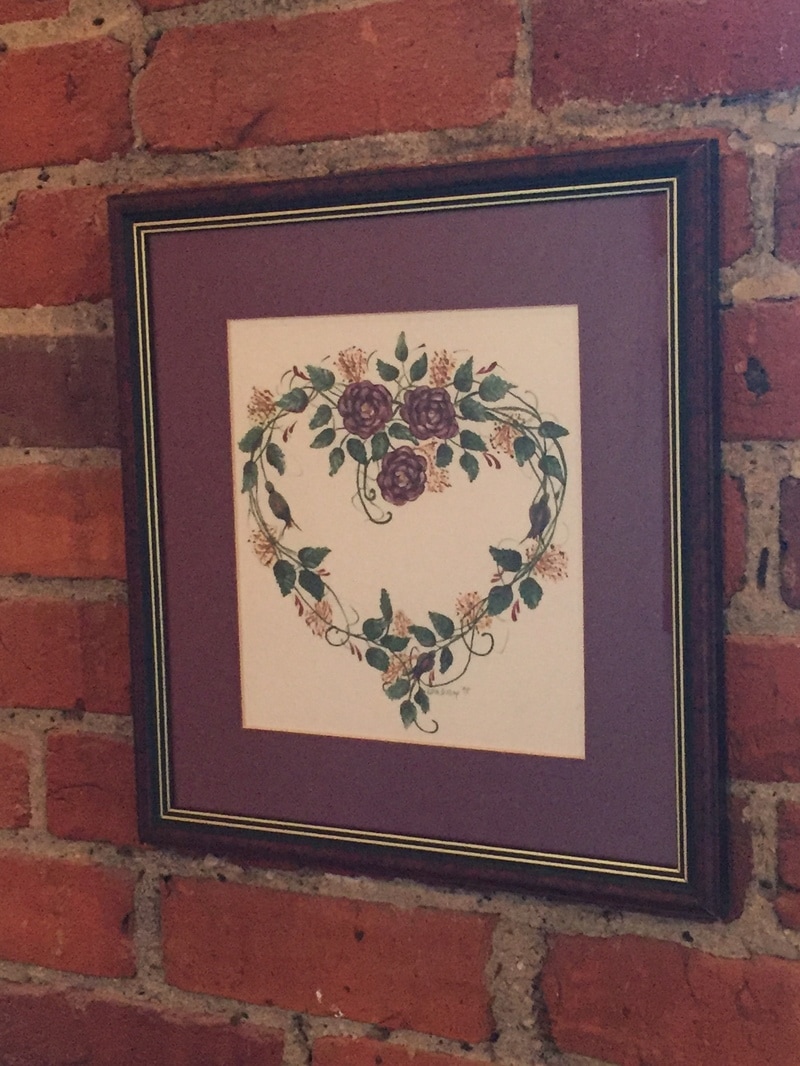
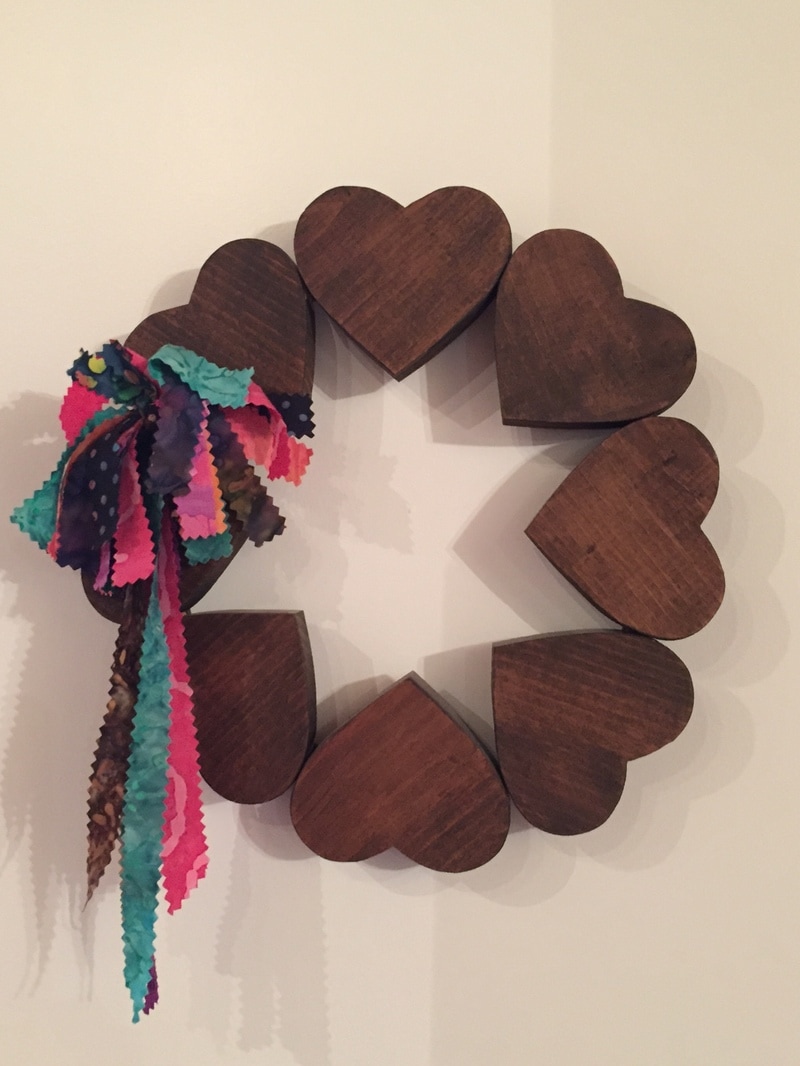
The Heart that Started it All...  The item that started my collection was a very special heart my high school sweetheart gave to me when he asked me to marry him. He and I had talked for quite some time about building a life together. We had friends who were getting engaged with the traditional solitaire diamond ring, and I mentioned how boring I thought they were. So he asked what I would like to have “someday”… and I said a heart. Little did I know until later what lengths he went to looking for that perfect ring. Heart-shaped stones were difficult to find since they were not that popular. He had just moved the summer before from our sleepy PA town to Richmond, a big city in our eyes. So we didn’t see one another as often as we wanted. He made the long drive home every couple of weeks to visit. One weekend in early April, he surprised me with a beautiful bouquet of red roses. My birthday was still a couple of weeks off, so it really was a special treat. As I was sniffing the blood-red blooms, I spied a sparkly ring and nearly dropped the whole bunch on the floor with excitement! There before me was the most beautiful heart diamond I have ever seen. It was sitting in a simple white gold setting… no frilly side stones or fancy ring. The heart diamond was so sparkly and absolutely perfect! Of course, I said YES! We went on to get married and have two kids together. A few years ago, I had that diamond reset into a necklace. It will always be the most precious of all my hearts since it symbolizes an innocent time that was the beginning of everything I’ve become since then. My Kids' Heart Projects  As I sit here writing this post, I’m looking at a heart that has been sitting on my desk since my daughter made it in 1992 when she was 10. It’s a clay heart with “I love you” inscribed on it. I’ve had it on my desk all these years and smile each time I see it thinking of the full-of-life little girl that she was! She has grown into such a wonderful young woman that has always had a heart of gold.  Another favorite of mine is the picture that my son made for me when he was in the 4th grade. It’s a simple row of colored stenciled hearts made with chalk. He brought it in one day after school telling me that he was going to throw it away, but then he remembered how much I loved hearts. When he pulled out the folded up paper, I had no idea what to expect. Opening it, I was thrilled and couldn’t wait to frame it. It has been one of my most prized hearts since 1991. Beachy Heart 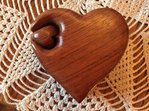 The Outer Banks in NC are very near and dear to me since I spent many family vacations there watching the kids play for hours in the surf. So, it’s only fitting that I have a special heart from there. It’s a wooden, hand-carved puzzle box that was the first of my wooden puzzle collection. Over the years, I added a fish and whale… no hearts on them, though! Isn't it stunning? The Road More Traveled! 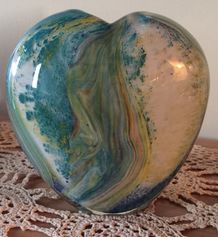 Several years back when I was still dreaming of creating my own business, I had a sales job that covered a territory of 13 states from PA to FL. I sold safety lights and sirens to federal customers in the police and fire departments of all branches of the military, law enforcement agencies, national parks, etc. My demo car was a super outfitted Dodge Charger. So I drove up and down the Eastern Seaboard… A LOT. I spent at least 30-35 hours a week behind the wheel of that V-8 hemi with the rest of my time spent with my customers doing demos of the car. I loved my customers and the folks I worked with, but the driving was so monotonous and lonely. Spending 3-4 nights a week in hotels is not all that fun, but it was a living. Both of my parents were still with us then, so I spent many an hour driving and talking to them on the phone catching up with what they did that day. On my visits to some PA customers, I always made sure to stop by my parents for a night to visit in person. On one such visit, my Mom gave me this vase. She said it was a heart and the design reminded her of all the roads that I was driving on. She always had a way of finding that perfect gift that suited the person at the perfect time… and this one was perfect for me! I’ll always treasure it! The Pup that Stole our Hearts 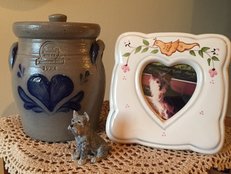 For 16.5 years, I had the most special dog. Her name was Crackers. I got her when I was a senior in high school... before my "adult” life began. She was a lost and abandoned soul who was about 8 months old when I adopted her at the local shelter. Her hair was ratty, matted, and dirty. She was terribly skittish and afraid. My folks thought I was nuts taking on such a hopeless-looking mutt. But I could see that all she wanted was to feel safe. We grew up together. She was there when I got married and moved to Richmond… when I had both the kids… when we moved from our first house to the house the kids grew up in. She loved riding in the car and playing with the kids. Christmas was her favorite time of year since she loved opening her own gifts and having the kids stick bows all over her as they opened theirs. She went everywhere with us… trips back and forth to PA… vacations… dropping the kids off at school. She was stuck to me and me to her. When she finally gave up her fight and died, I didn’t have the heart to bury her since I knew I would move on eventually from that house. So, here she sits in her urn always with the ones that loved her best. We miss her every day. Love from Mom & Dad My Mom and Dad were always so very crafty with anything they did. This heart painting is one that Mom made when she was approaching 70, got bored, and decided to take painting lessons! This wreath is one that Dad made out of scraps of wood in his workshop…simply perfect! My Kids are My Heart  Of all the things I’ve done in my life, the two that I am most proud of are my kids. They are what life is all about. These two pictures of when they were tiny are very precious to me and hold my dearest memories. They have grown to be better adults and people than I could have ever dreamed of. Because of them, I have a rich life with so many adventures and memories. They are what make this Valentine’s Day and every one truly special…  From our Heart(s) to Yours... Happy Valentine's Day! With Valentine’s Day right around the corner, we wanted to share our top ten favorite winter-themed dates for you and your sweetheart! Let us know how they go! 1. Spa Day
2. Sleigh Ride This classic date is so romantic and traditional. You and your love can ride the night away in a carriage fit for royals! Many cities have lovely tours of beautiful lights and charming winter views. 3. See a Ballet Hands down, this is one of our favorite dates! Not only is the talent mesmerizing, but you and your sweetie can dress up for a spectacular night on the town. Get ready for some amazing memories! 4. Ice Skating Ah, yes, another classic date that is fun for all ages. Whether you go outdoor or indoor skating, you’re sure to have a blast trying to keep your balance and laughing all the way. Plus, there’s always the added bonus of needing to cuddle for warmth afterwards! 5. Fireplace S'mores  Who doesn’t love sitting next to a crackling fire? Take this inviting aura to the next level with delicious treats for you and your sweetheart. Snuggle under a warm Quilt with some marshmallows, chocolate, and graham crackers, and you’re good to go! This date is inexpensive, simple, and perfect for a warm night in. 6. Netflix and Stay Warm When the temperatures drop, who doesn’t love to cuddle? You can binge-watch your favorite shows and movies like Stranger Things and FRIENDS and stay cozy all day. It doesn’t get much better than that! 7. Game Night If you’re in the mood for a lovely group date, invite your best pals and play the night away! Everyone brings their favorite party game and a delicious treat. Party favorites like Monopoly, Life, and Charades are great options! While there’s ice and snow outside, nothing but laughs and love will be felt in your home. 8. Snow Day in a Local Park  Feeling a little adventurous? You and your loved ones can enjoy the beautiful snow outside. Build snowmen, have a snowball fight, and make snow angels! Channel your inner-child and have a blast this lovely time of year. 9. See a Play This date is another romantic classic that you’ll love. You and your love can enjoy a meal and visit the local theater for a night of entertainment and memories. It’s like dinner and a movie, but better! 10. Homemade Dinner  Take one night to send the kids to Grandma’s and prepare your spouse a delicious meal. Date night is made easy with some wine, good company, and candles. And when it's time to clean those dishes, don't forget your Tailored Touches Kitchen Helper Hand Soap. Show one another how much you care! :) Still Need a Gift? Well, you're in luck! Check out our array of Valentine's Gifts. From romantic to just fun, there's something for every couple! We hope you have a lovely Valentine's Day.
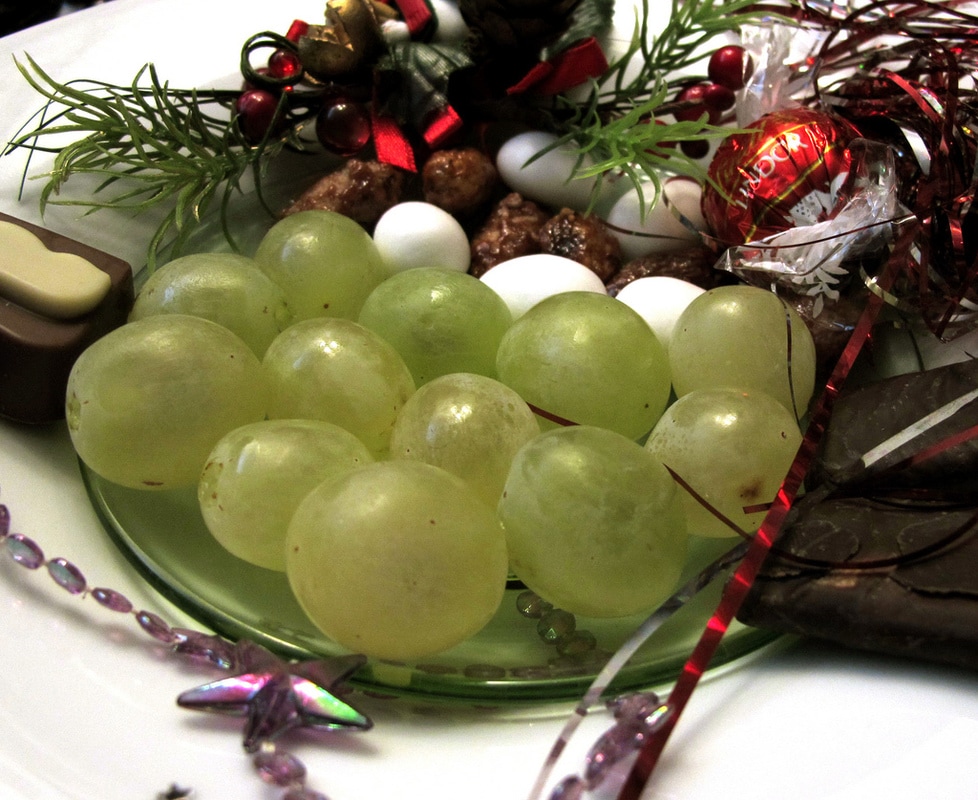
Traditions Around the Globe Happy New Year! How is it 2017 already? At our house, ringing in the New Year with champagne (and sparkling cider for the kiddos) is a must! Singing, laughing, and waiting for that ball to drop is at the top of everyone’s to-do list! But, around the world, some countries ring in the New Year with unique traditions that can surprise us… Spain, for example, celebrates in a much quieter and symbolic way. For the first 12 seconds of the New Year, everyone focuses on eating 12 of the “miraculous grapes” which symbolize the 12 lucky months of the New Year ahead! This may sound easy, but it definitely takes some courage to get all those grapes down! To add some traditional flare, each second of the countdown is heard broadcasted on TV or you can open your windows to hear the bell of the church chime. While we have our eyes glued on the New York ball drop, Spaniards watch their friends and family eat grapes to the chime of church bells! Whoever is successful in grape-eating is promised a blessed New Year, full of happiness, love, and... well, grapes! If you’re in the mood to try this holiday tradition, make sure you’re prepared.
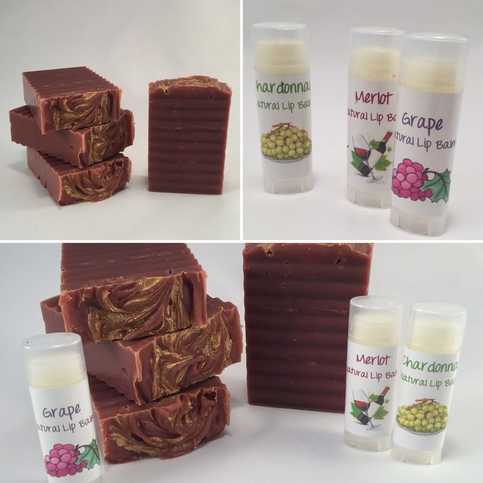
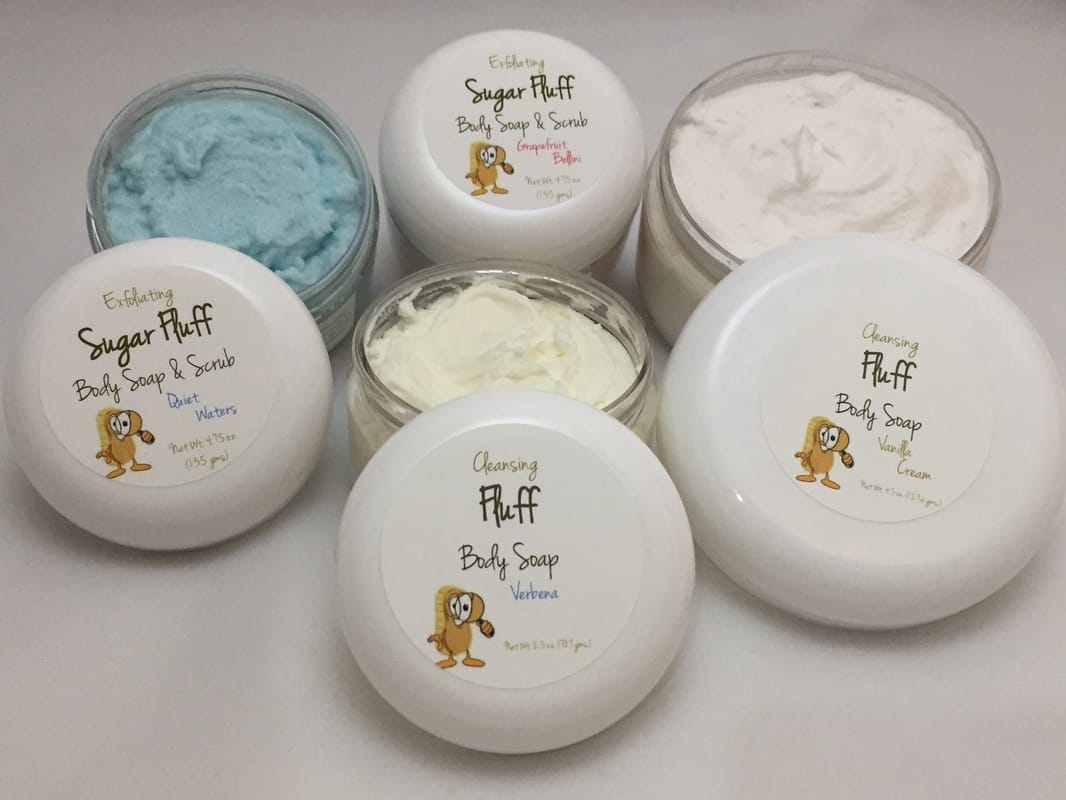
Along with eating your 12 grapes if you are celebrating New Year's in Spain, don't forget to wear your red underwear...yep, that's another tradition of Spainards to ring in the new year that also brings you luck. Get Festive with Grapes!In honor of the Spanish New Year tradition, "GRAPES" is our theme for January. So, if stuffing 12 grapes down isn’t quite your thing, you can still be festive with one of our grape-themed products! Check these out! NATURAL LIP BALMS in Grape, Champagne, Merlot, or Chadonnay flavors...made with the oils of Jojoba, Avocado, and Castor plus a touch of beeswax and flavor. Our limited edition RED WINE ARTISAN SOAP made with red wine and a sprinkling of gold mica is decadent! Signature FLUFF SOAP or SUGAR FLUFF SOAP in Pink Sangria scent.
However you plan to celebrate ringing in the New Year, we hope it's one of your best years yet...
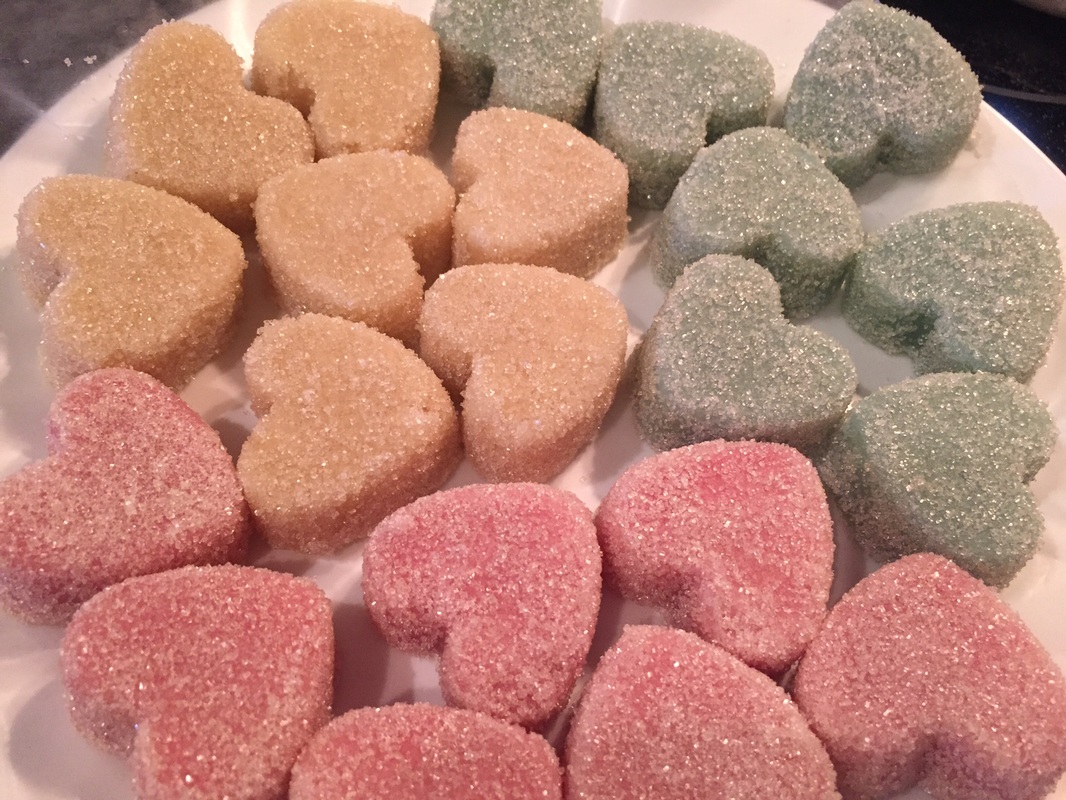
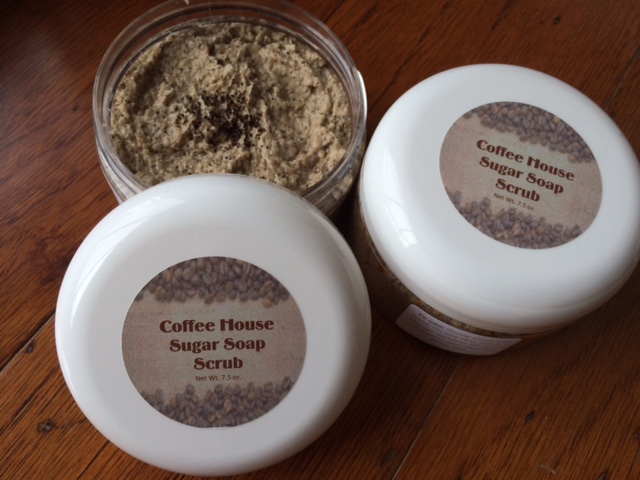
Welcome 2017! Hundreds of types of moisturizers line the shelves of stores, but which ones can you trust? With all of the different chemicals found in moisturizers, it’s important to know what you’re rubbing into your skin. The best, skin-loving ingredients are found in nature! The following are all-natural products that have excellent moisturizing benefits, which is why we use them to make our products. Some might surprise you! Honey and Beeswax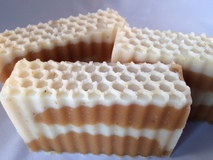 Honeycomb Natural Soap Honeycomb Natural Soap As beekeepers, this ingredient is dear to our hearts! Not only do we harvest our own honey and beeswax, but we use them in our soaps, too. Beeswax is a natural substitute for petroleum-based moisturizers you may be using, plus it adds some vitamin A to your skin routine. Honey is filled with antioxidants, which leave your skin healthy and happy. Many of our soaps include our own honey and beeswax - like this Honeycomb Natural Soap. It also has many other natural moisturizers! Olive & Coconut Oils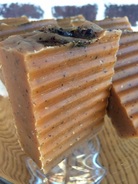 Sweet Virginia Tea Soap Sweet Virginia Tea Soap Olive and coconut oils are absorbed deep into your skin, and lock in moisture with fatty acids like linoleic acid. Both also act as great conditioners for strengthening hair! Raw coconut oil works well as a moisturizer, a facial cleanser, and even lip balm, plus it adds a tropical scent. Our Sweet Virginia Tea soap is made with coconut and olive oils for extra moisture plus canola, palm, and castor oils. The base is real organic brewed tea and a touch of honey! Shea Butter, Aloe, and...Avocado? Radiant Avocado lotion bar Radiant Avocado lotion bar These substances are rich with vitamins: A and F for shea butter, C and E for aloe, and A, D, and E for avocado. Shea butter helps reduce skin blemishes, like wrinkles and eczema. Aloe is the perfect pre-makeup moisturizer, because it leaves the skin smooth, but not greasy. You may not expect avocado to be used as a moisturizer, but the fruit has many more uses than topping your chips and tacos. Avocados have so many healthy fats and vitamins that retain the moisture in your skin. Our Radiant Avocado lotion rolls on with ease and comes in a portable tube. Extra Tip: Always Exfoliate!A quality lotion or moisturizer works wonders but only if you take the proper steps. For best results, remember to gently exfoliate your skin before slathering on your moisturizer! Pair a moisturizing soap or lotion with one of our many exfoliating sugar scrubs, like these Sugar Heart Scrubs or this luscious Coffee House scrub. Or exfoliate as you wash up with one of our signature Fluff soaps with sugar or salt added. |

Welcome to Tailored Tidbits!If I'm not in the kitchen cooking up new items for my shop, I'm sewing fabric baskets, taking care of our honeybees, pitching in on the latest project at my son's, or planning a trip somewhere with my daughter. Here, I'll share a "day in the life" at Tailored Touches! 
Sign up for the newsletter for an instant 10% off coupon.
Categories
All
Archives
February 2019
|


 RSS Feed